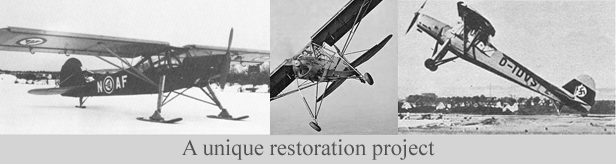


Page 1 - Page 2 - Page 3 - Page 4
News 10 July 2016
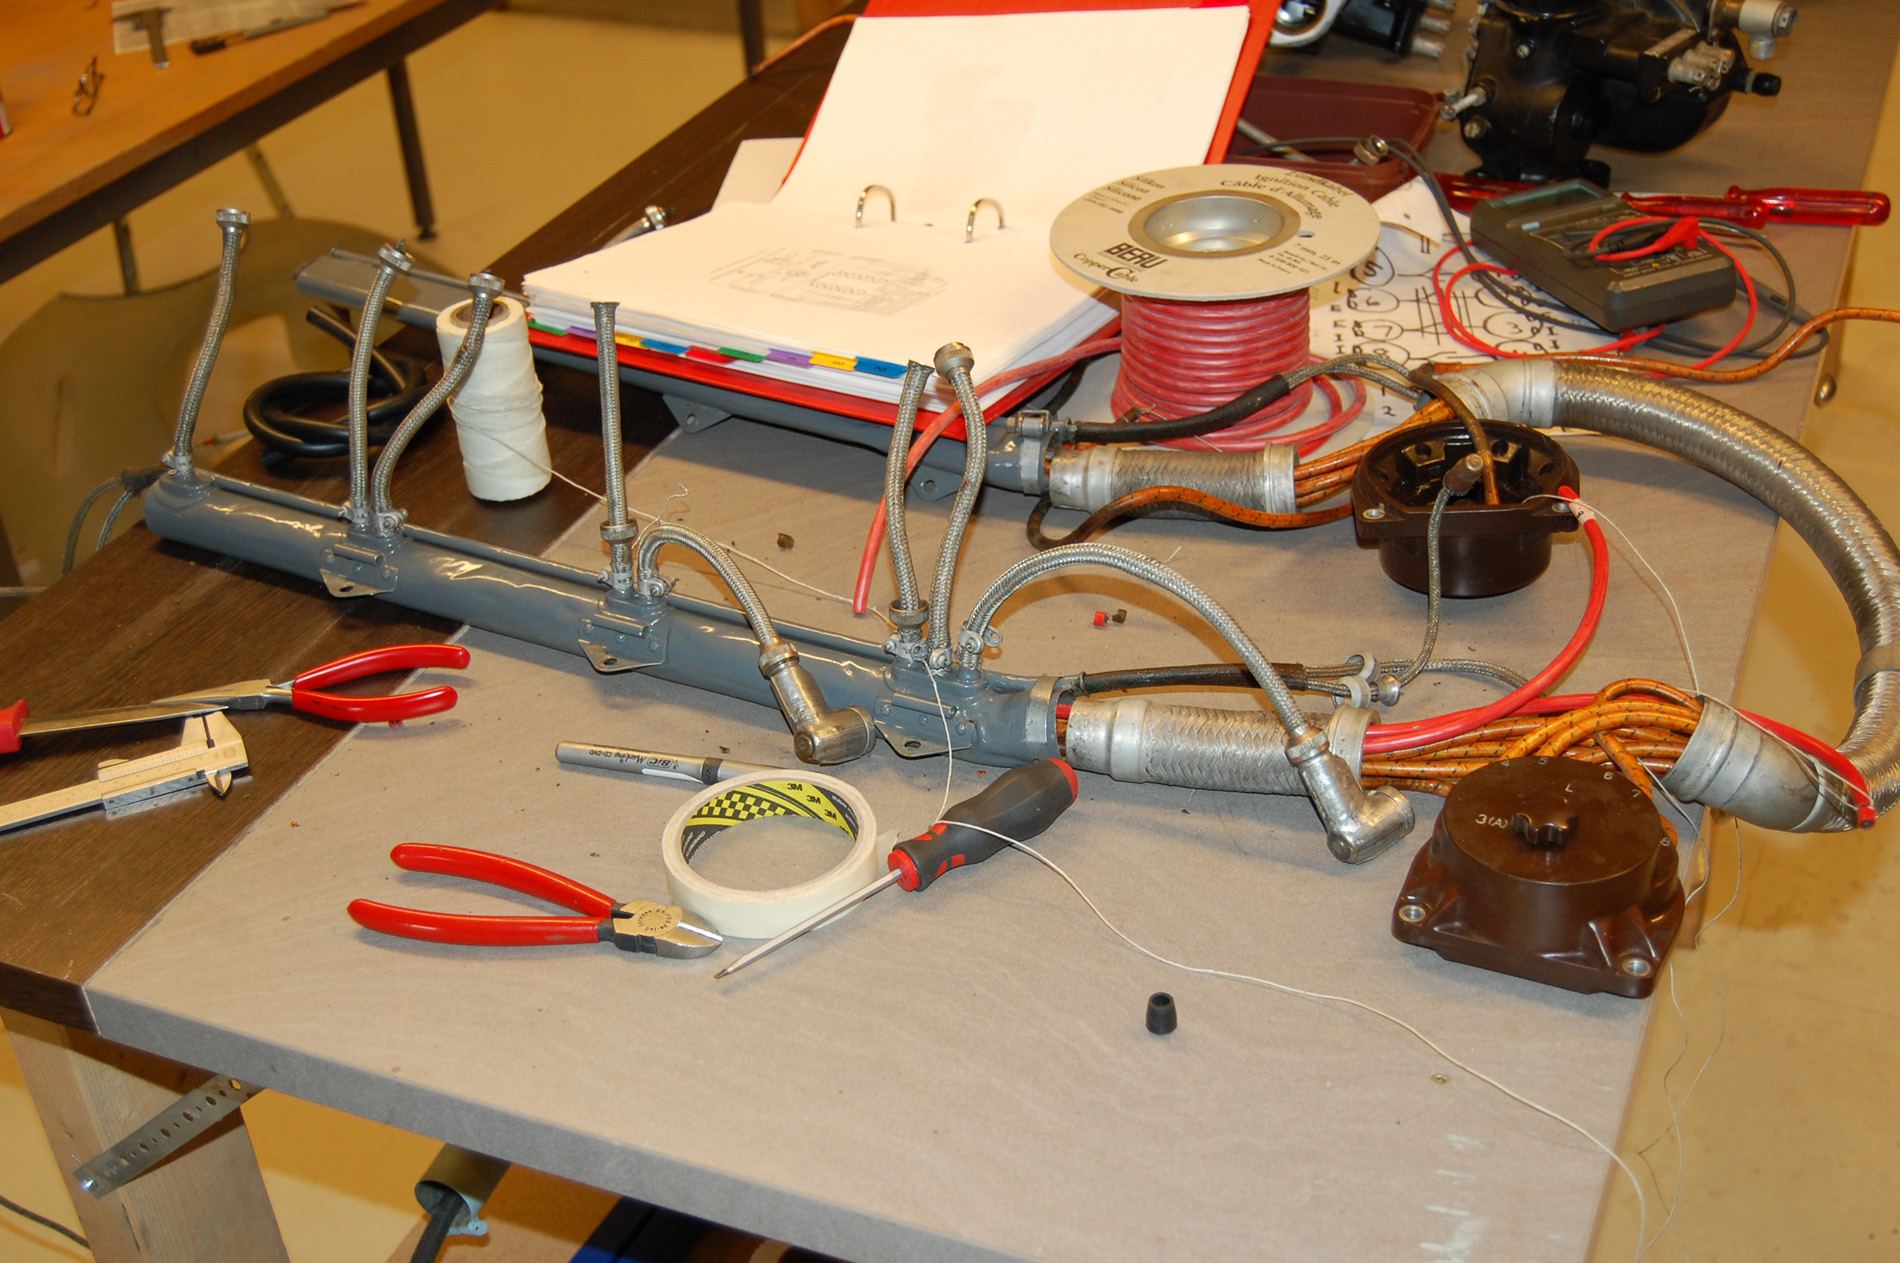
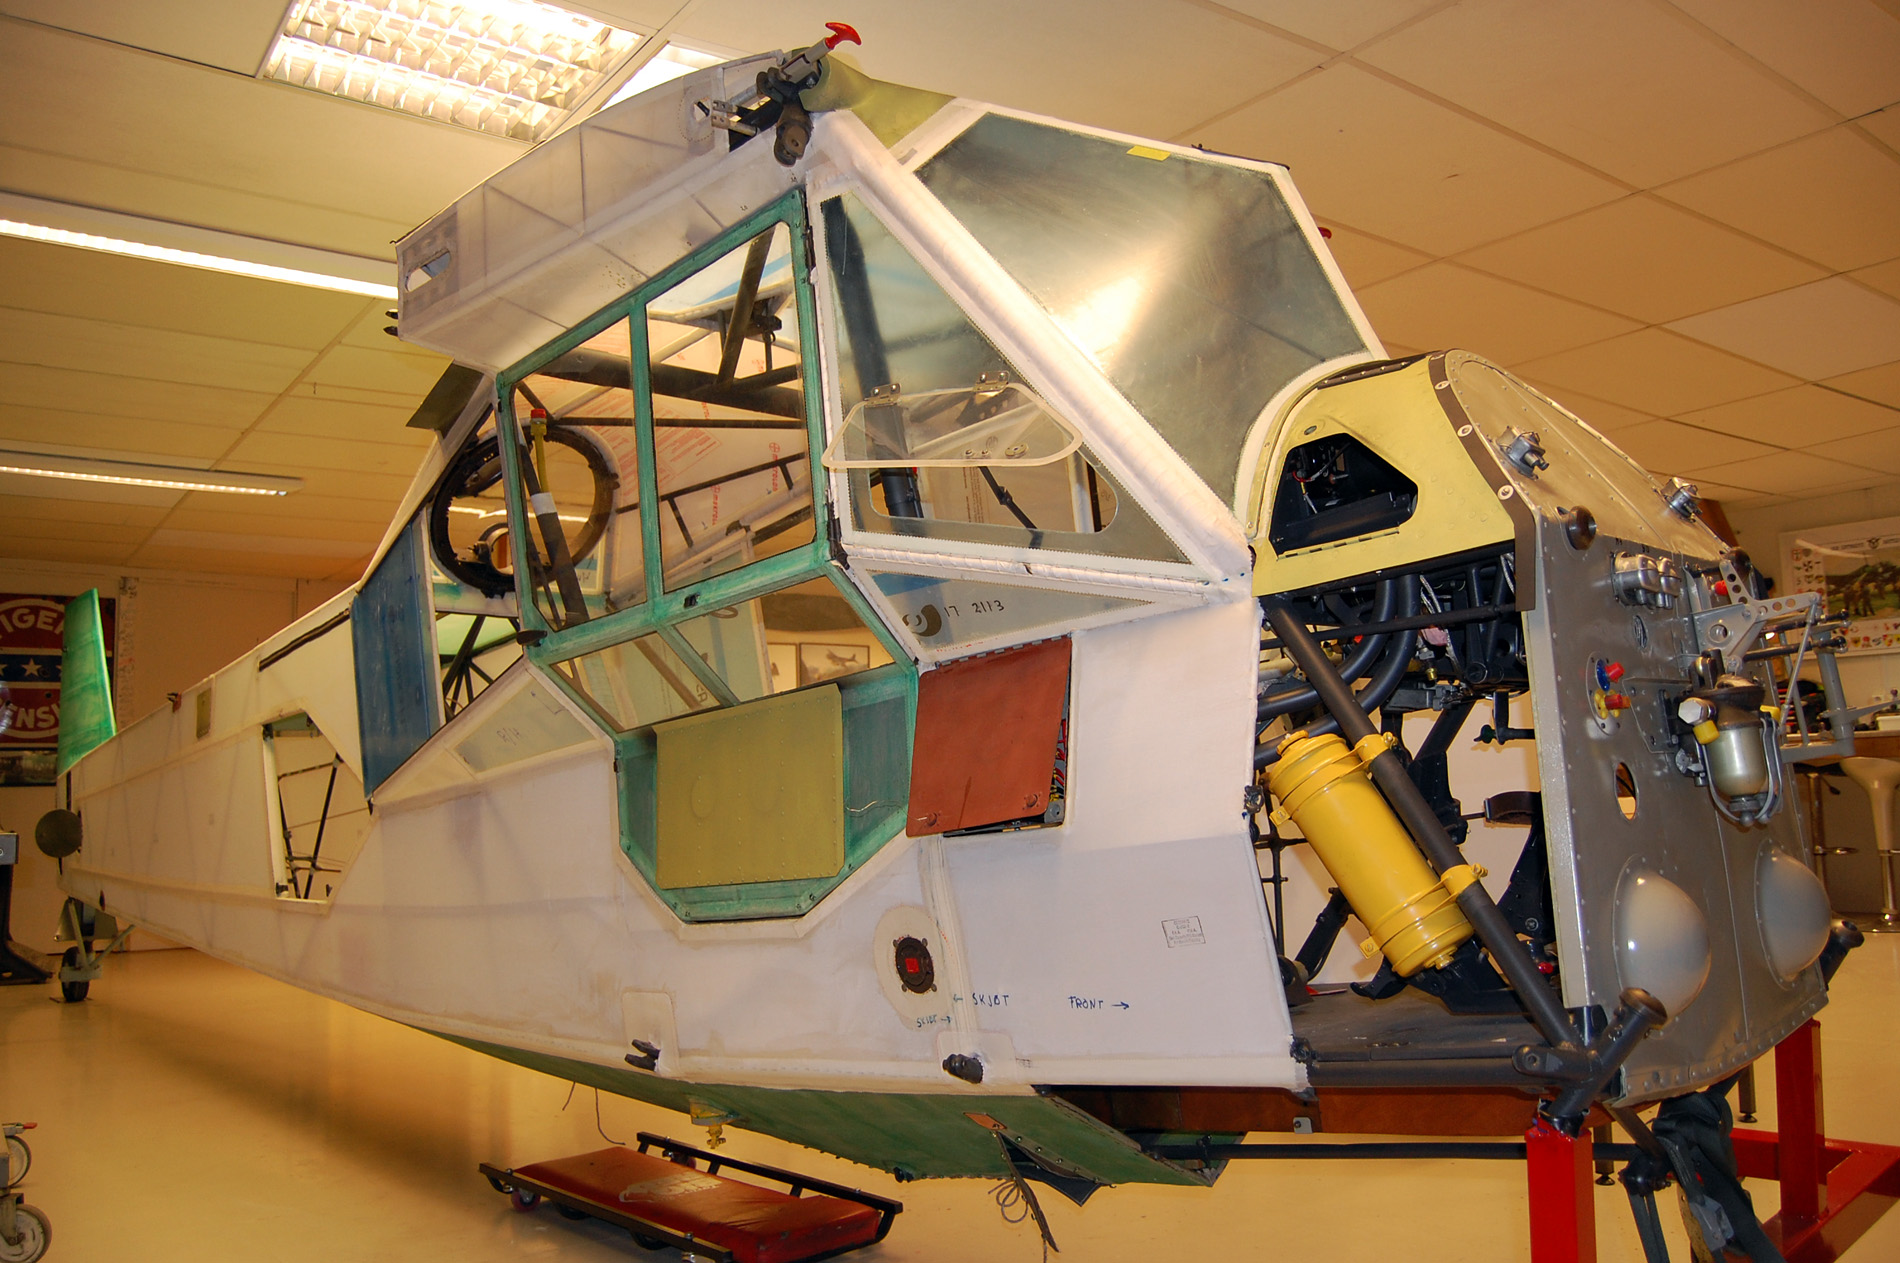
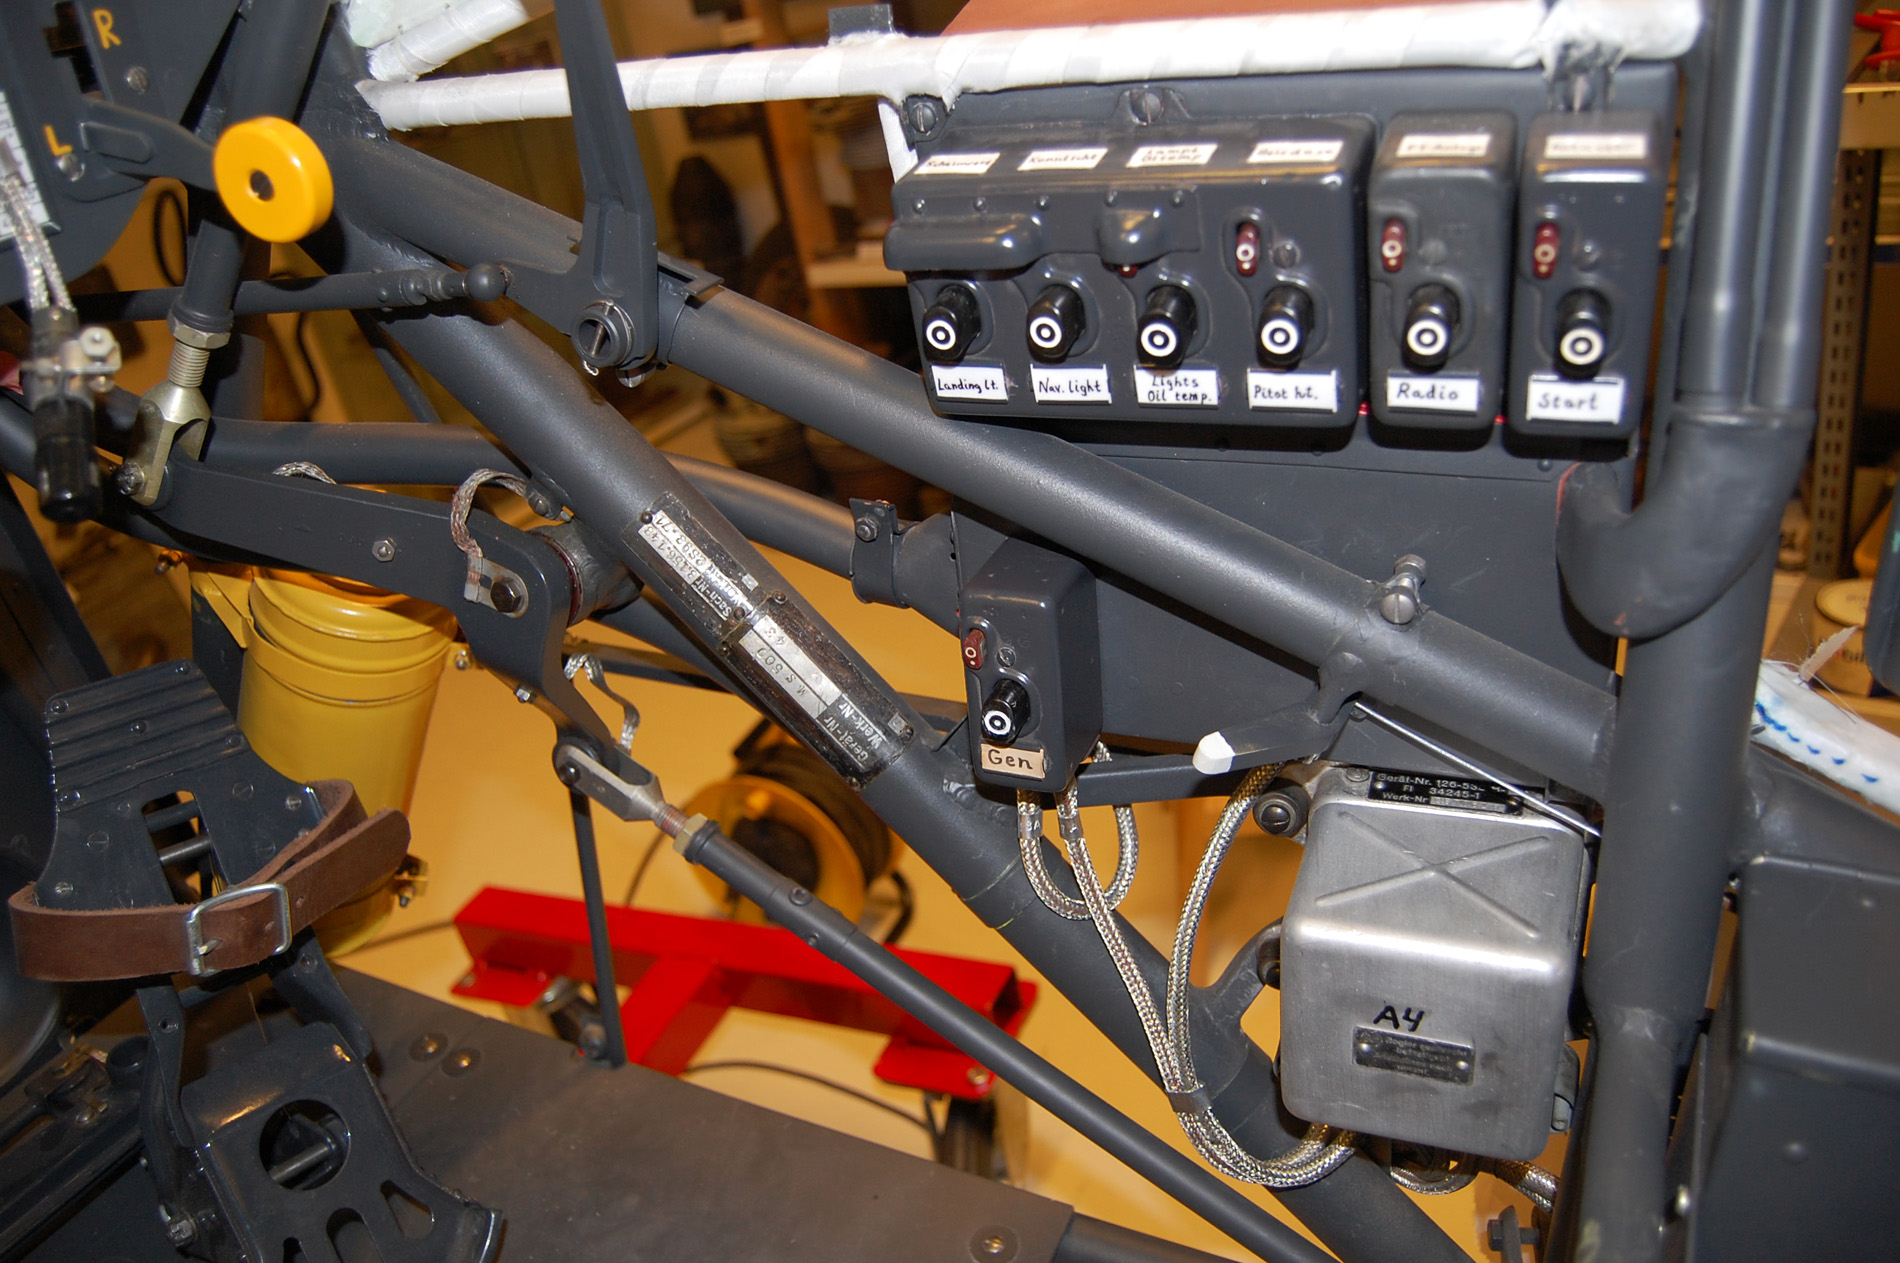
Details at the engine installation have been the main focus the last two months. Considerable time has been spent on tasks like changing high voltage wires and associated details in the ignition hardness, restoring the spark plug connectors and restoring the oil cooler attachment. Restoring an airplane made in the US is in many ways easy because nearly all standard aircraft parts from the WWII period are either available or have acceptable substitutes. Not so for historic German airplanes. Even finding hoses and time typical hose fittings can be a challenge.
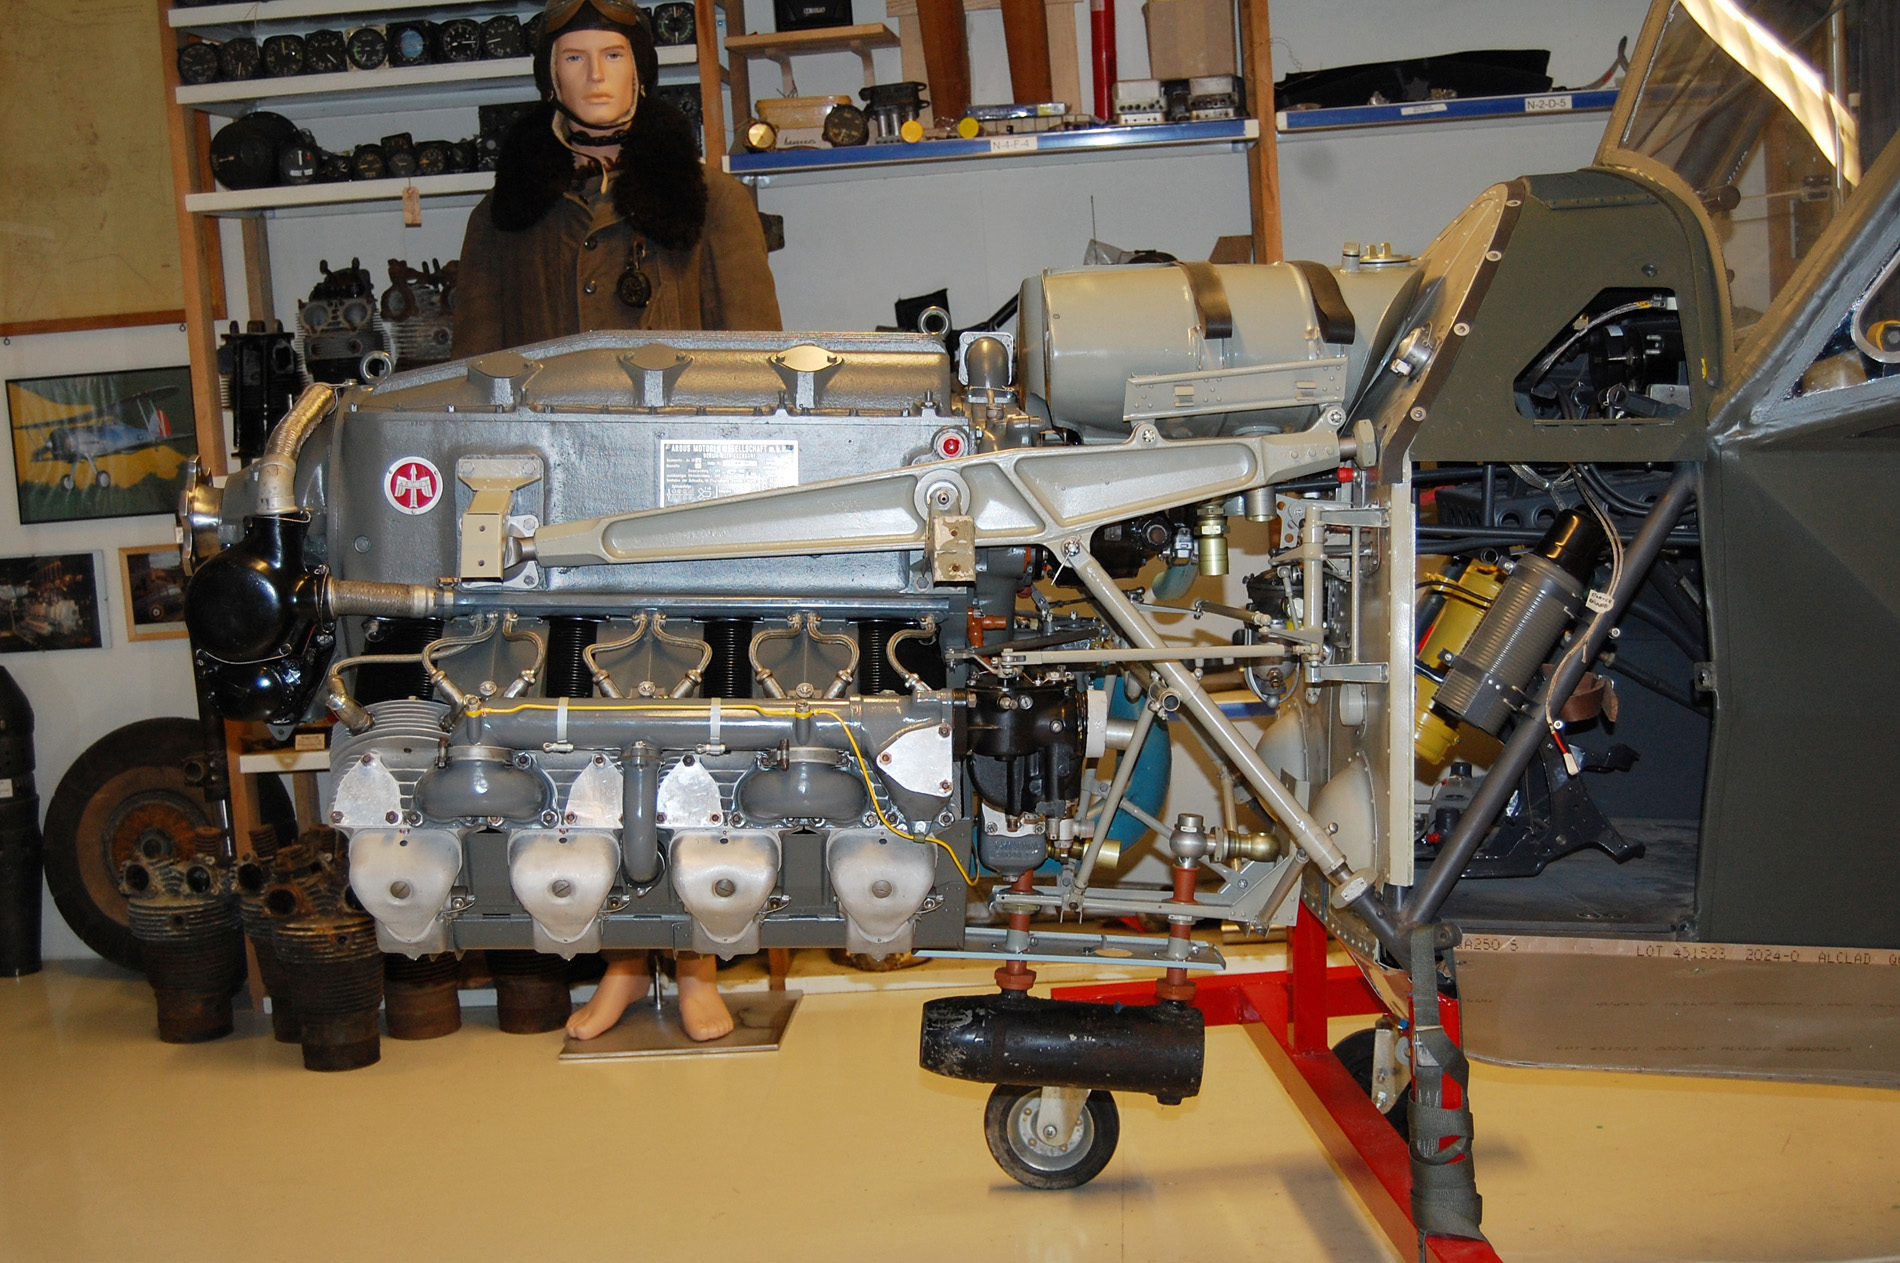
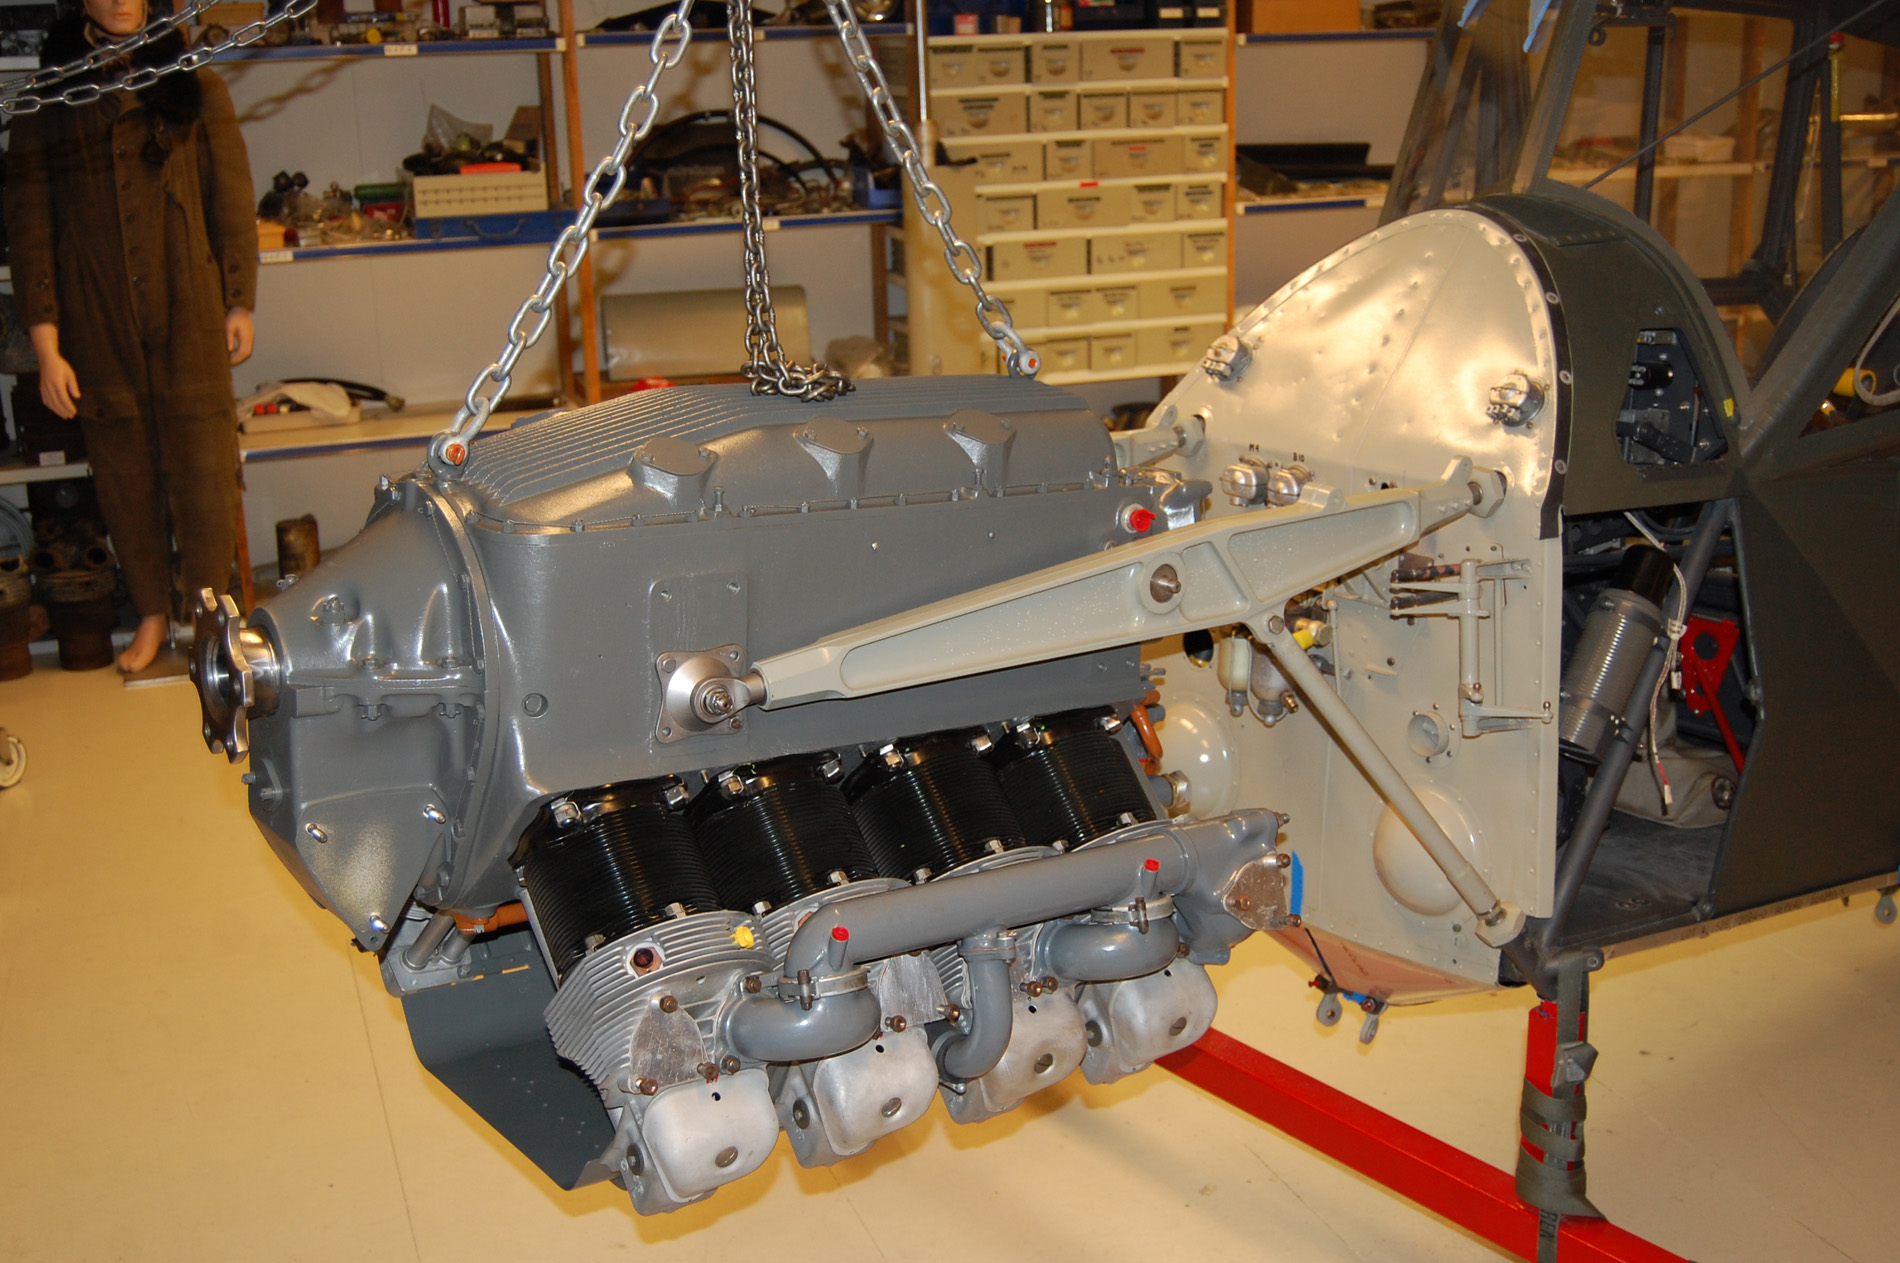
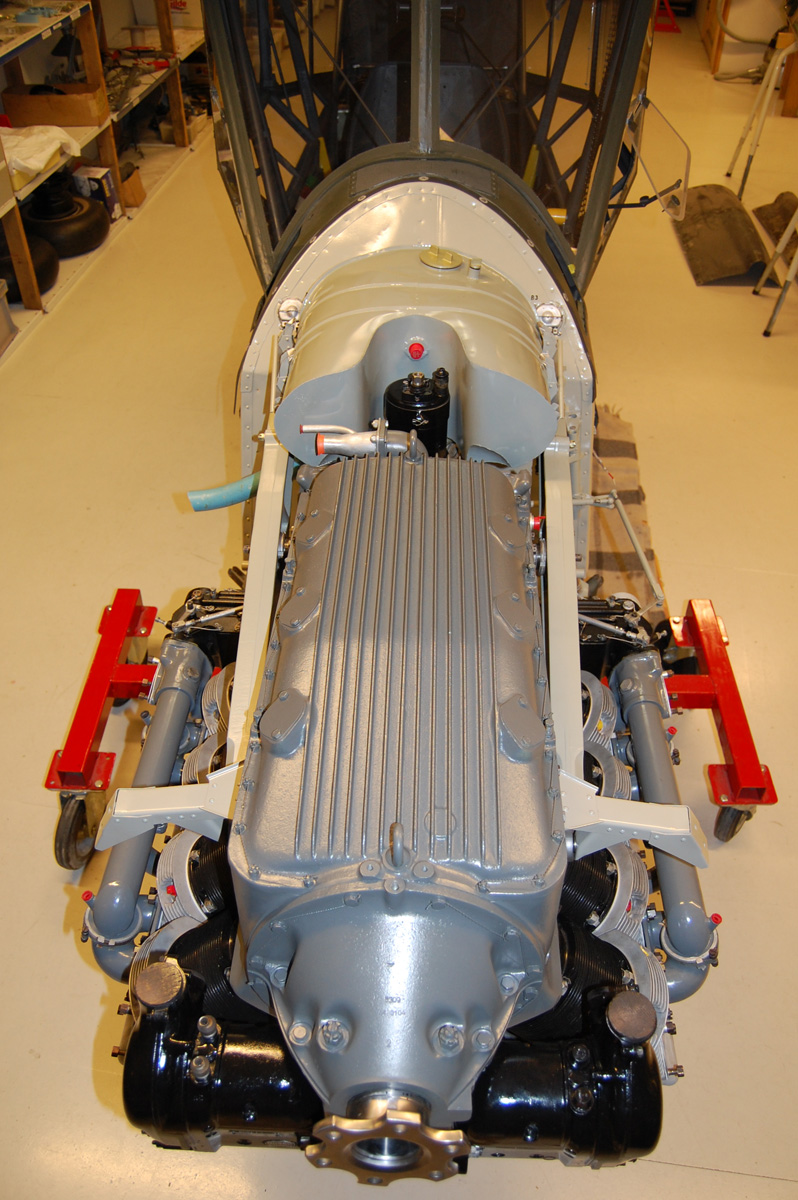
The engine with main components installed. All hoses and wires are still missing.
Old high voltage wires (orange) being replaced with new (red).
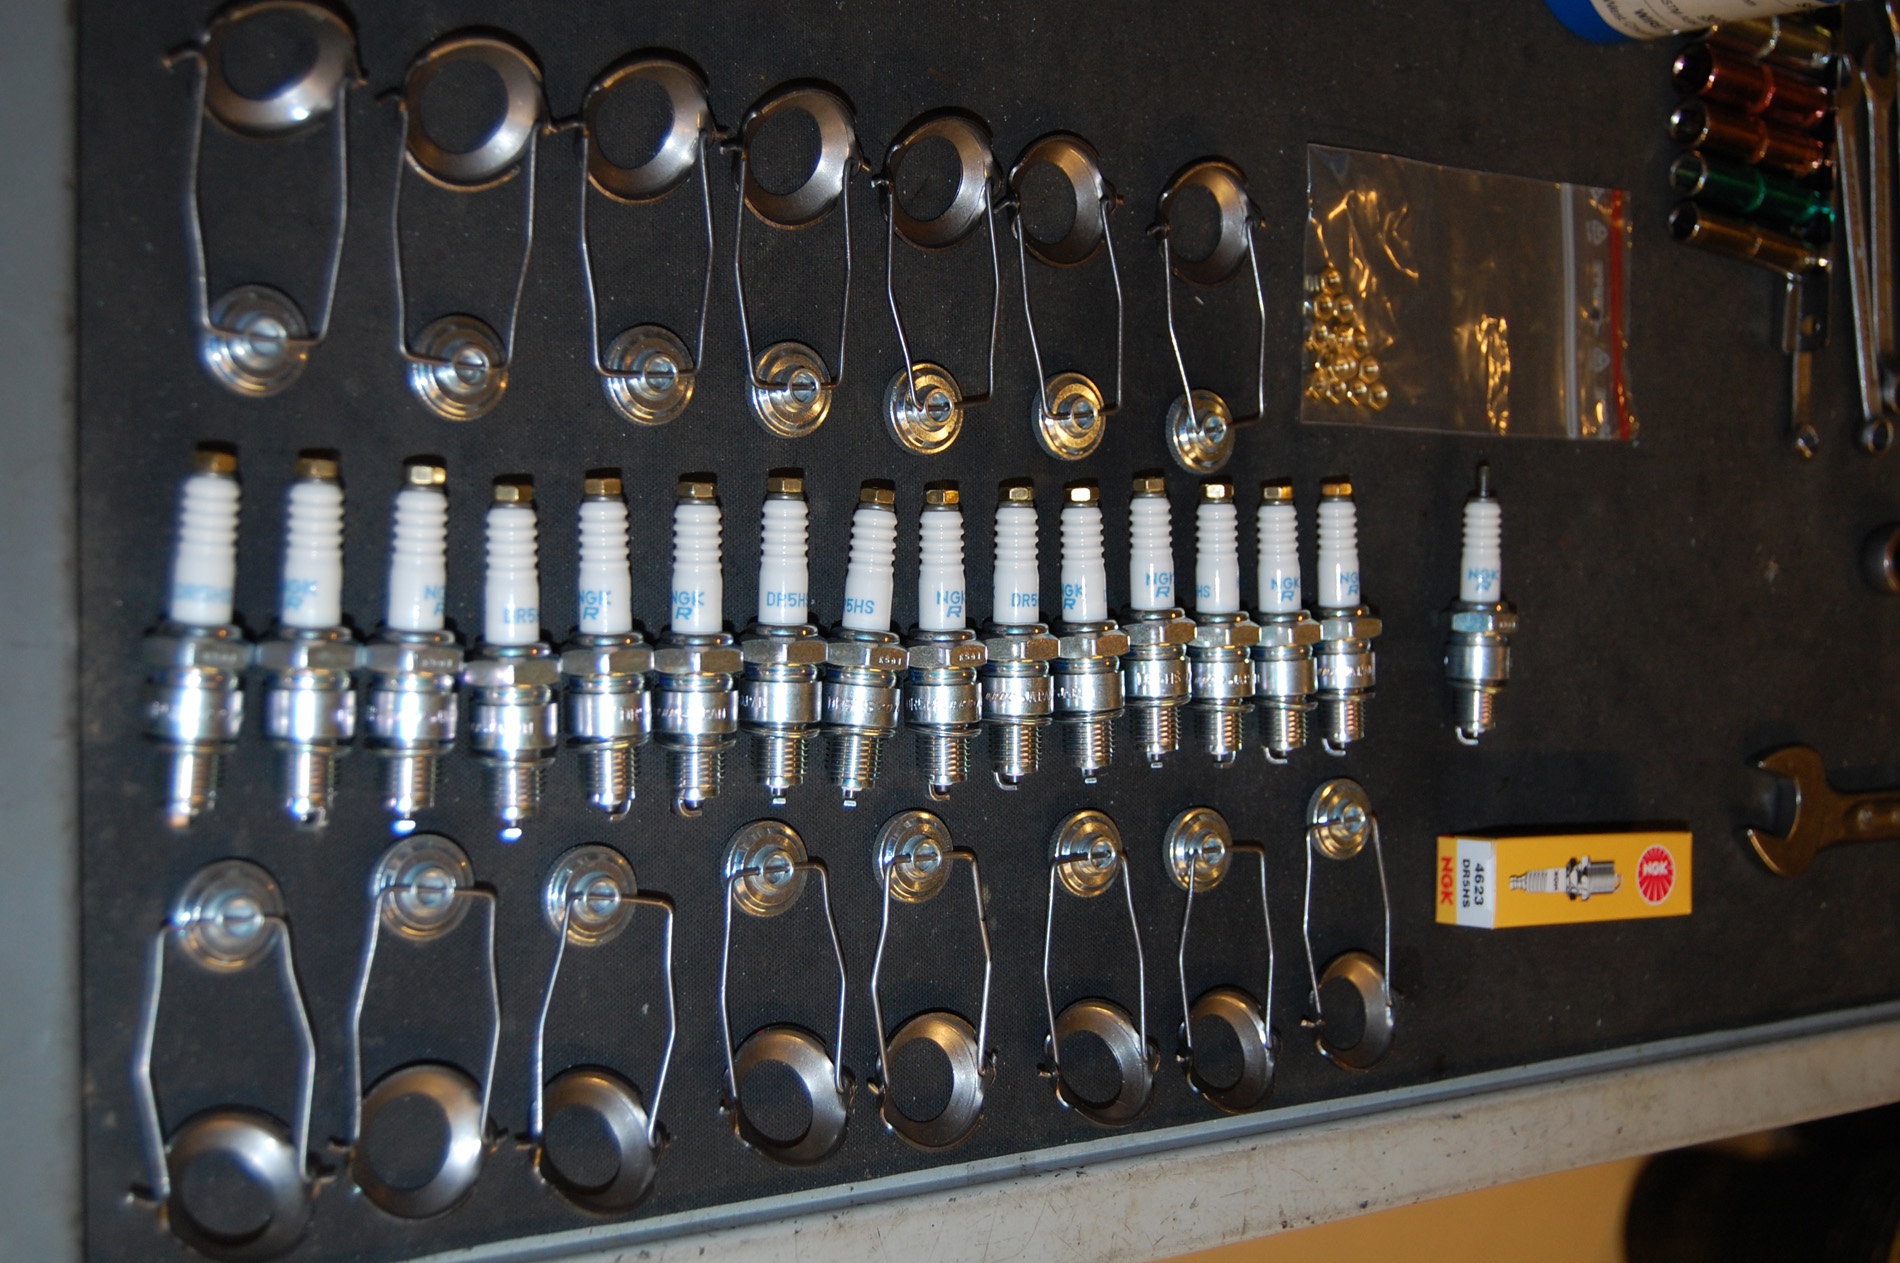
Slightly modified NGK DR5HS spark plugs and clips holding the spark plug connectors ready for installation.
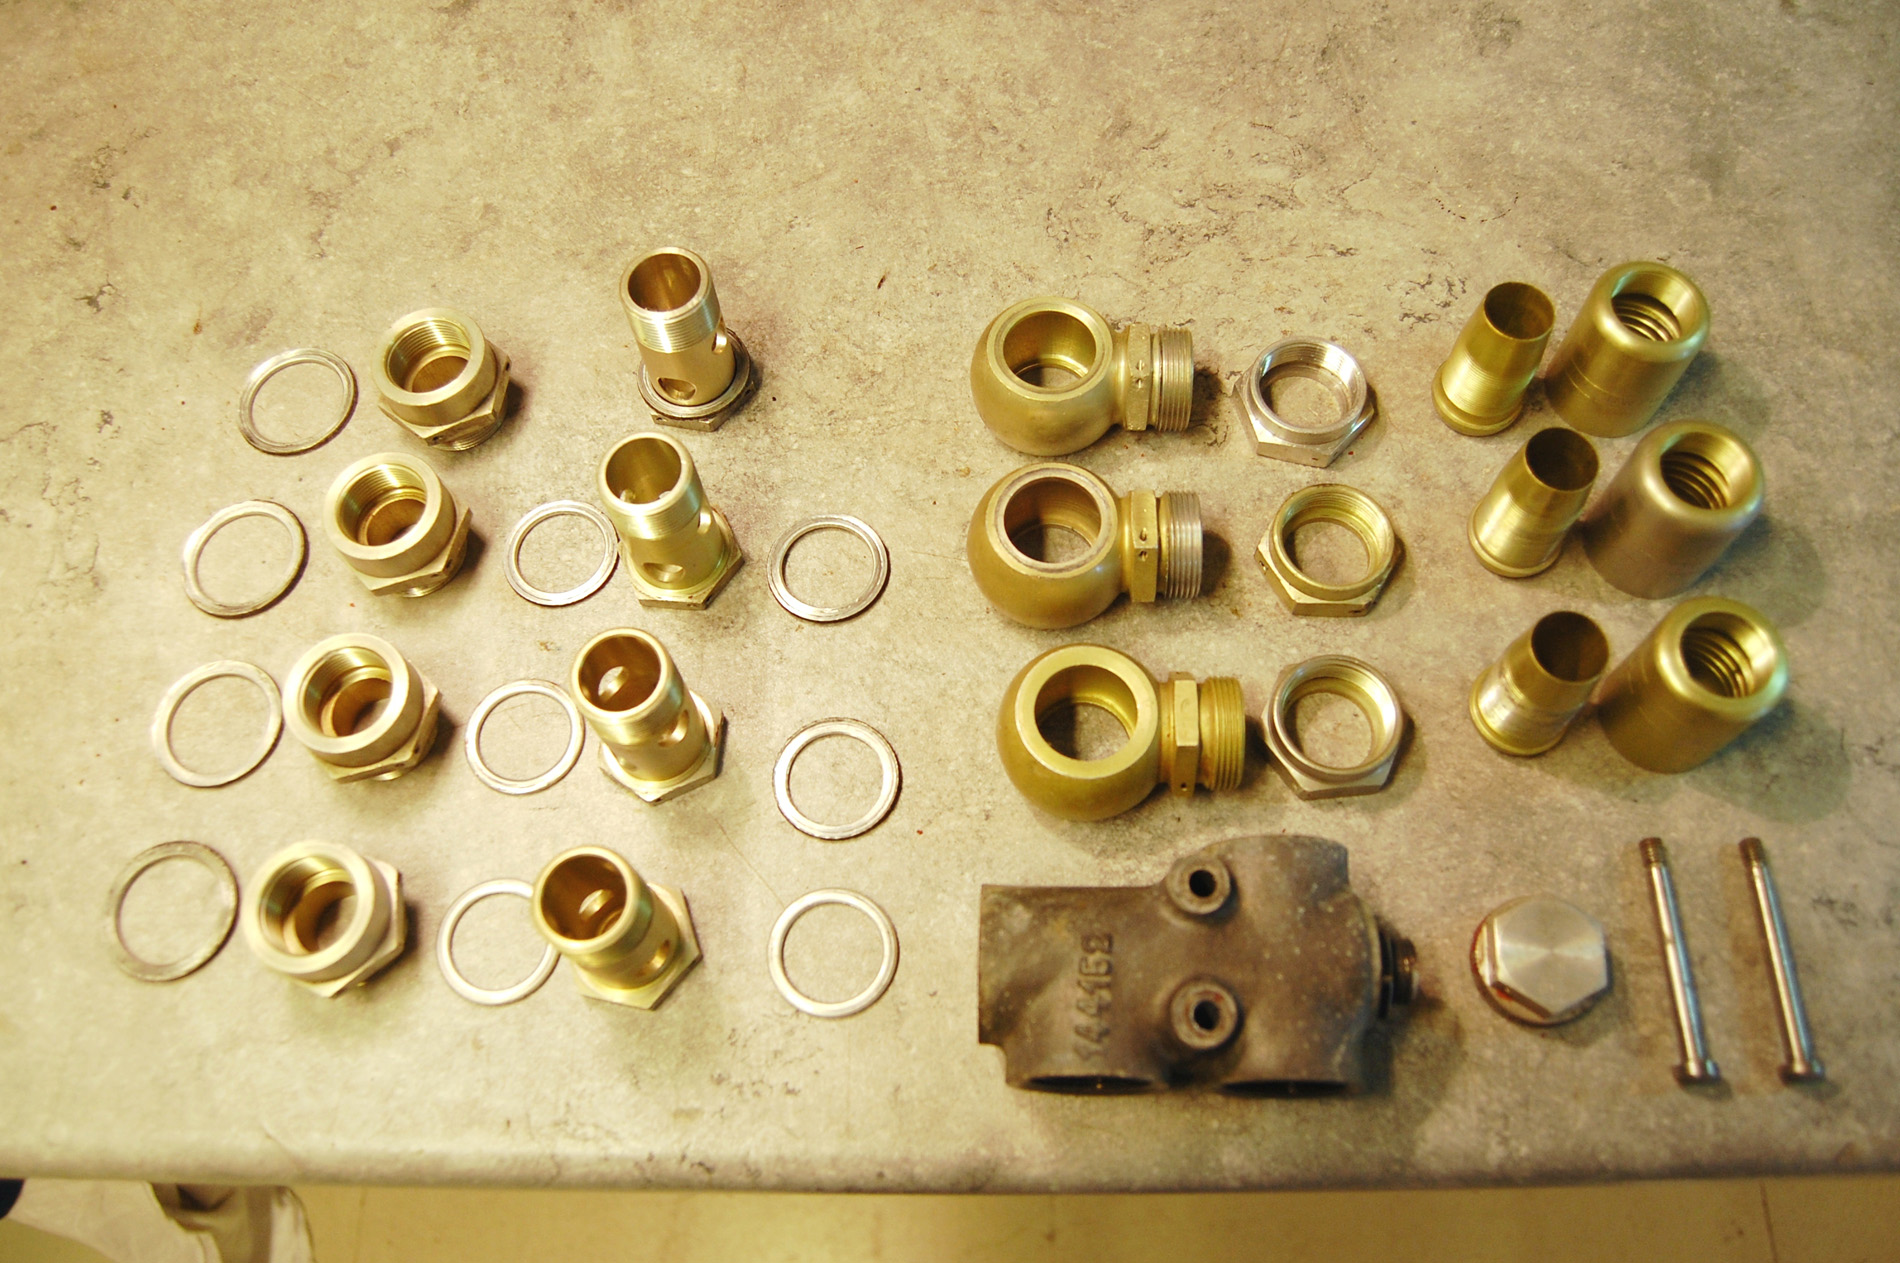
The valve regulating the oil temperature, including hose fittings, can be hard to find.
News 18 May 2016
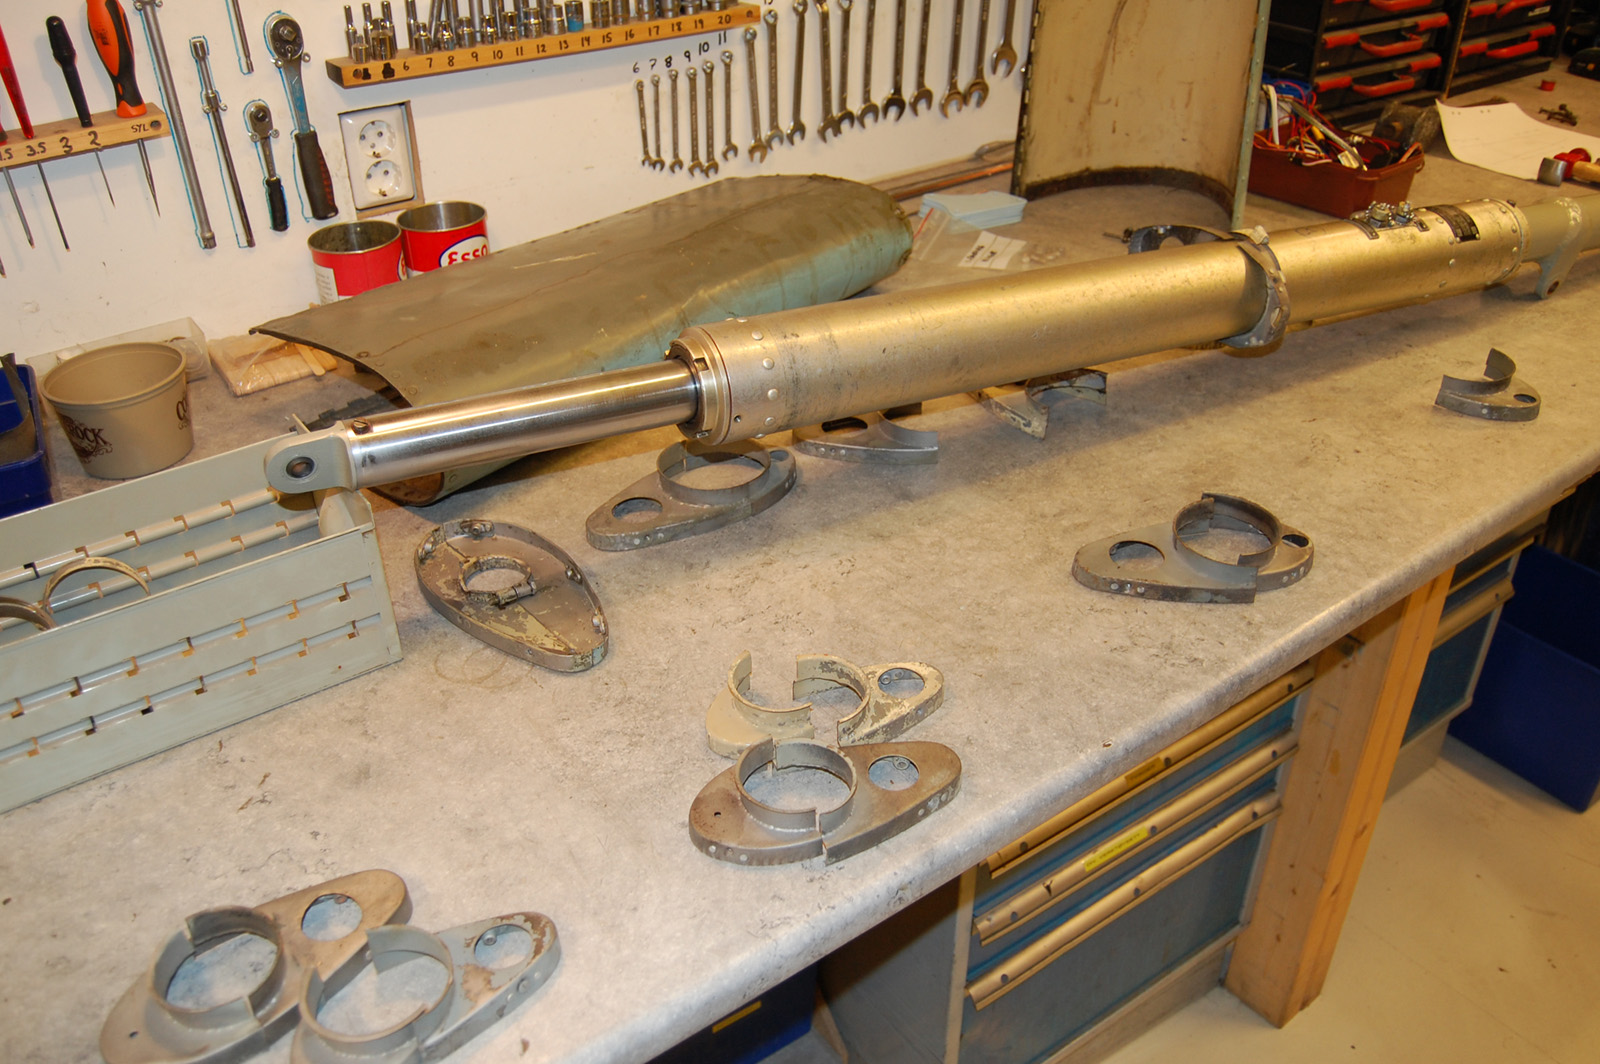
A great milestone was reached when the engine was installed in the engine mounts for the first time. Luckily, all seemed to fit nicely. Just a few adjustments were necessary to get the propeller trust line correct. The plan is to install various components like the oil cooler, oil tank, engine controls etc. first. This makes it possible to find the exact routing for oil and fuel hoses and wires. Later, the engine will be removed again and run in a test stand.
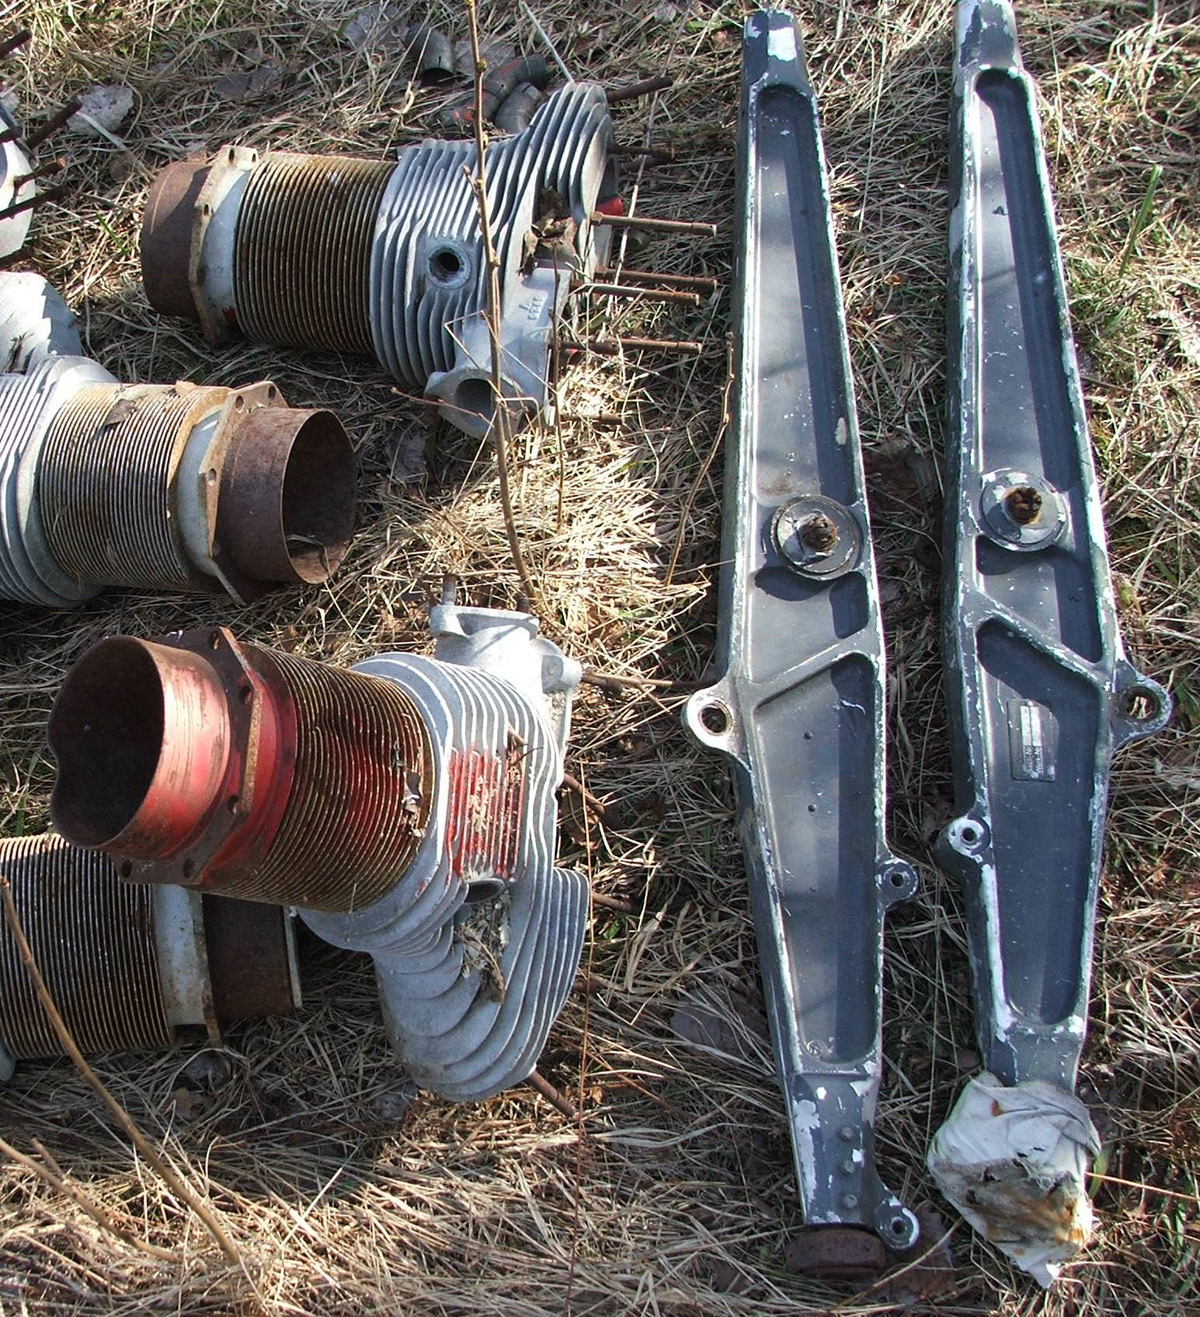
The way I got the engine mounts has to be mentioned. A friend, Øyvind Ådnevik, heard rumours about some aircraft parts at a farm north of Kongsberg, Norway. It turned out that the owner has died. Relatives was about to clean up the area and throw everything away when Øyvind arrived. Lying outdoor, between various aircraft parts he discovered the complete engine mount for a Fieseler Storch. He contacted me and an agreement was reached. What a coincidence! I cleaned the parts, remove some superficial corrosion and sent them to the Air Force laboratories for NDT inspection. It turned out that the parts was airworthy although they had been lying outside for years. The engine mounts originates most likely from one of eight Storchs broken up after it has been taken out of service in the late 1950s.
The engine being hoisted into position.
For comparison; the engine carriers as found outside in 2011.
Many of these parts were actually in good condition.
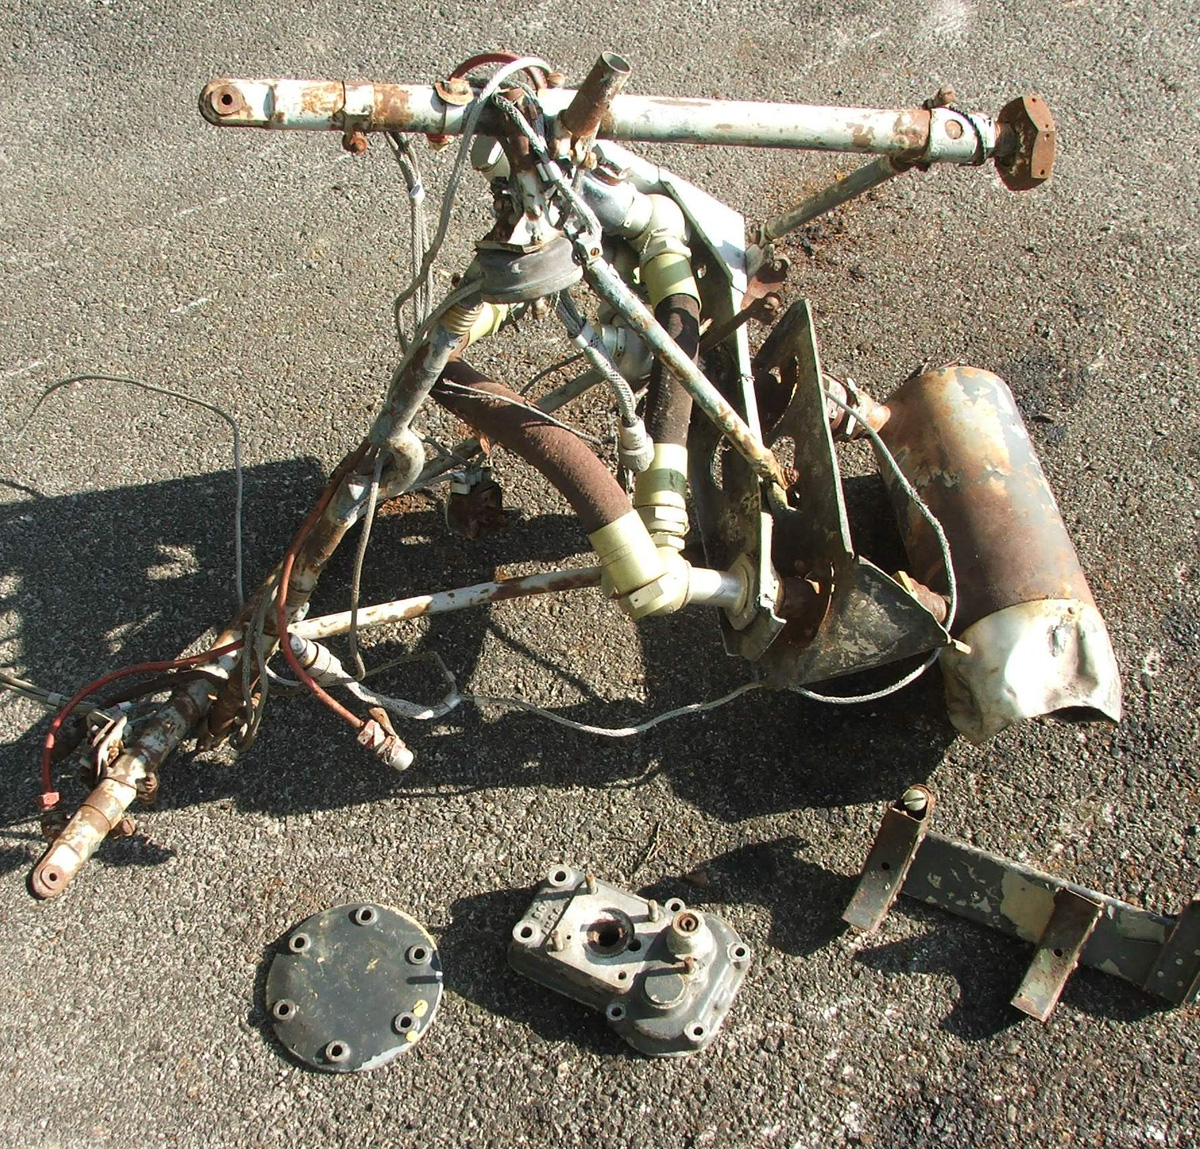
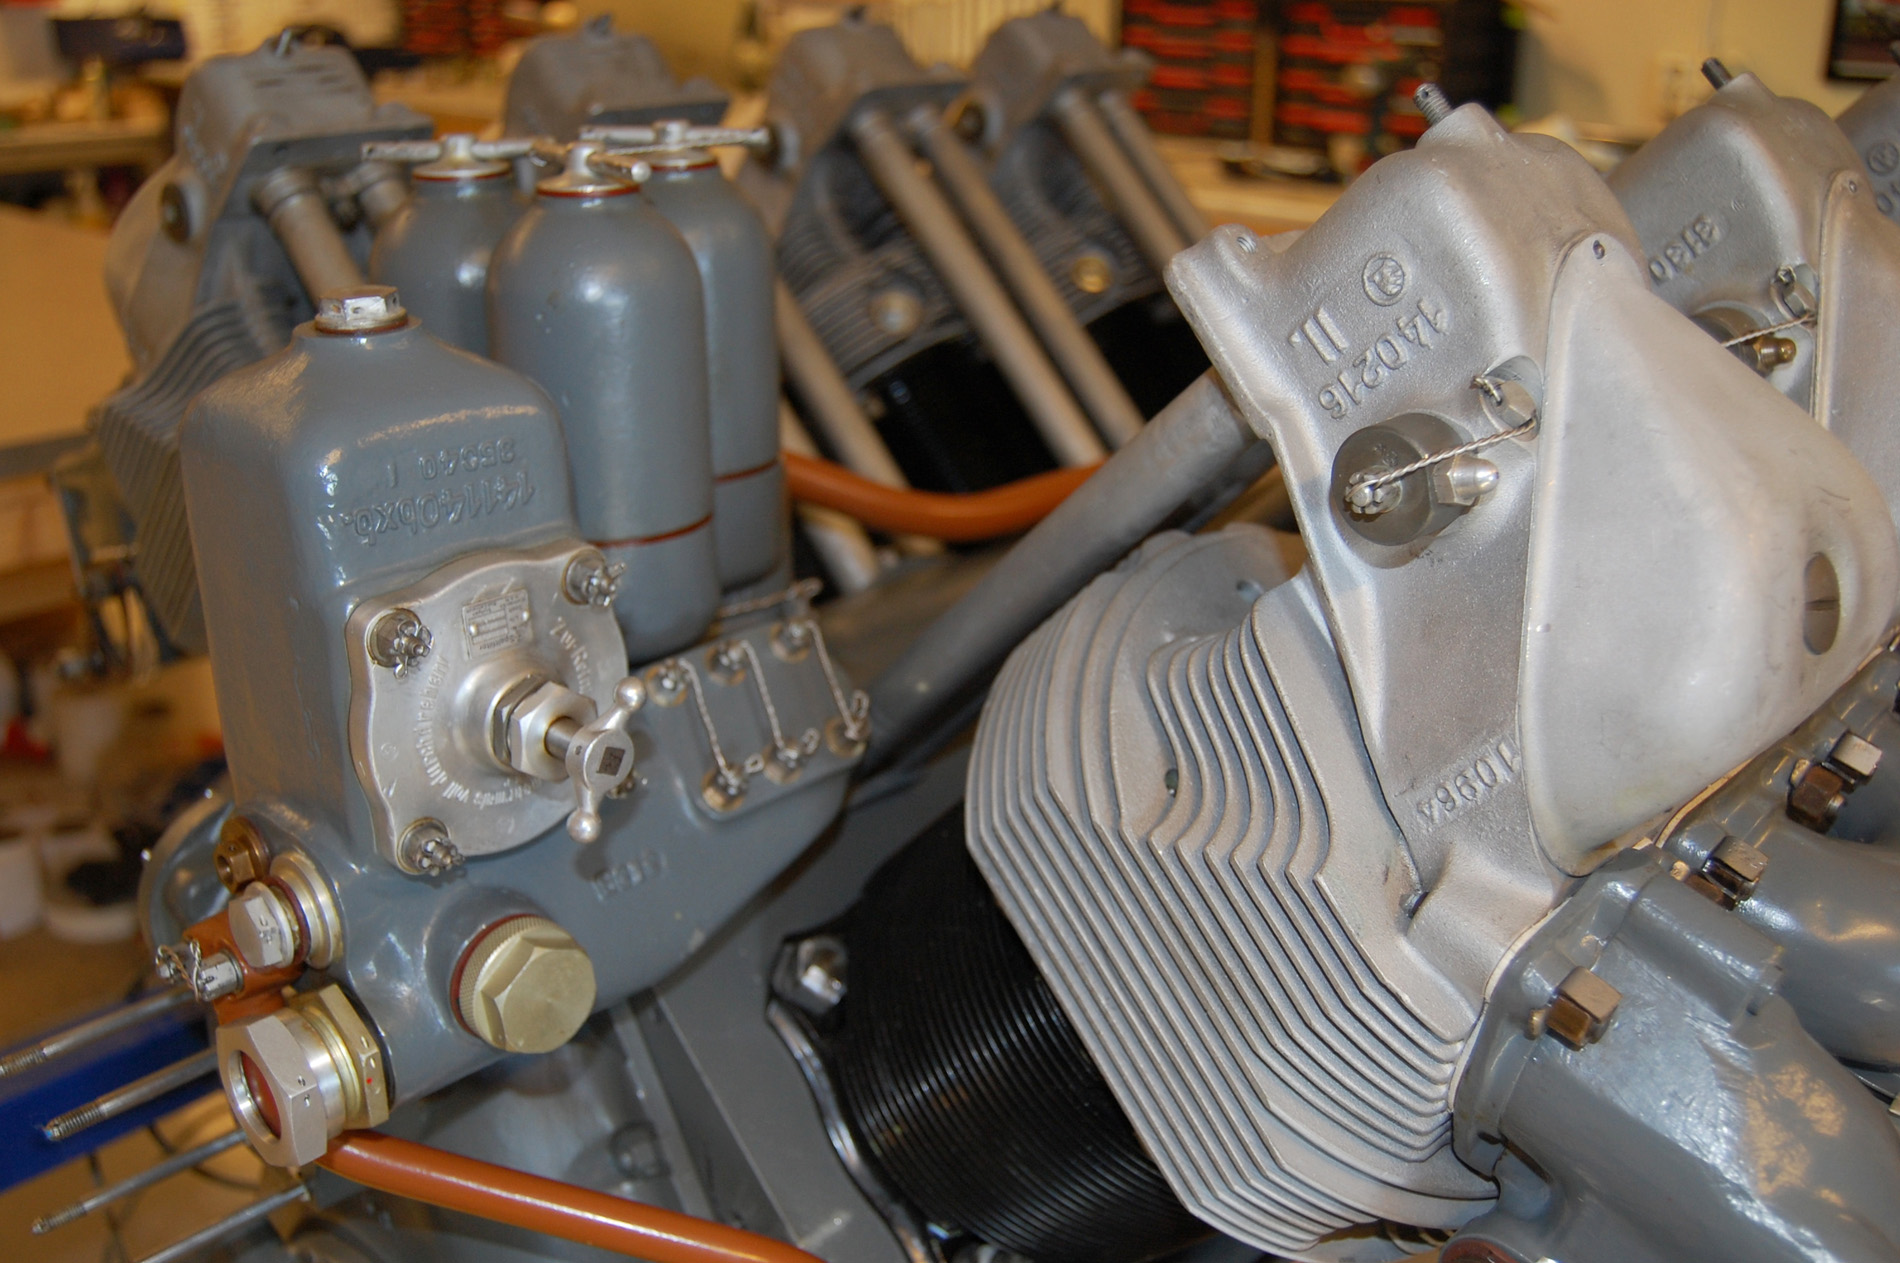
The accessory drive case with starter in centre position, the crank case ventilation/oil separator (the knee turning right), the step-up gear box for the generator (right) and the Jumo fuel pump (aluminium finish). The bell crank (bottom right) is part of the mixture control linkage.
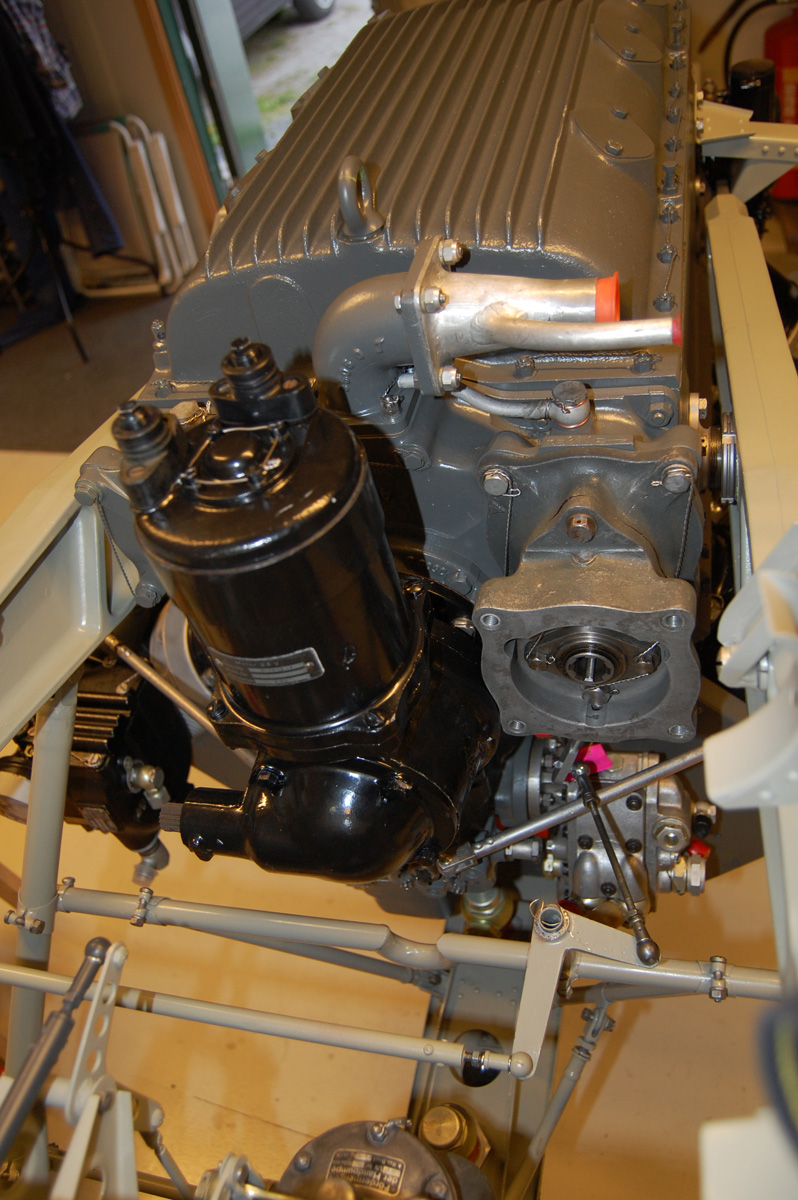
The Argus engine installation seen from a rather unusual angle.
Two Bosch ignition magnetos in front. The oil tank is nicely surrounding the starter.
News 23 March 2016
The engine overhaul is almost done. All cylinders are installed together with baffleplates, induction pipes etc. However, the list of seemingly minor details is long. Carburettors, magnetos, starter, generator etc. need attention. Probably the trickiest part is to make missing parts for the ignition leads and spark plug connectors.
Four filters located to the rear of the engine.
Two are for the scavenge pumps and two are for the pressure pump. The one to the left consists of disks and with cleaning knives in between. It can be cleaned by turning the handle.
Checking exhaust system alignment while the engine is still upside-down.
News 6 February 2016
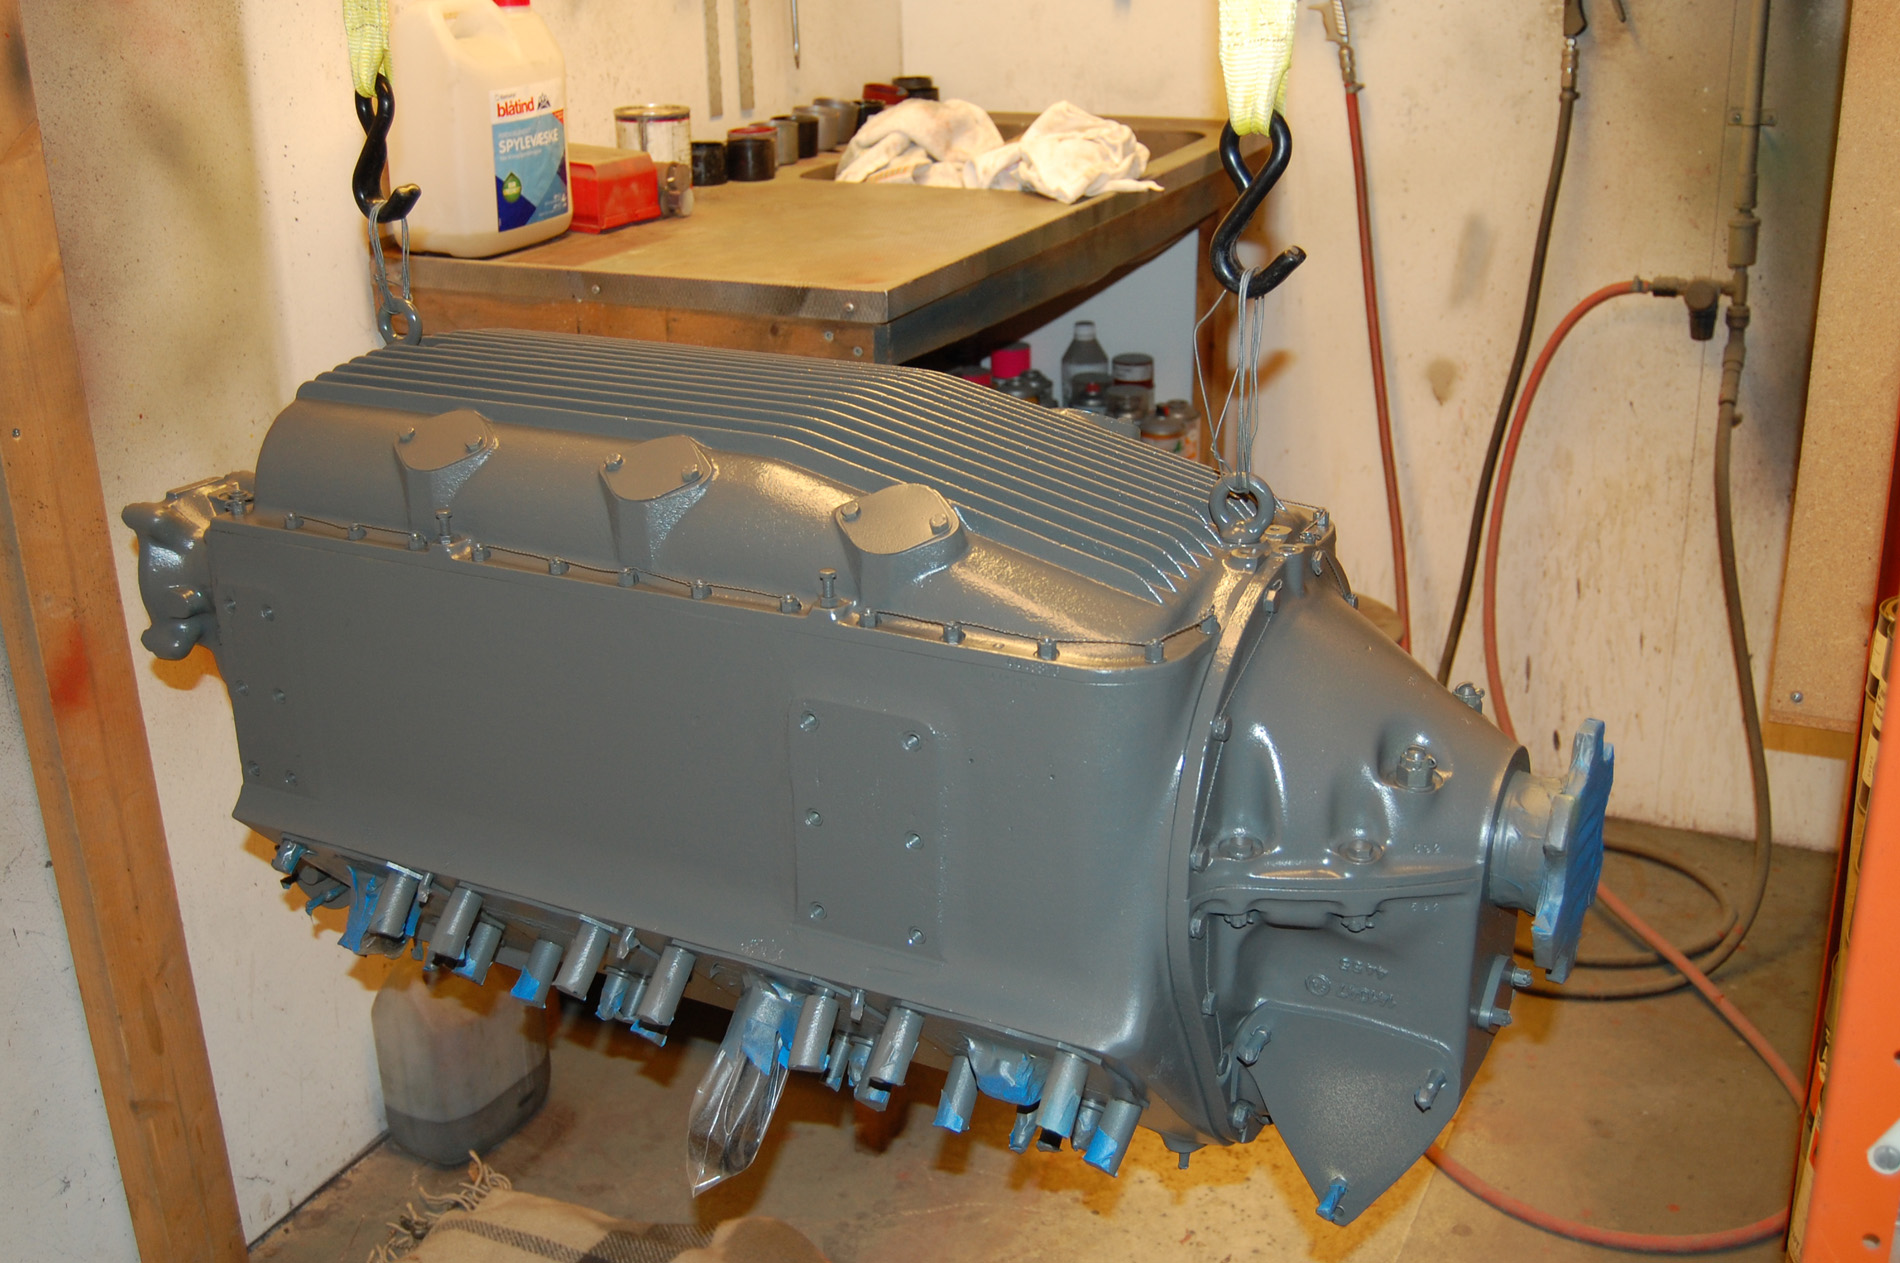
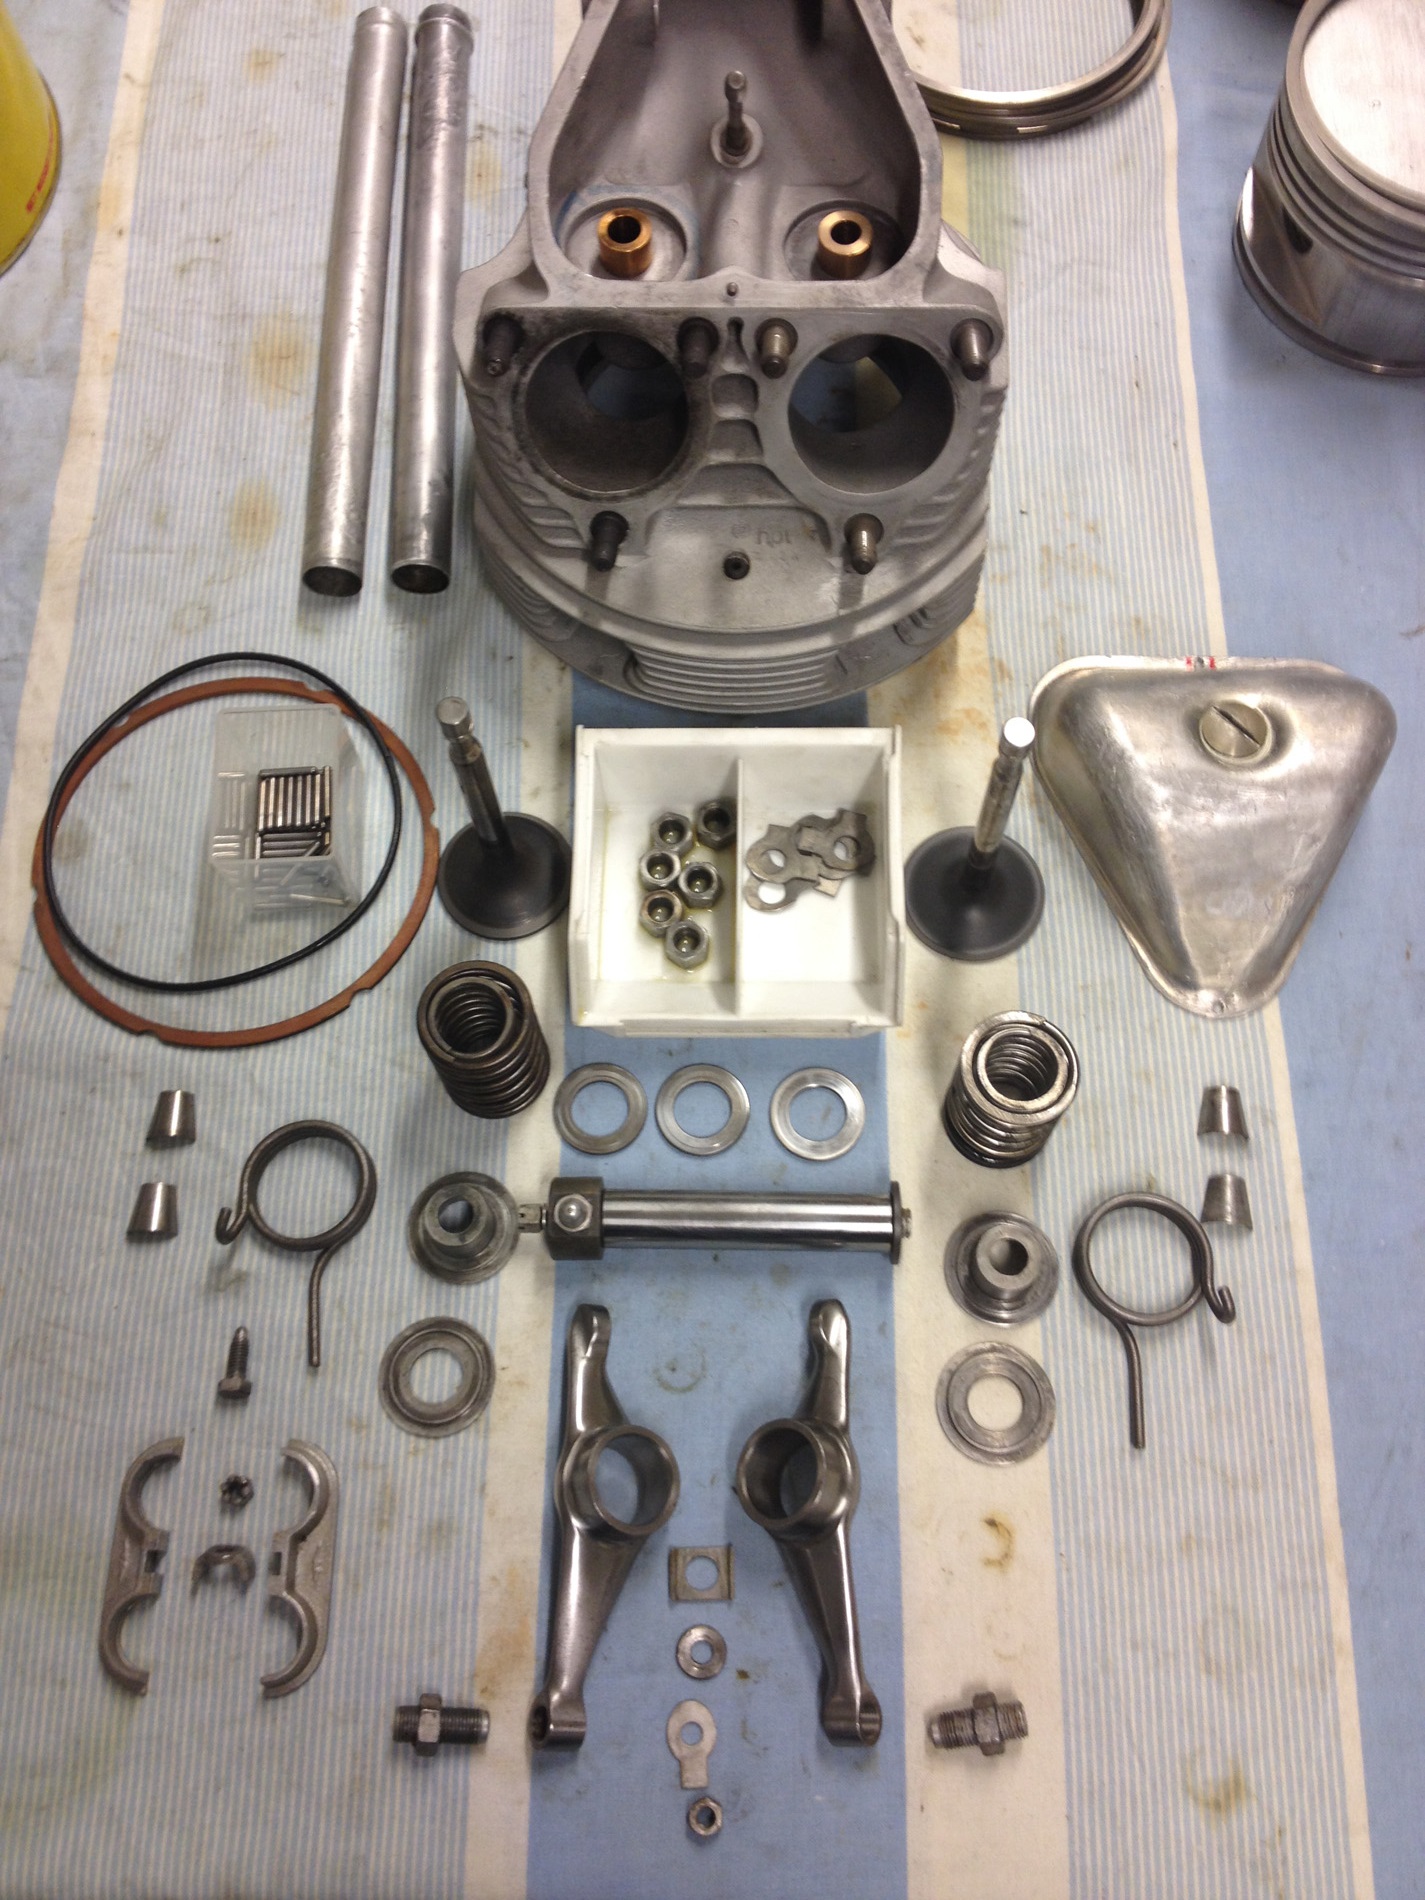
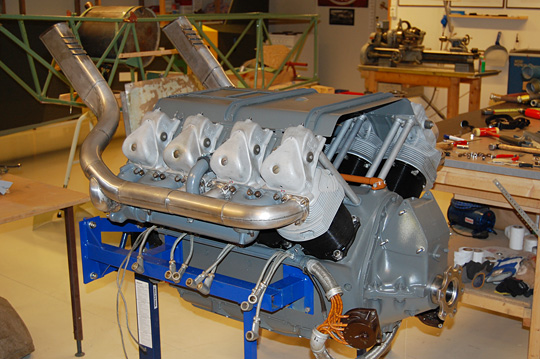
We have resumed final assembly of the engine. The engine was set aside in February 2013. Now it’s time to complete the work. We installed the top cover and the accessory drive case. Then we brought it into the paint shop for priming and painting. Next we mated the cylinder heads to the cylinders. Now we are about to finish installing valves and the valve mechanism. Luckily, we have enough new or old stock parts to make the engine like new.
In the paint shop. The colour is based on colour samples from
several war time spare parts.
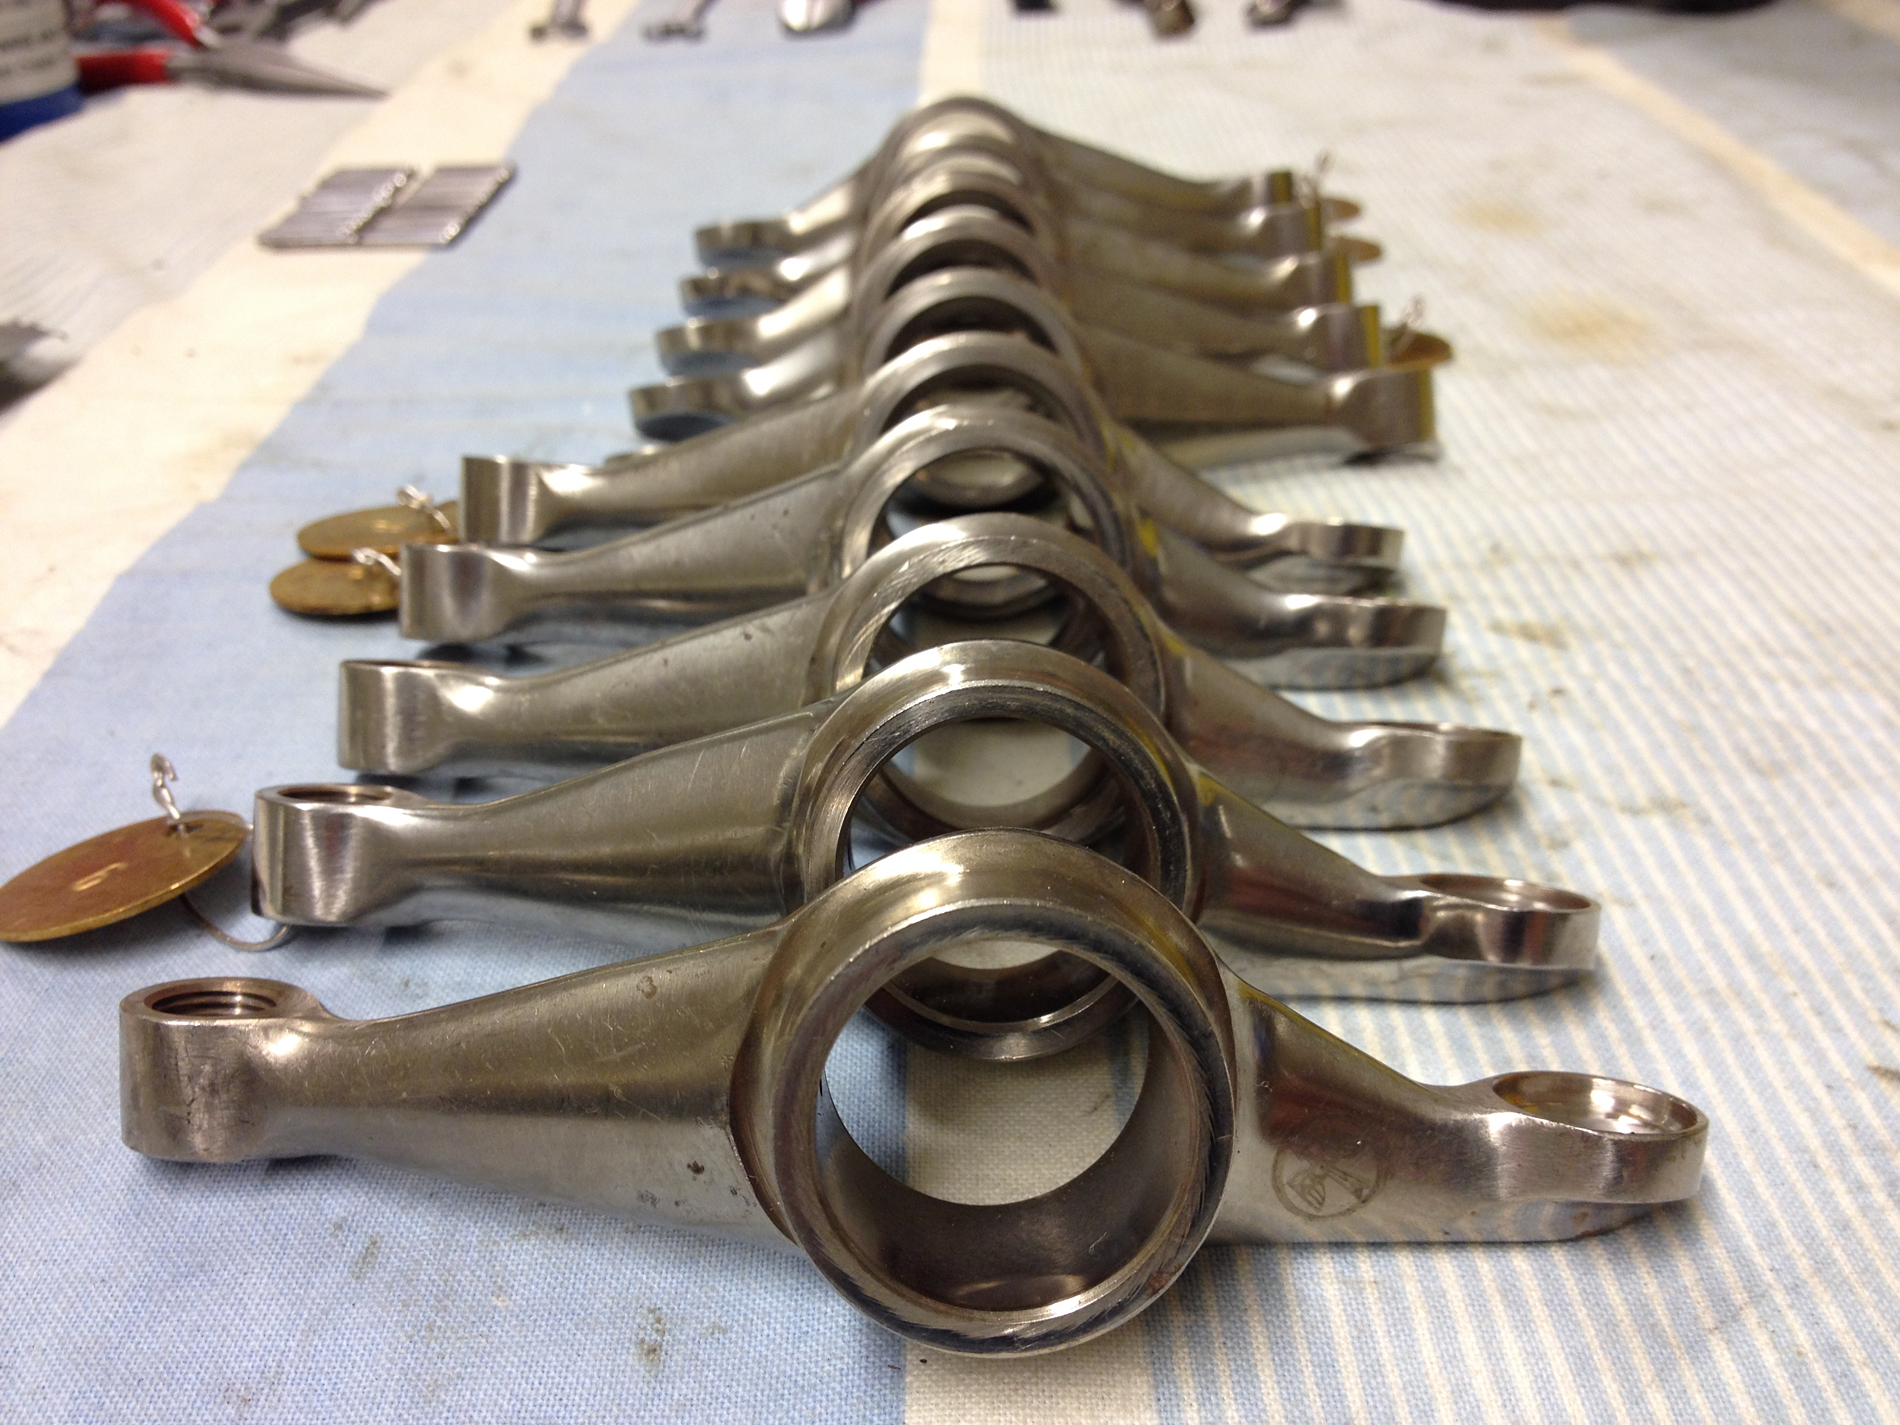
Inspected and ready for installation. Argus rocker arms are artwork.
The etched Argus emblem is still visible to the right.
The valve mechanism ready for installation.
Grease lubricated needle bearings in the rocker arms are one of the rather
unusual and expensive details on this engine.
42 needles in the small plastic box to the left.

Ready for installation on the crankcase. Note the Skoda emblem to the right.
Skoda made most of the cast parts on the Argus AS 10.
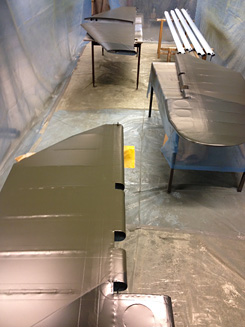
News 2 December 2015
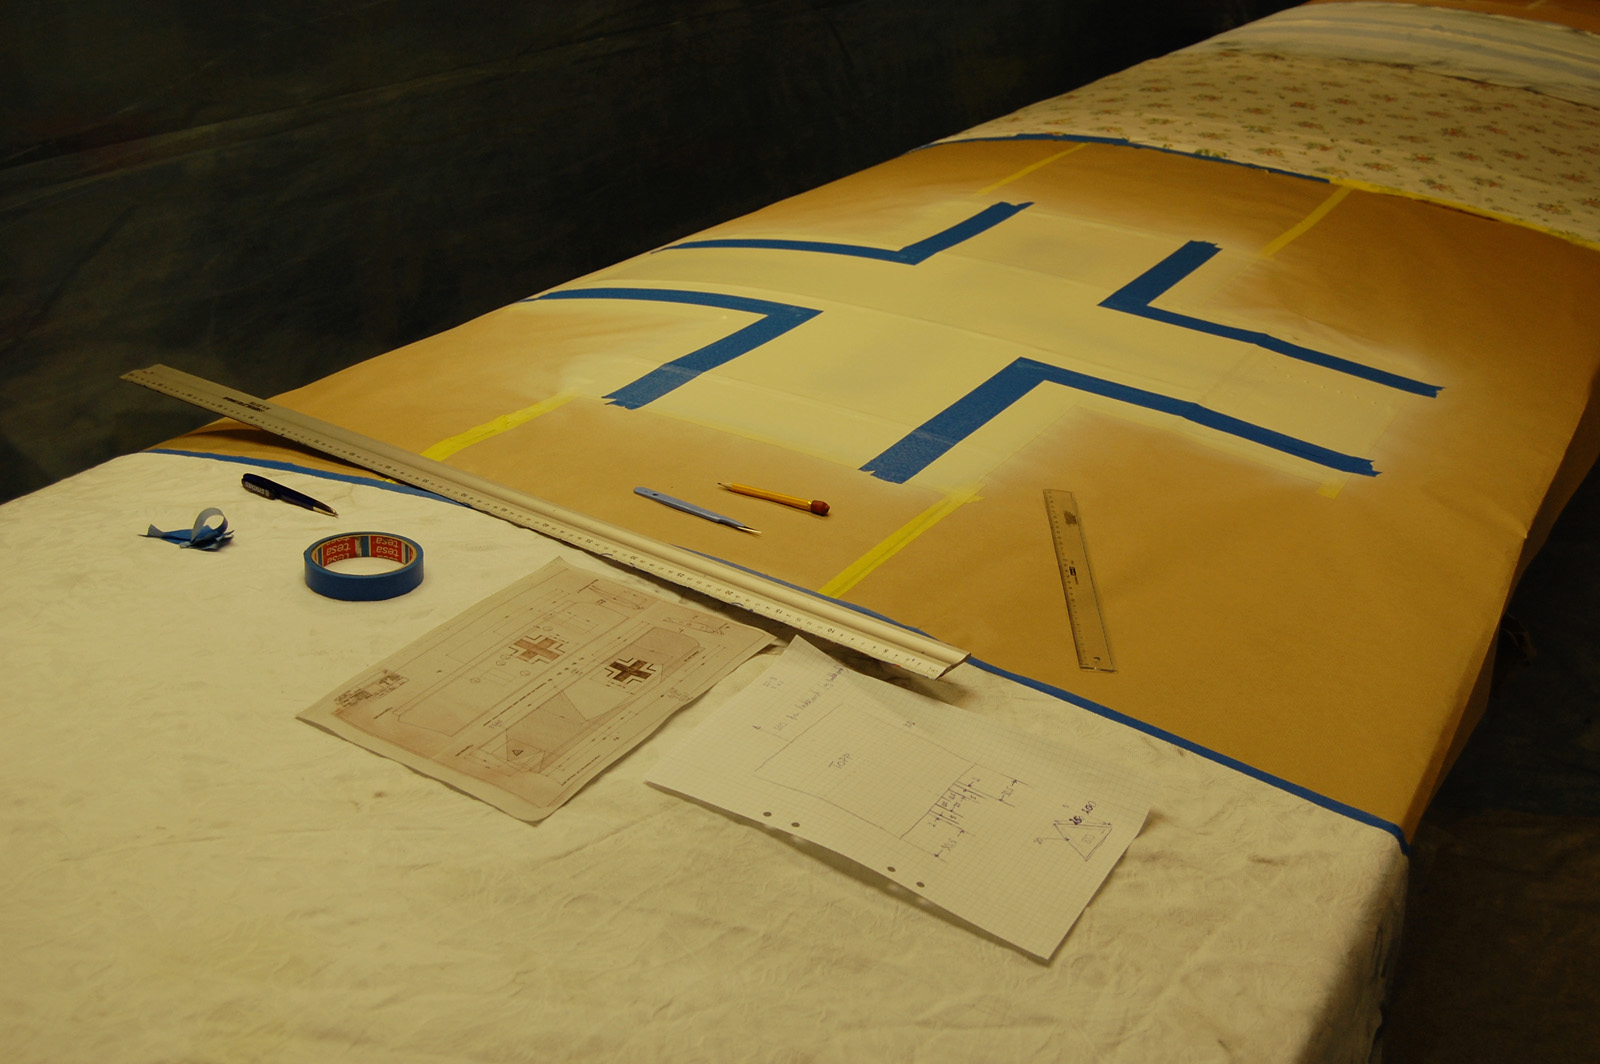
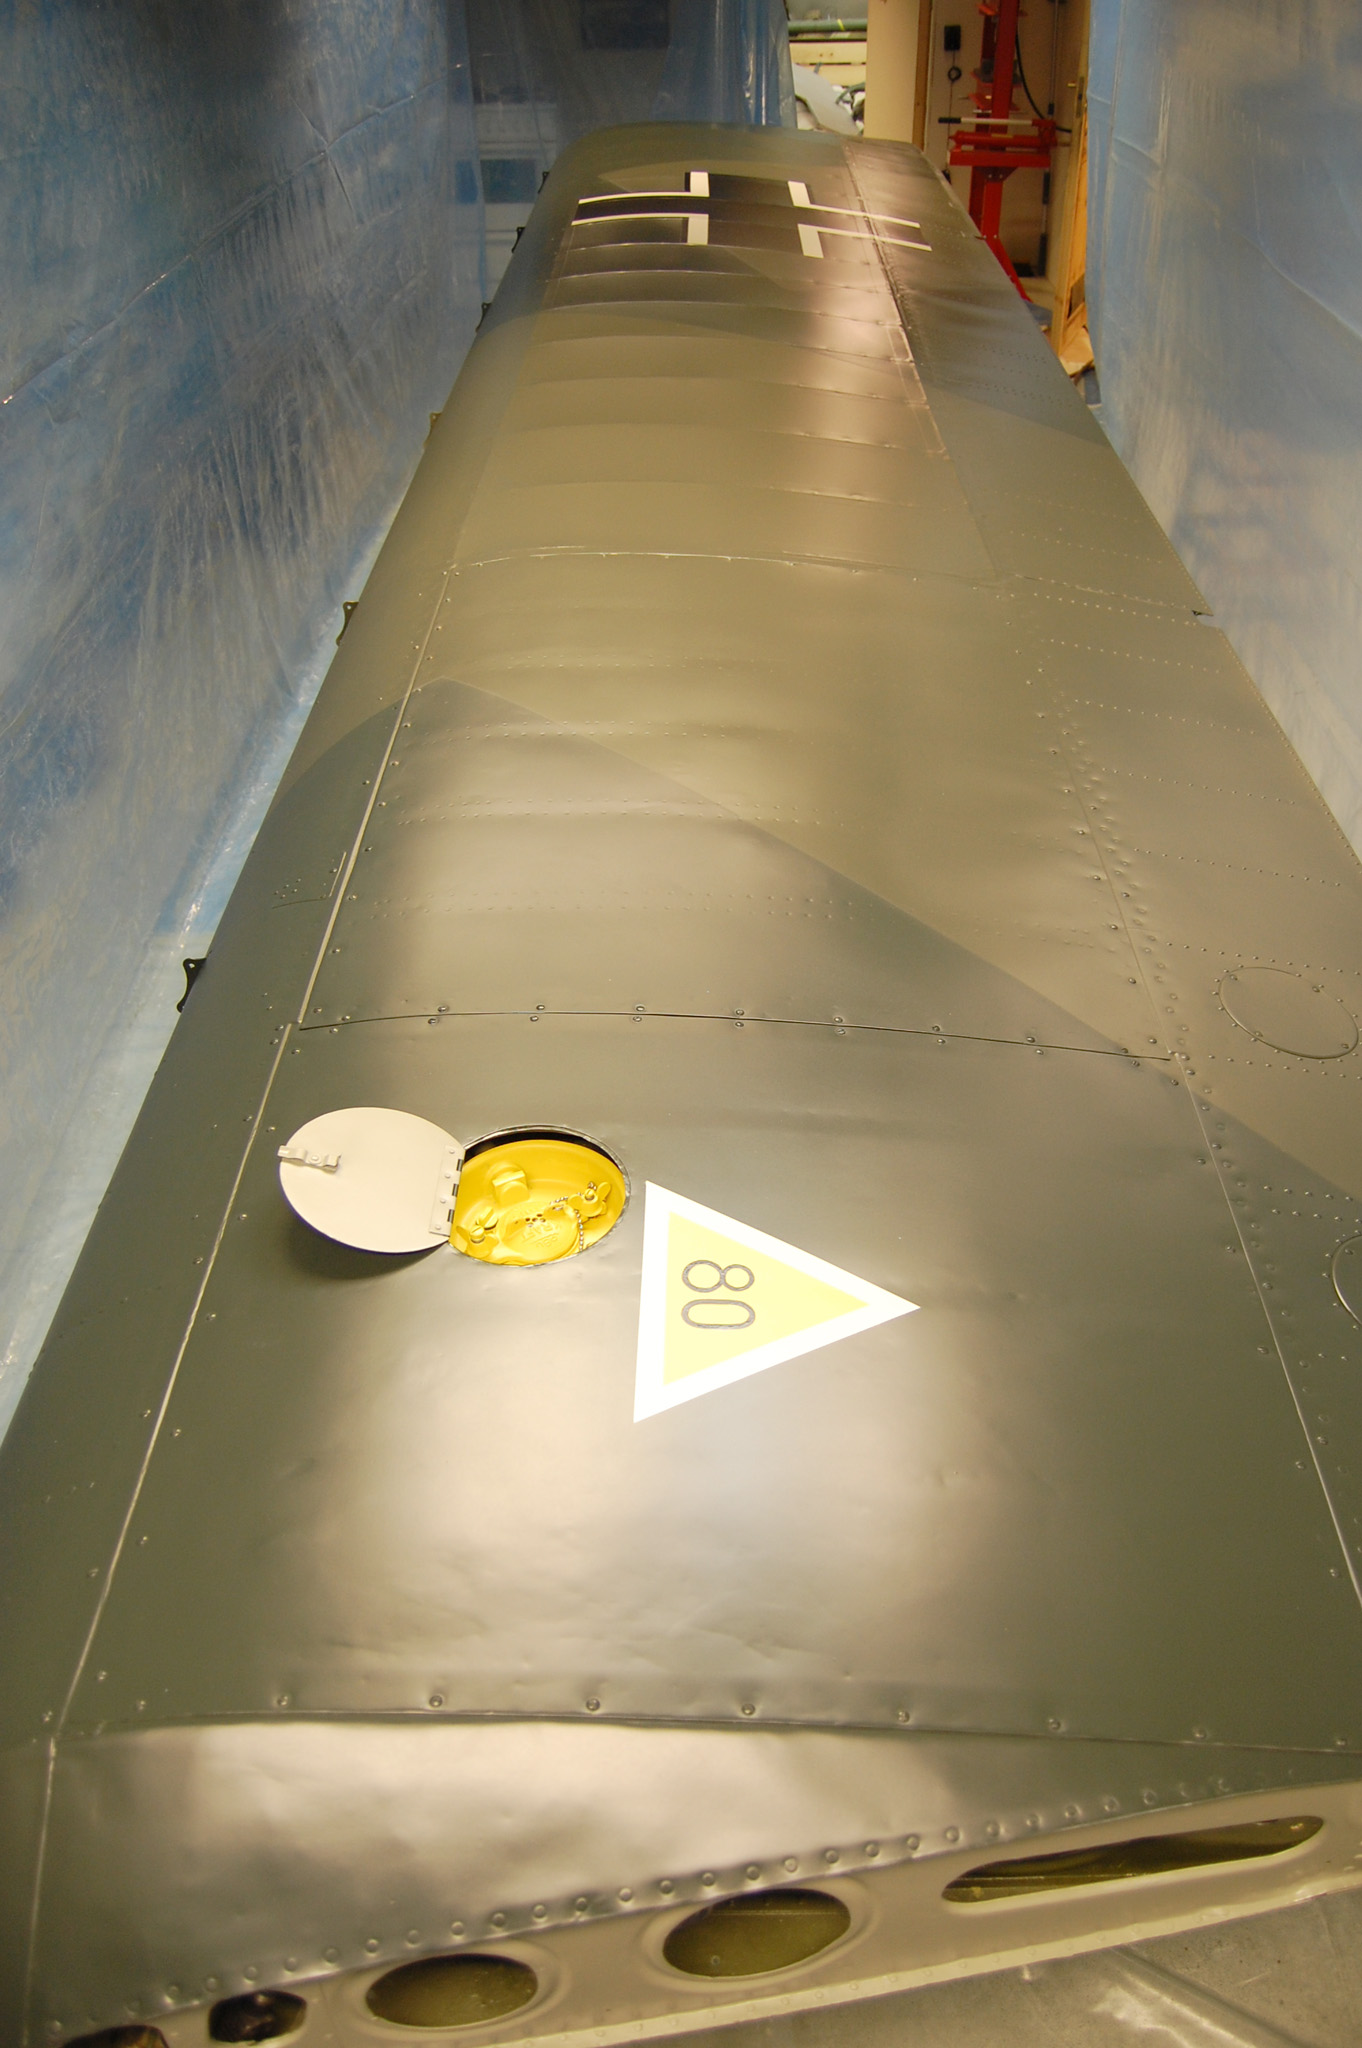
In principle, the Storch paint job is now finished. We have painted all “big” objects like the leading edge slats, ailerons, horizontal stabilizer and elevators. The last items to leave the paint box were four wing struts. It was a pleasure to take down the plastic “walls” and pack the makeshift paint box. Finally we can spread out over the entire workshop again. We still have to paint a flap and the engine cowlings, but this have to wait until we have the parts.
We also make progress on the landing gear. It was trickier to restore the landing gear fairings than expected. The landing gear struts also present challenges. The whole construction is full of special bolts, bushings, swivels and links. Every part has freedom to move in almost all directions.
Next is final assembly of the Argus engine.
The tail feathers in the paint box.
The lower fairing had to be made new. The two upper sections could be saved.
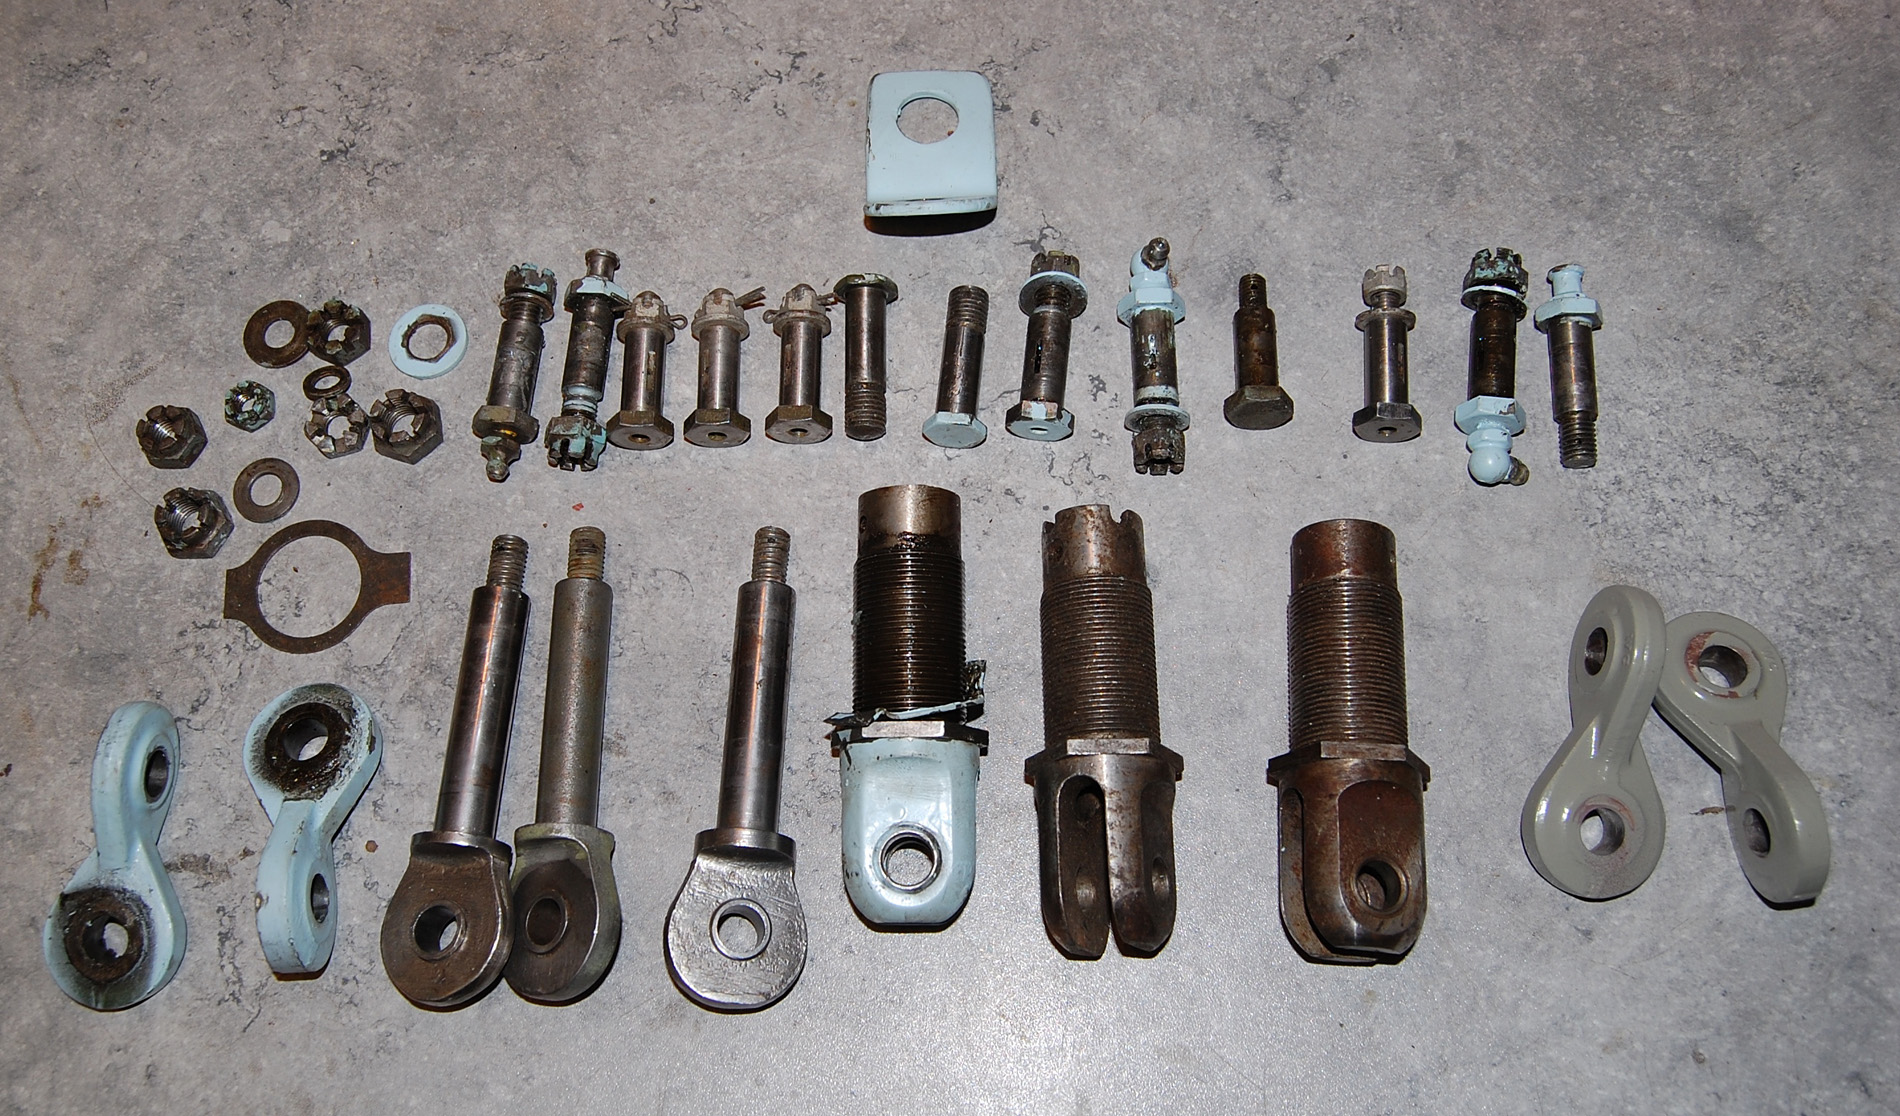
A collection of strut ends necessary to assemble the landing gear.
In the first place standard metric aviation bolts are hard to get. Not a single bolt in this collection can be regarded as standard. I have a few spare, but if they are worn out, I have to make new ones.
News 7 October 2015
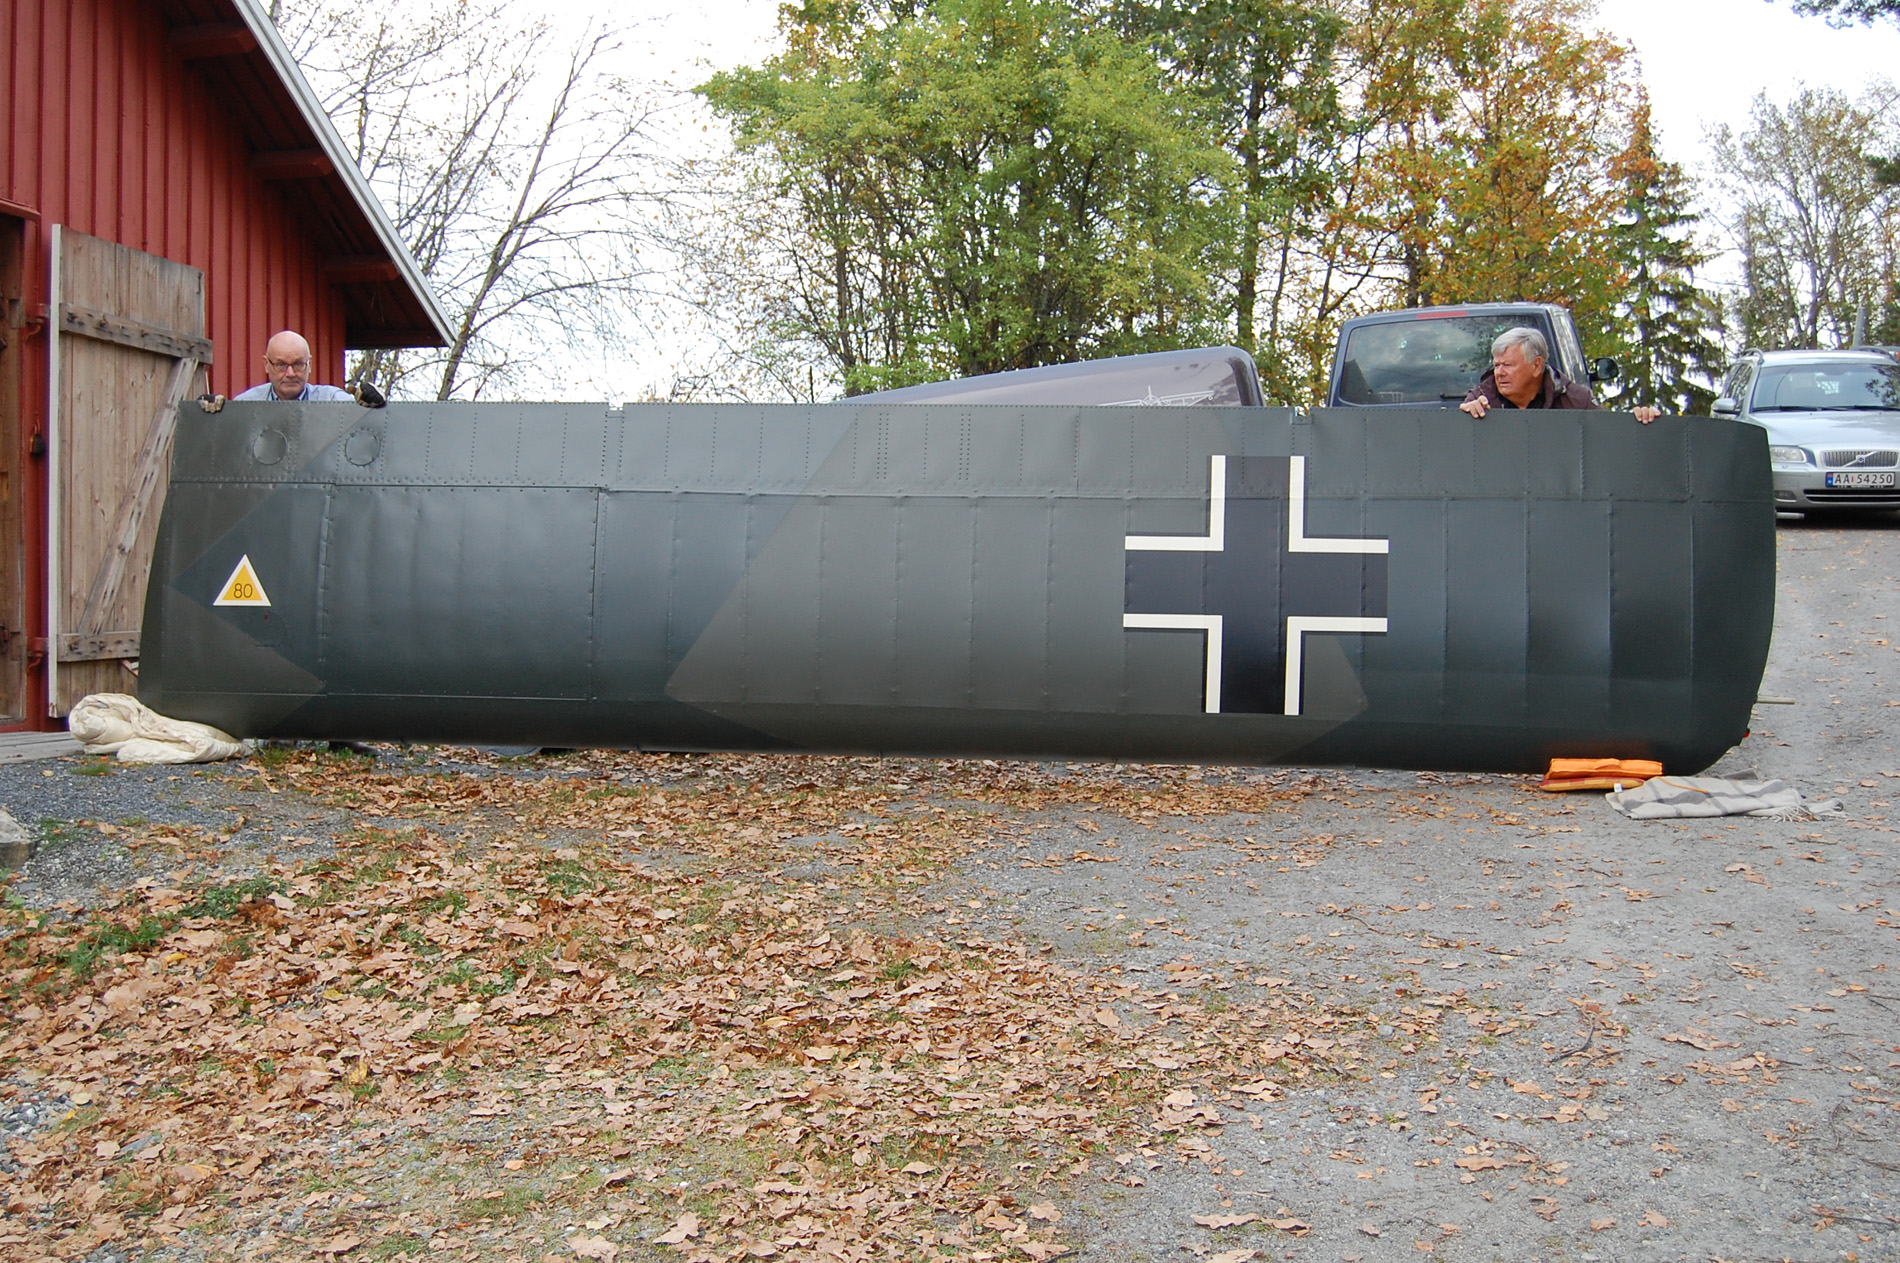
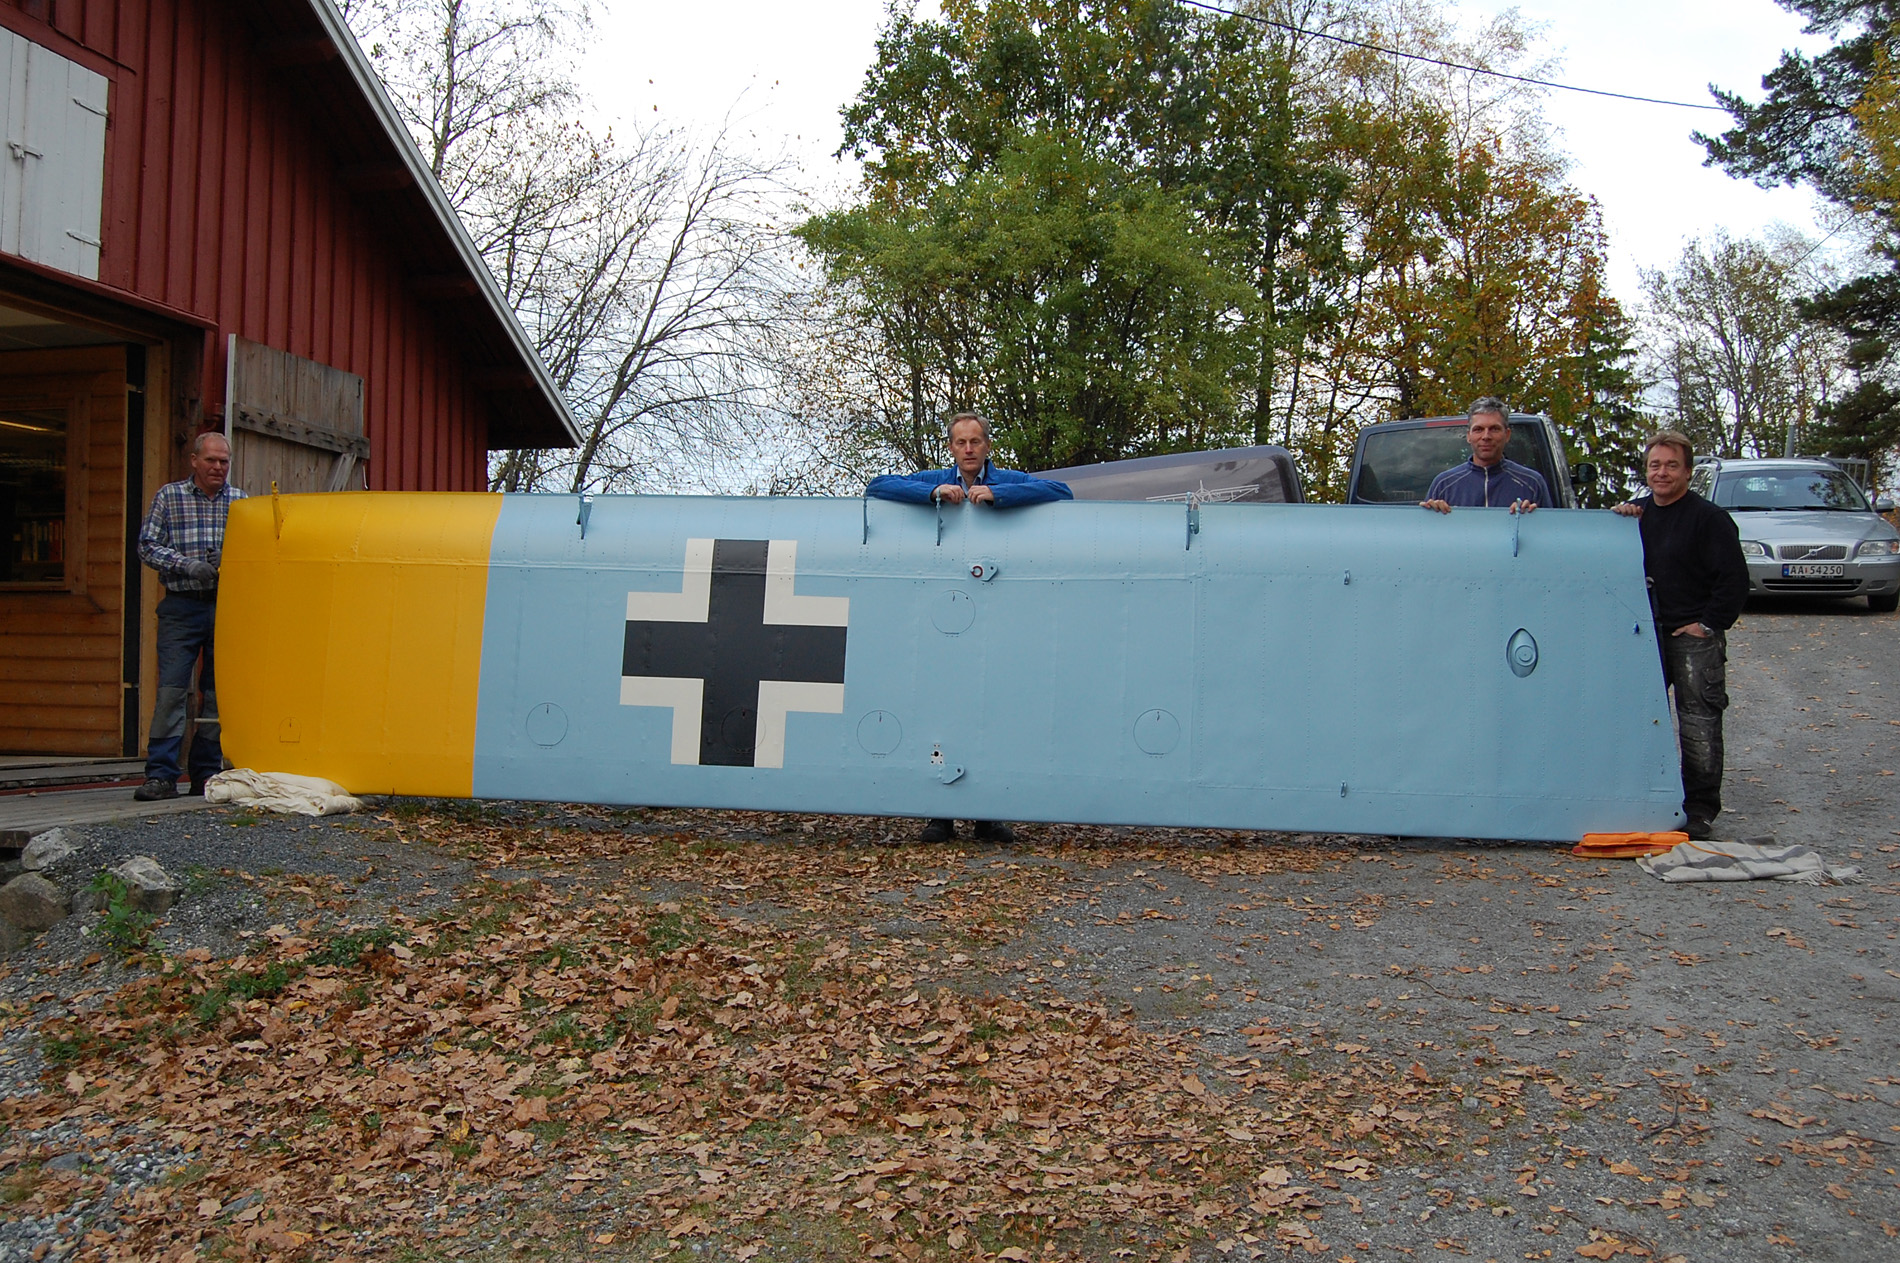
The Storch project has moved forward steadily. We finished the second wing (L/H) last week. The wing is big! We had to bring it outside the workshop and swop ends in order to get it correctly into the wing stand. We jumped at the chance and made a few photos. All flight controls, leading edge slats etc are next in the paint box.
The L/H wing top side minus leading edge slats, flaps and aileron.
Ready for installation. It was no big letters under the wings on H3+BF
News 27 August 2015
We passed 7000 man-hours during work on the left wing. There were no real surprises discovered during the work. The structure was good and the fuel system had the same standard as on the right wing. However, we had to rework all the wiring for the pitot heat, landing light and nav. light. It was challenging to install the junction box and connectors with the fabric on. The paint work is straight forward, although it takes some time because each layer of color has to dry before you apply the next. To fill in some time-gaps we started to work in parallel on the landing gear fairings.
Preparing for black color on the Balkenkreuz.
The landing gear fairings are rather complicated on the Storch.
News 3 June 2015We started working on the right wing early April. The wing is so big that we had to rearrange the entire workshop to get it onto some tables. The wings were basically finished when I bought the Storch, but a few details had to be dealt with. Firstly, the fuel system was the French version with the fuel hose going on the underside of the wing. My plan was to convert it back to the original German version. A nice surprise was that the French fuel tank contained the original German fuel pick-up tube. Only the fuel ventilation system had to be reworked. Next was a thorough inspection of the internal structure and flight control linkage. The restoration was not up to my standard, but removing the fabric and re-do everything was out of question.
During the work with bolts and bearings I discovered bad news. I had two L/H flaps and no R/H. Sometimes the Americans can be too fast and superficial during their restorations. Now, I’m in contact with the guy who sooner or later will discover he has the opposite problem. I could continue without the flaps and we erected the old makeshift paint box again. It was most convenient to start painting the upper side of the wing first.
The wing before the upper wing panels was reinstalled. The colours internally are wrong and the fuel filler neck was painted red. We skipped repainting the whole wing internally, but just had to paint the filler neck yellow. The blue lines are fuel tank vent. The yellow line drains away fuel spillage during refuelling.
The right wing before we turned it over and started painting the underside light blue and yellow.
News 21 March 2015
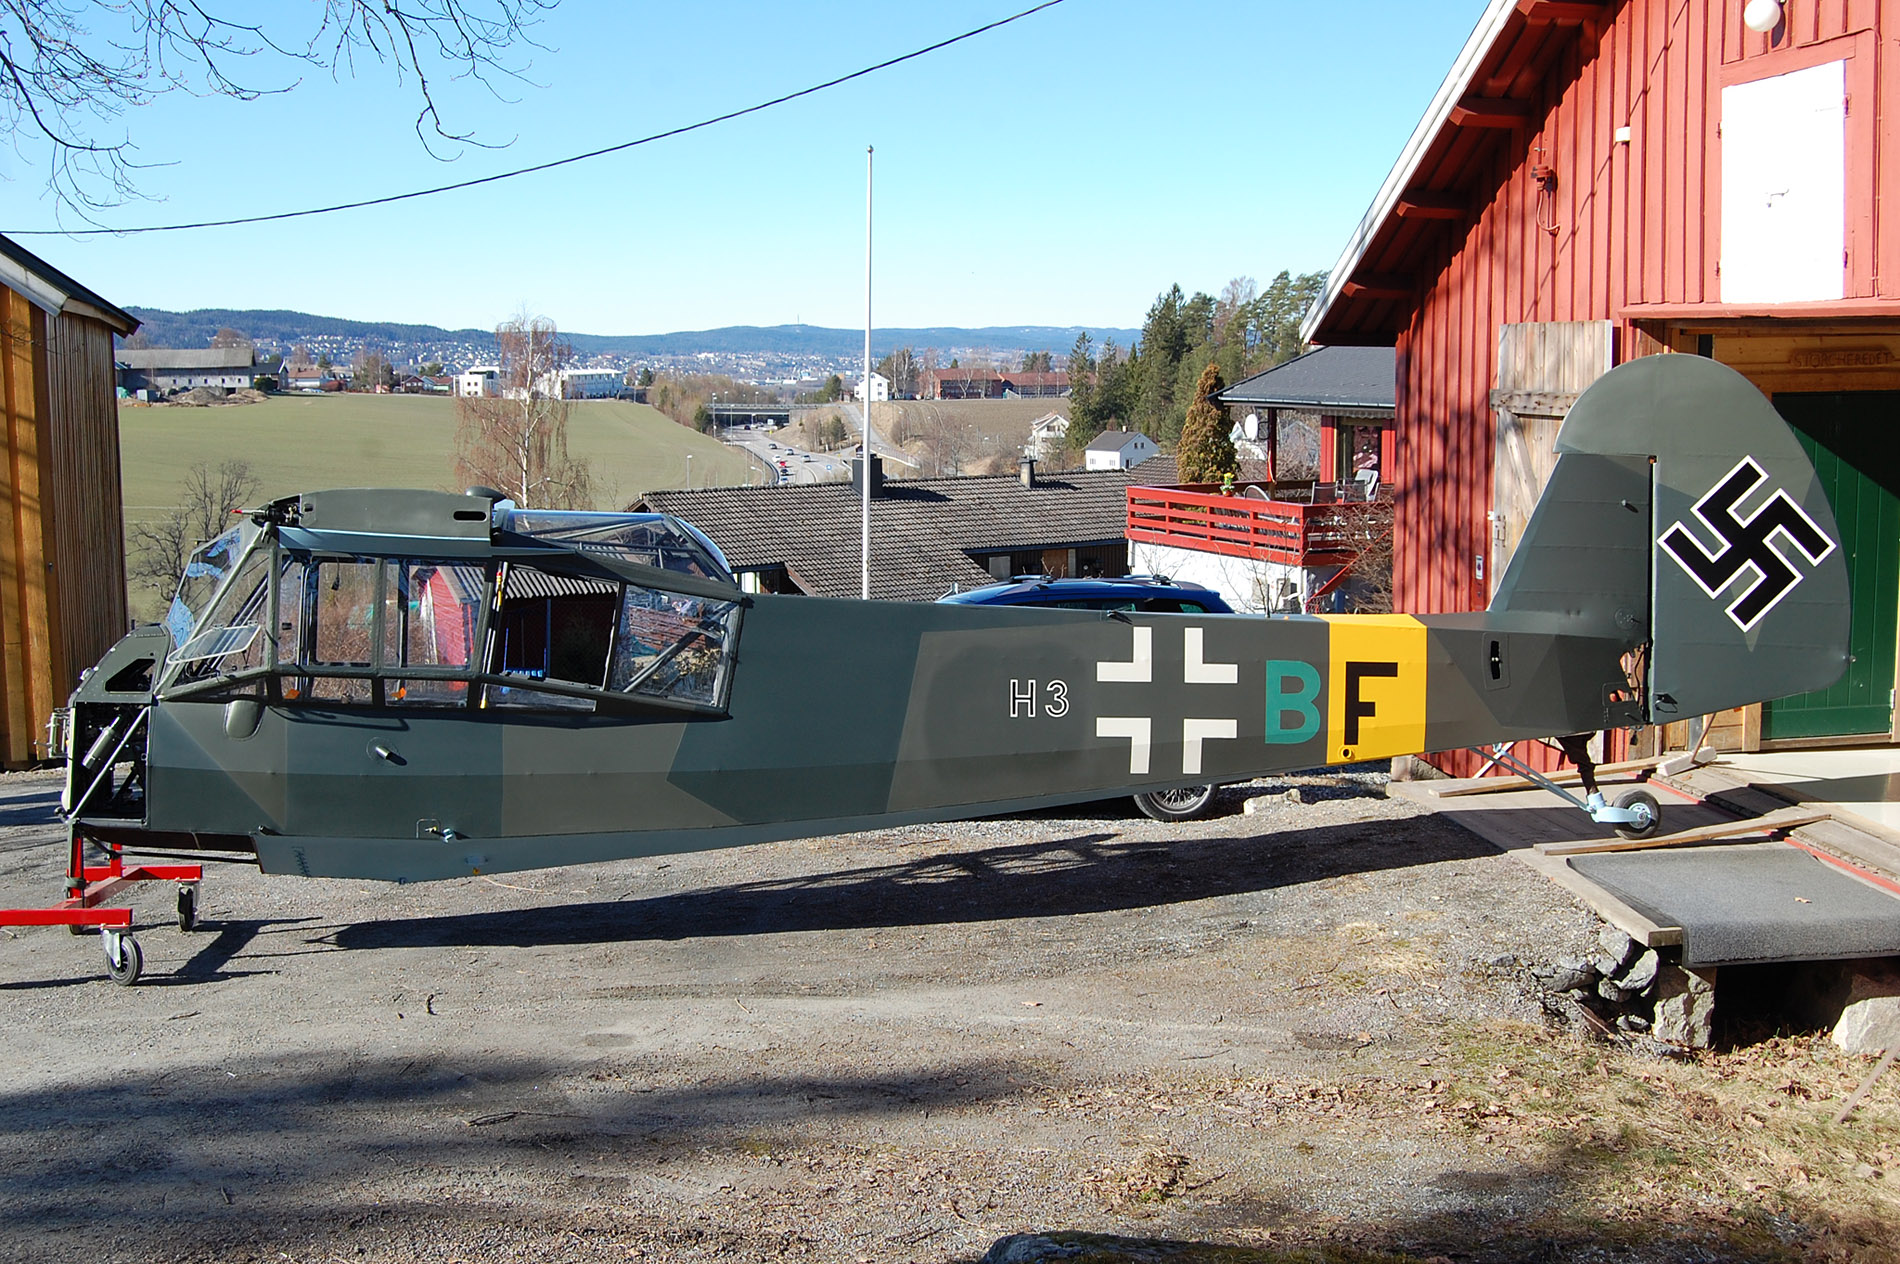
The fuselage is painted and out in the sunlight for the first time. Just a few details like small text have to be added. Installation of the pilot seat and seat belts are basically what remain before we can declare the fuselage as finished. Wings next!
Out in the sunlight for the first time.
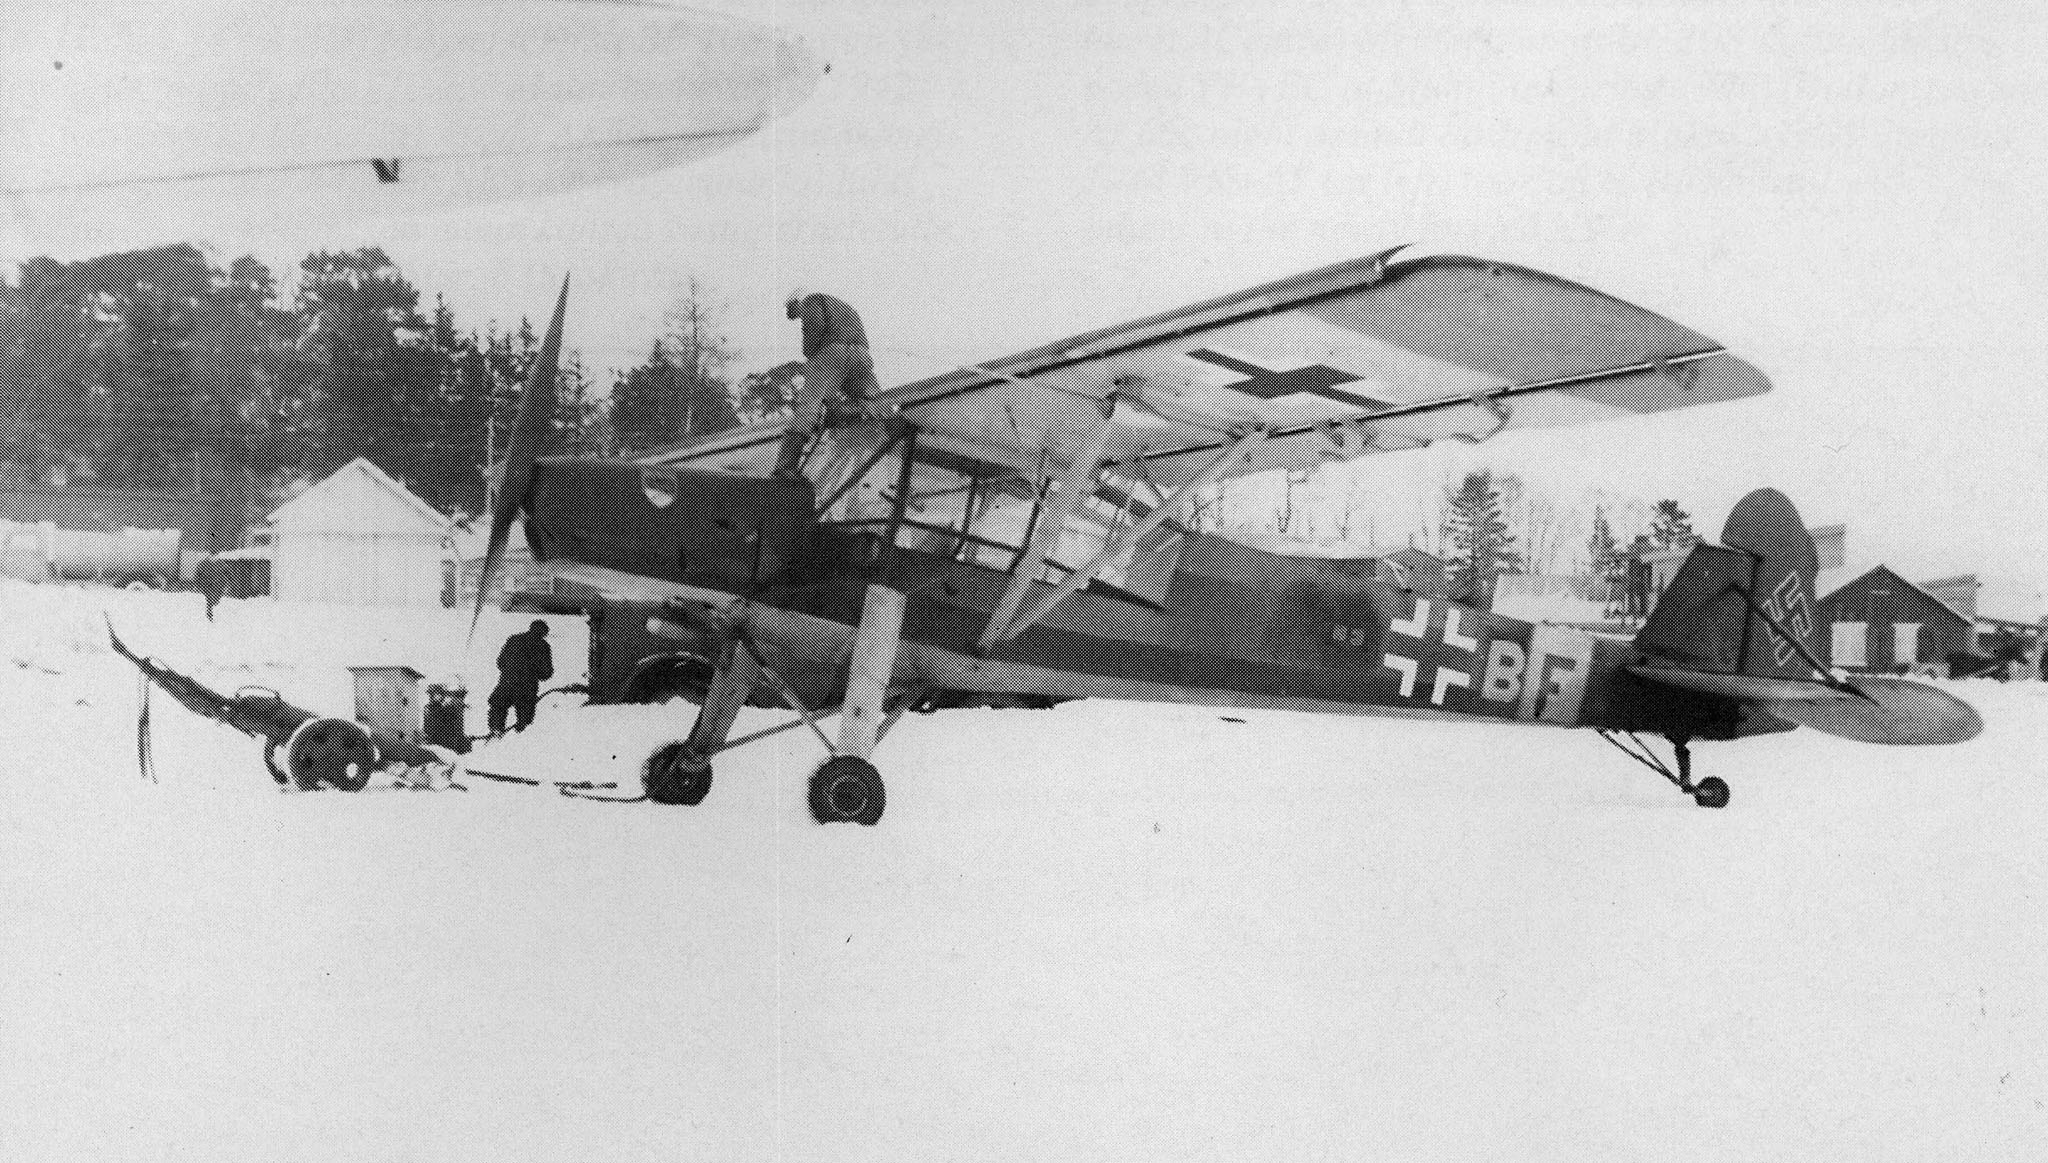
A photo of the original for comparison. A Storch belonging to
Stab Jagdfliegerführer Norwegen taken at Stavanger Forus in December 1943.
It is time to look back and recall the condition of the Storch when it arrived in November 2007.
News 24 January 2015
The next task was to paint the cockpit interior with RLM 66 Schwarzgrau. This was not easy because we didn’t want to paint a myriad of details installed inside the cockpit.
Then it was time to close the cockpit door and seal off all openings in preparation for external work. The first two layers of dope were brushed on. The next layers were to be sprayed on with a spray gun and a makeshift paint box had to be constructed. A “tent” made of plastic worked nicely. Suction/ventilation was provided by connecting the “tent” directly to the open door on the permanent paint box. Then a layer of Rand-o-Proof was sprayed on followed by a layer of Butyrate with aluminium paste in it.
Next on the agenda was to find the right external colours. As reference I used colour samples from the books “Luftwaffe Camouflage and Markings 1933 – 1945” by K.A. Merrick (and Jürgen Kiroff). Bilxtra at Lillestrøm spent hours patiently mixing the right colour tones with Sikkens polyurethane paint. RLM 65 Hellblau is the first colour to be sprayed on.
RLM 65 Hellblau on top of a layer of silver dope.
The makeshift paint box.
Cockpit painted in RLM 66 Schwarzgrau.
News 23 November 2014
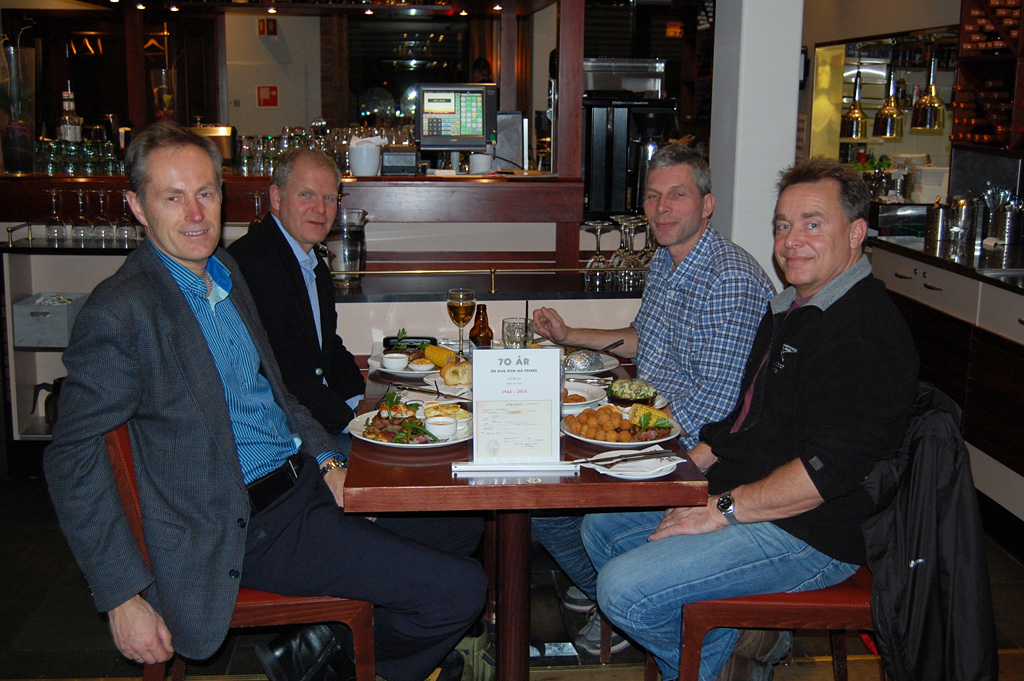
Our Storch was 70 years old today. The front page of the first civilian aircraft logbook for Werk Nr 1816 states the production date as 23 November 1944. The special event was celebrated during a dinner with 4/6 of the restoration team present. A plaque at the table made it clear for everyone that we celebrated 70 years, but hopefully nobody at the restaurant believed it was one of us.
Tor Nørstegård, Torstein Walseth, Harald Holm and Eivind Svenningsen
News 4 November 2014
The last window is sewn in. All finishing tape and reinforcements are installed on the outside of the fuselage. We had to install the rudder and horizontal stabilizer in order to find the exact position where flight controls had to run through the fuselage fabric. At present we are installing finishing tape on all window frames internally. The electrical system is complete aft of the fire wall. This is real fun!
Fuselage with all windows installed.
The main electrical panel before fabric installation.
Locating the correct position for the elevator trim slot and holes for the rudder control wires.
News 20 September 2014
The whole fuselage is now covered with fabric. It still remains to apply finishing tape and details like inspection panels, but it starts to look like an airplane. The MG mount (kleinen Linsenlafette LL-K) is finally in place, but we have to install 5 windows before we can apply all finishing tape inside the cockpit. A milestone was reached a couple of weeks ago when we switched on power on the battery bus for the first time. No smoke or fire was a good indication. When windows, fabric and finishing tape are all in place it is time to paint the cockpit internally with RLM 66 Schwarzgrau. Hopefully, this will take place this year.
Attaching fuselage fabric – first with clamps – then with fabric cement.
Der kleinen Linsenlafette LL-K following final installation.
News 16 July 2014
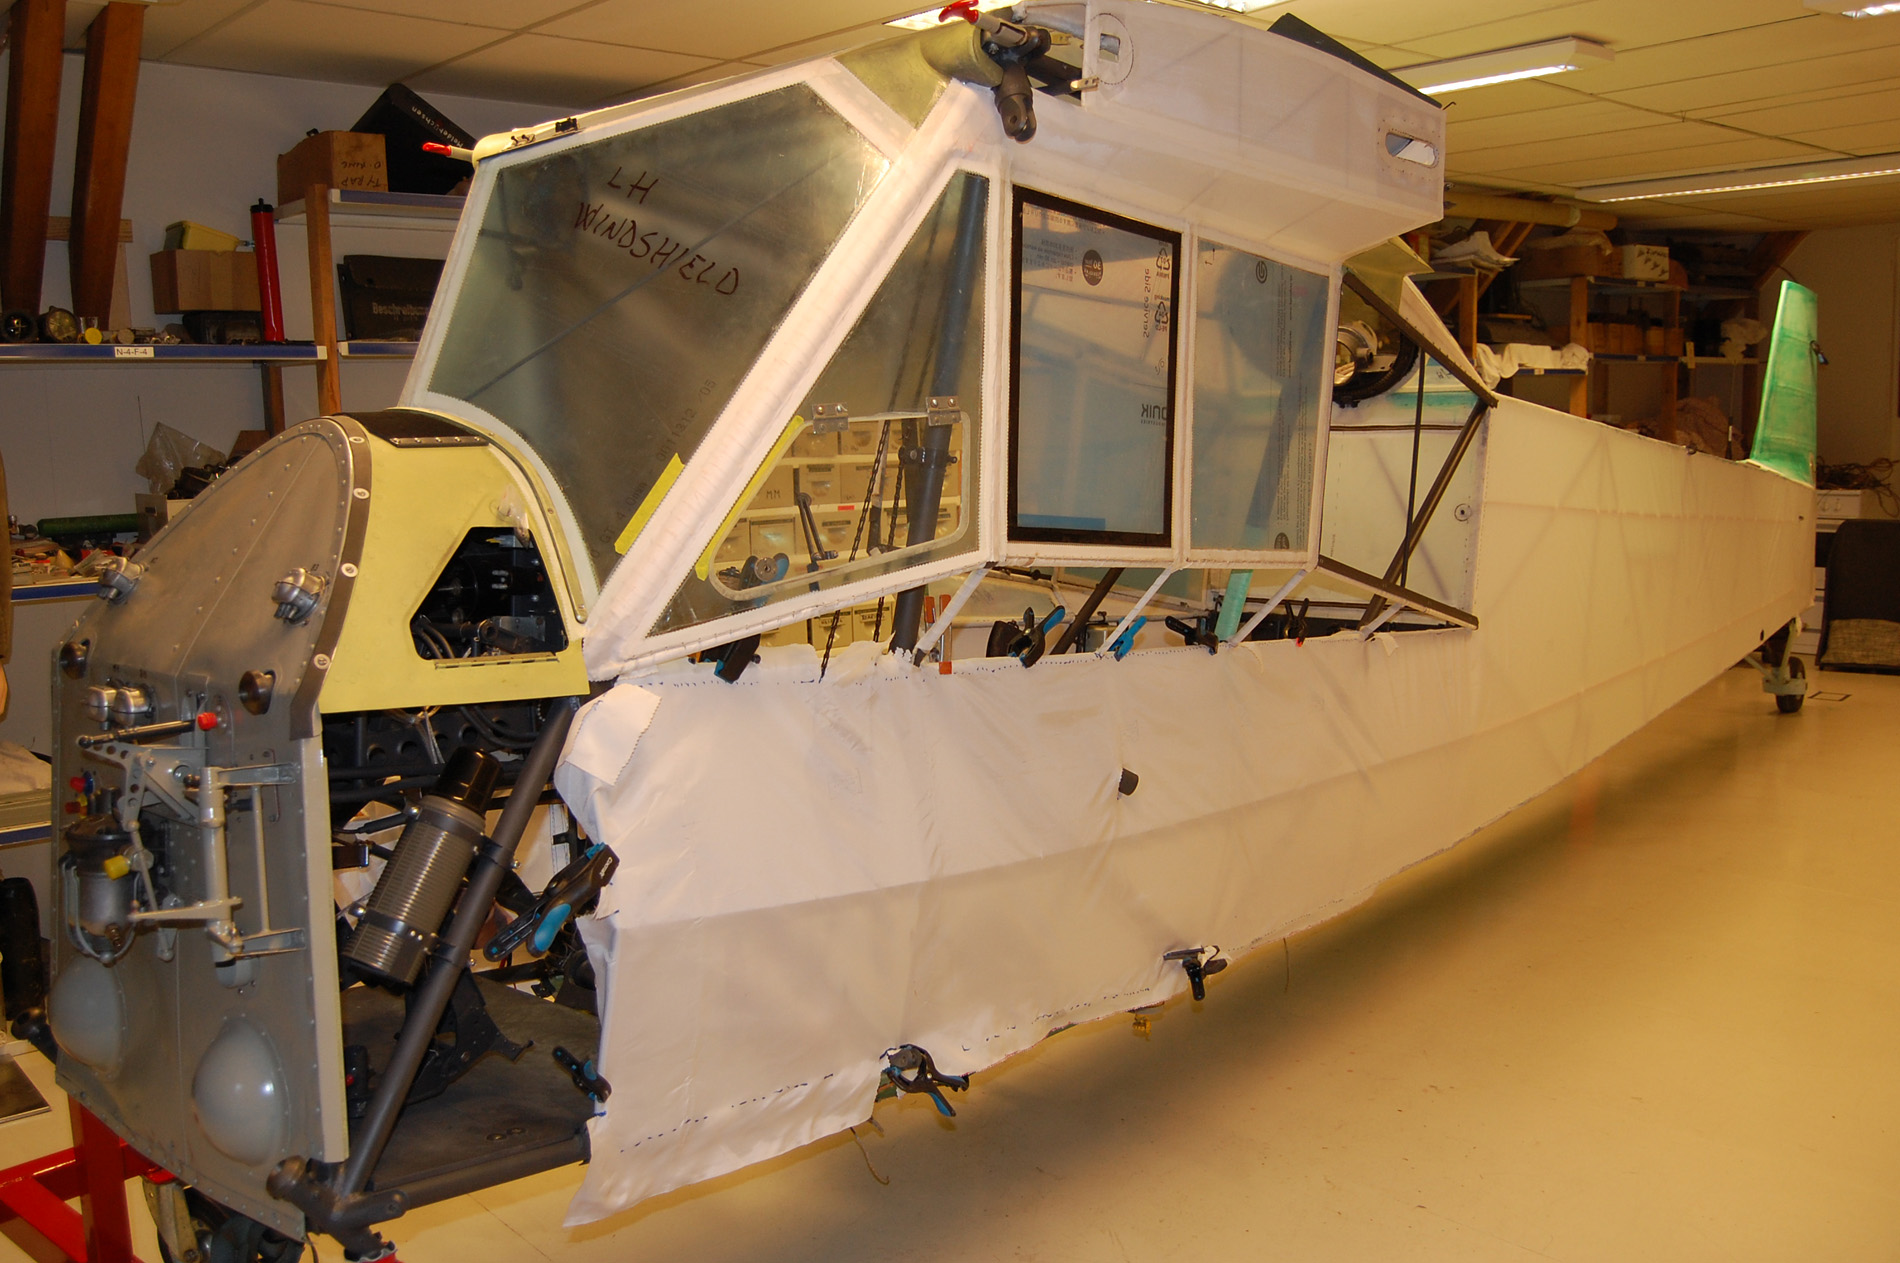
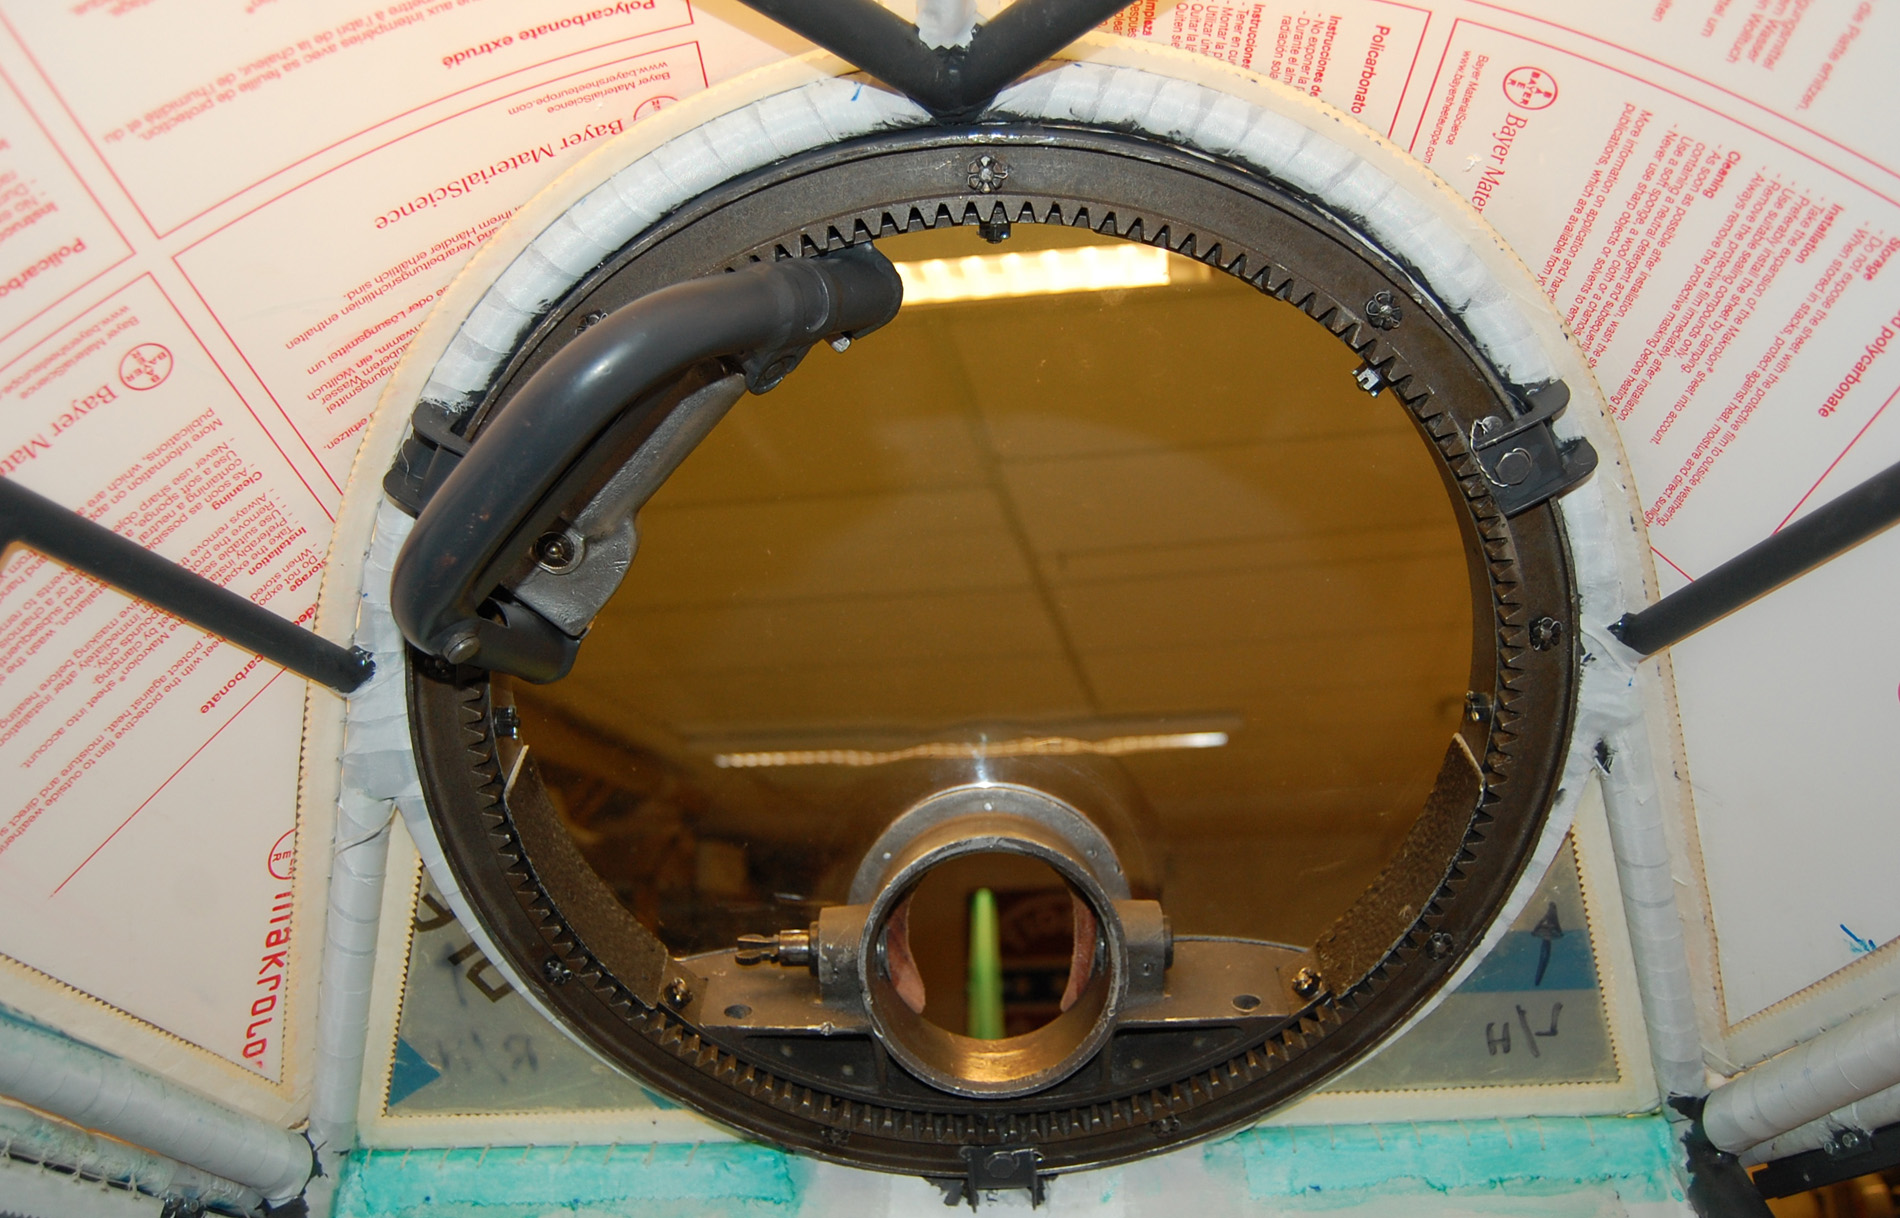
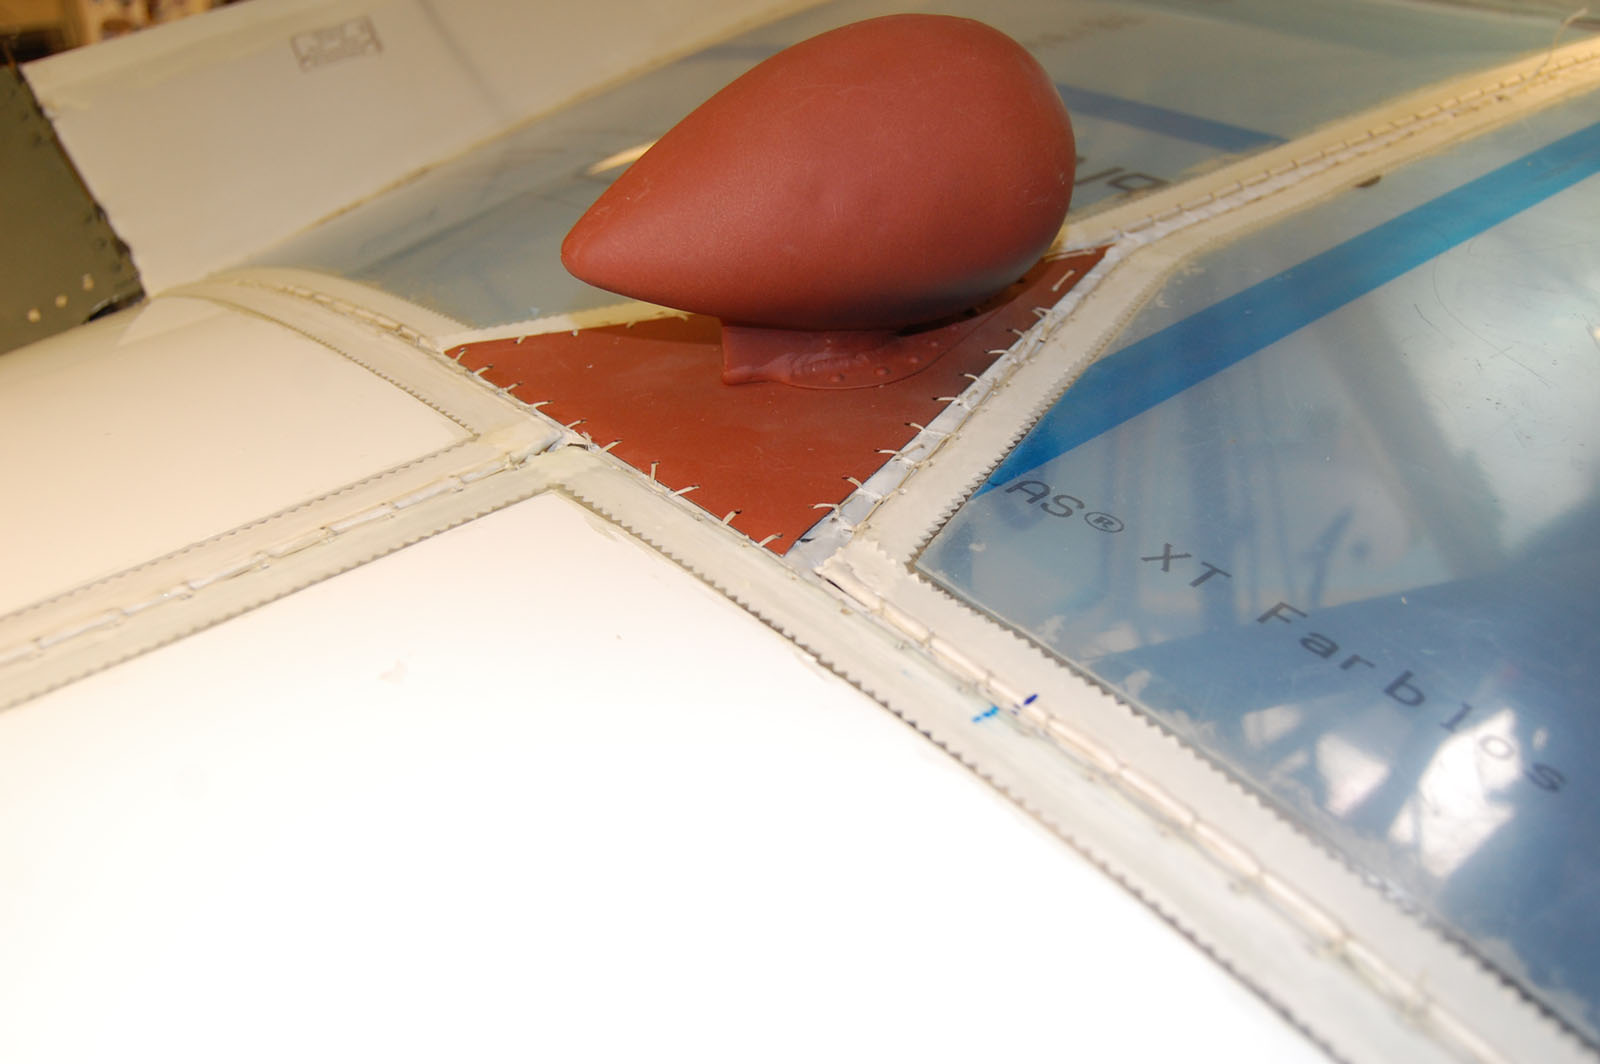
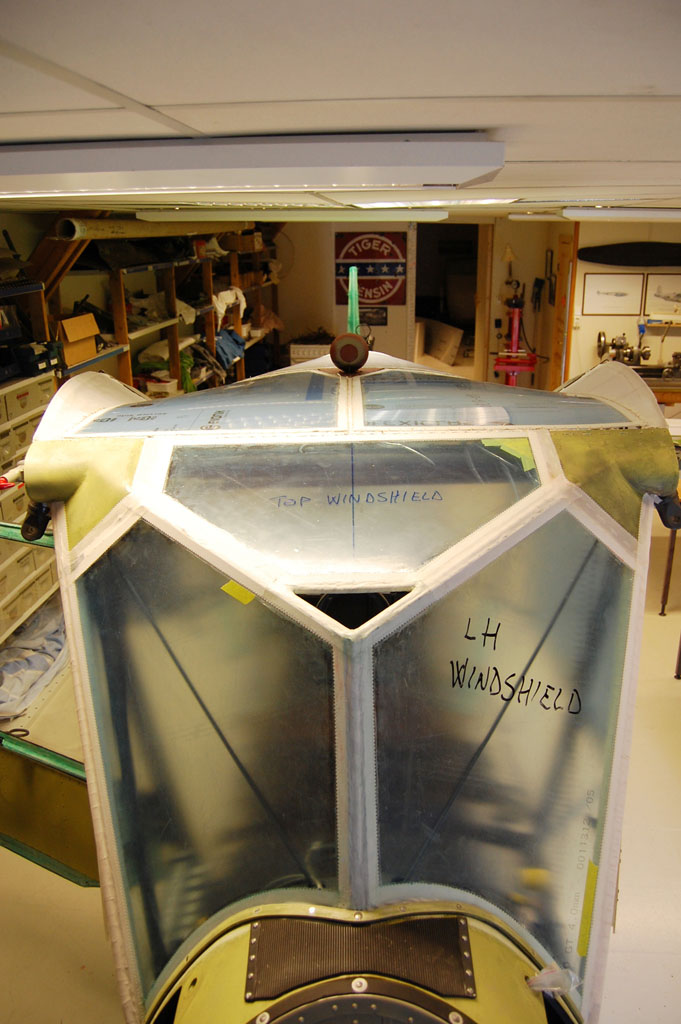
In June we trial installed the right wing. It fit perfectly as well. With both wings safely back in its wing stand it was time to continue with the window installation. At present 20 windows are installed and 8 remains. The rear windows in the ceiling next to the MG was challenging because they curves significantly. We decided to make them from polycarbonate because it is easier to form. Original type Plexiglas is installed in all other positions.
The cabin fresh air inlet amidst the four cabin ceiling windows. Polycarbonate has white protective tape while Plexiglas has light blue. The finishing tape is not yet glued on so the stitches can clearly be seen along all edges.
News 1 May 2014
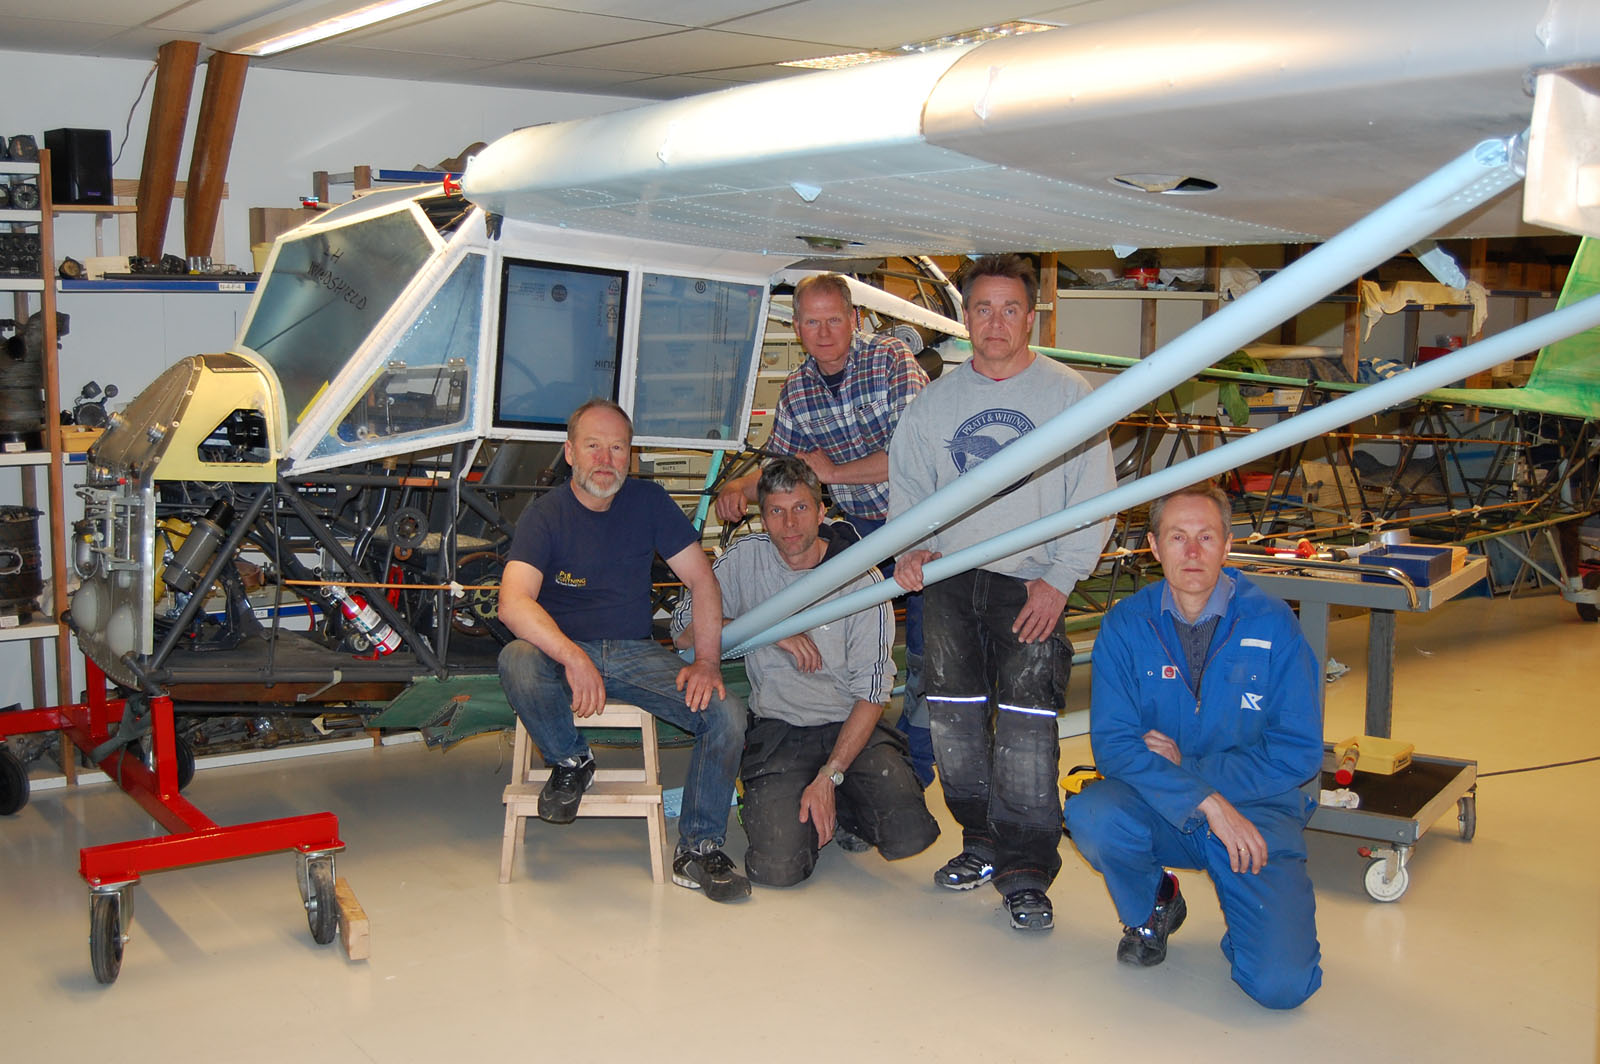
Last evening we had an exciting moment when the left wing was trial installed for the first time. Despite taking all possible measurements we had no guarantee that the wing would fit. However, it seems like the wing attachment repair was good and the bolts fit nicely. Before we started the work we designed and manufactured a makeshift main landing gear and an adjustable wing support dolly. Finally, we installed the tail wheel. The airplane can now be moved freely.
When the wing-to-fuselage fillet is installed, we will remove the wing, turn the Storch and repeat the process with the right wing.
From left to right: Arild Tveit, Harald Holm, Torstein Walseth, Eivind Svenningsen and Tor Nørstegård under the wing.
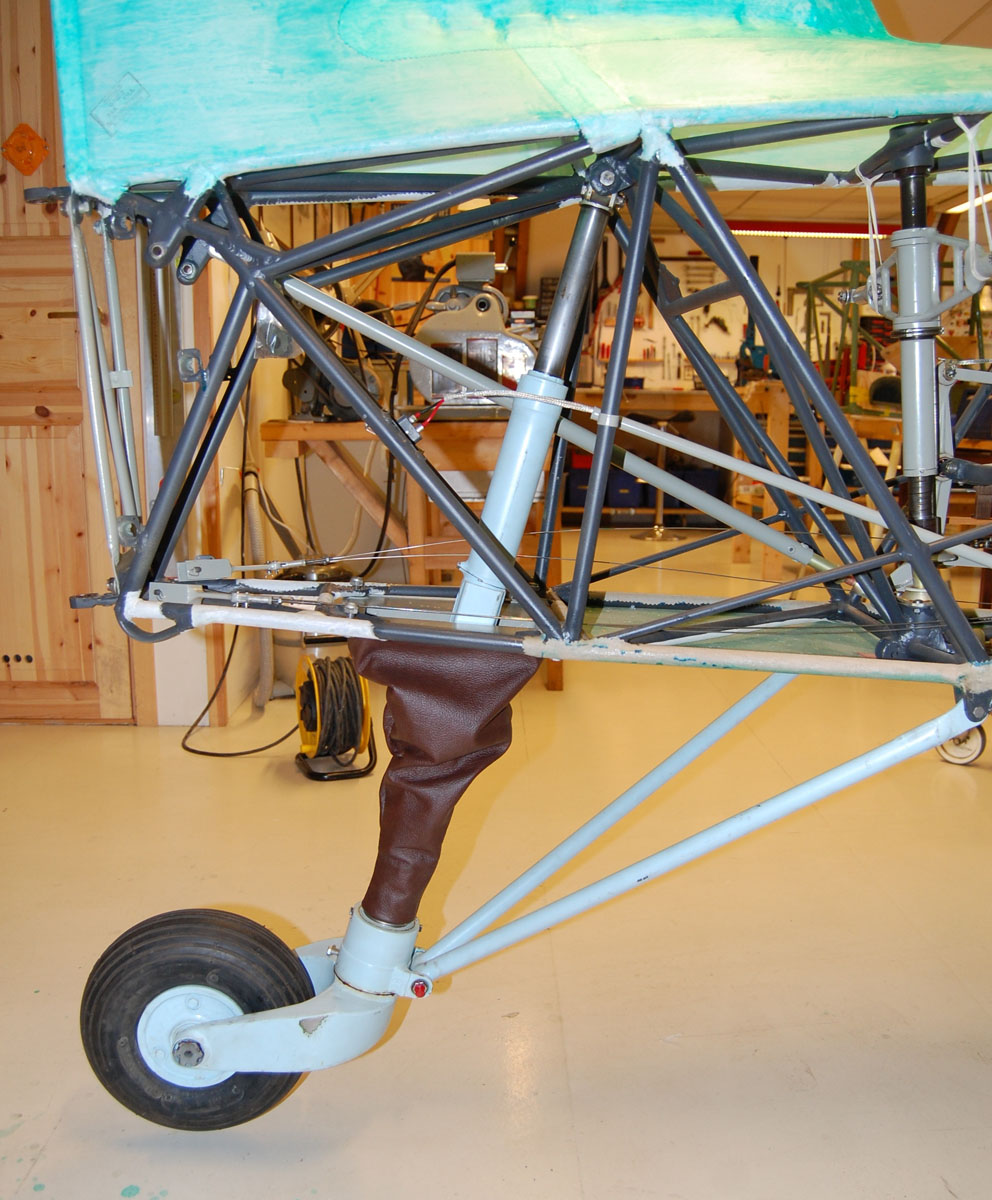
The tail wheel ready to fly.
The elevator trim screw jack to the right.
Page 1 - Page 2 - Page 3 - Page 4