

Page 1 - Page 2 - Page 3 - Page 4
News 12 March 2014
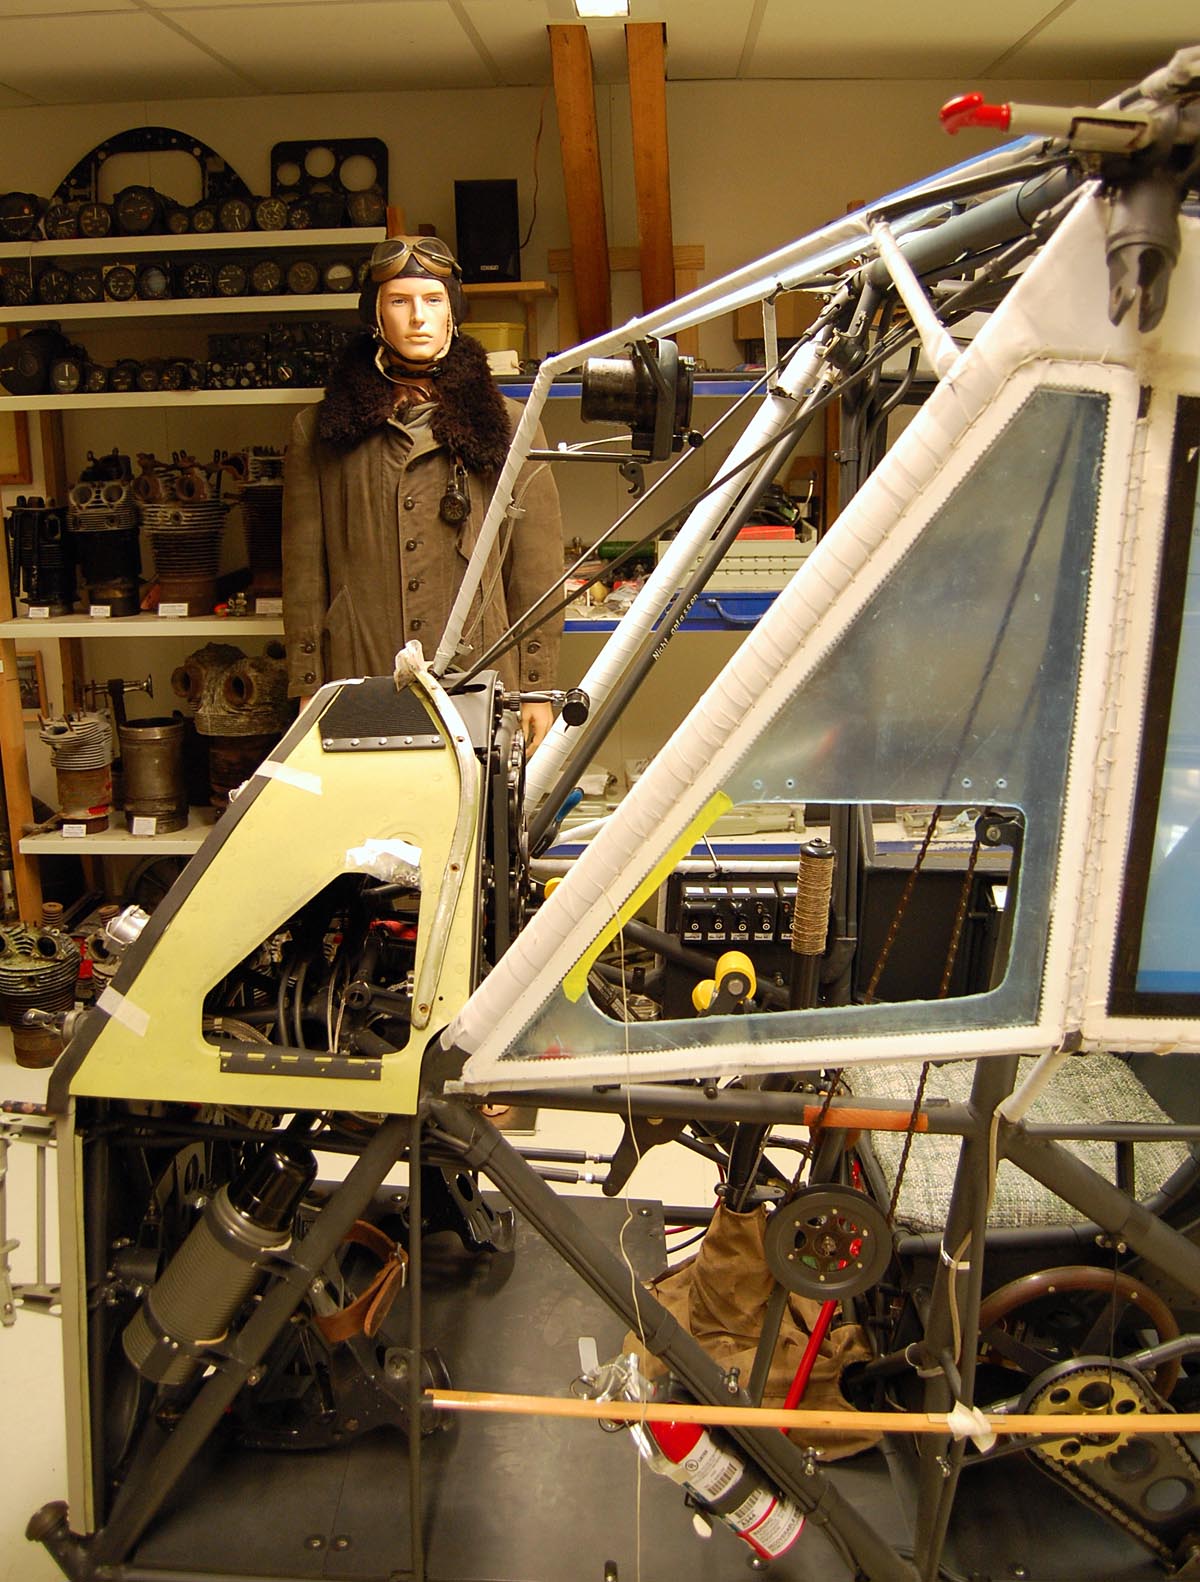
The belly fabric has been installed and the fuselage turned into normal position again. Next was covering the vertical fin and fuselage top. All fabric used from now on are of the modern Ceconite type. The fabric has been secured to the fin with rib-lacing cord. It is all finished of with tape and two layers of dope. The attention is then turned towards installing windows.
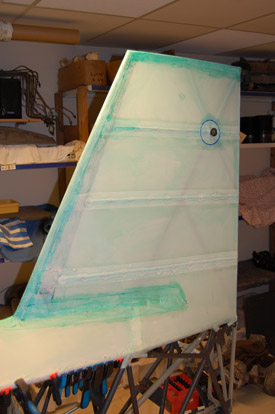
The vertical fin
Stitching a window pane to the fuselage frame.
News 12 January 2014
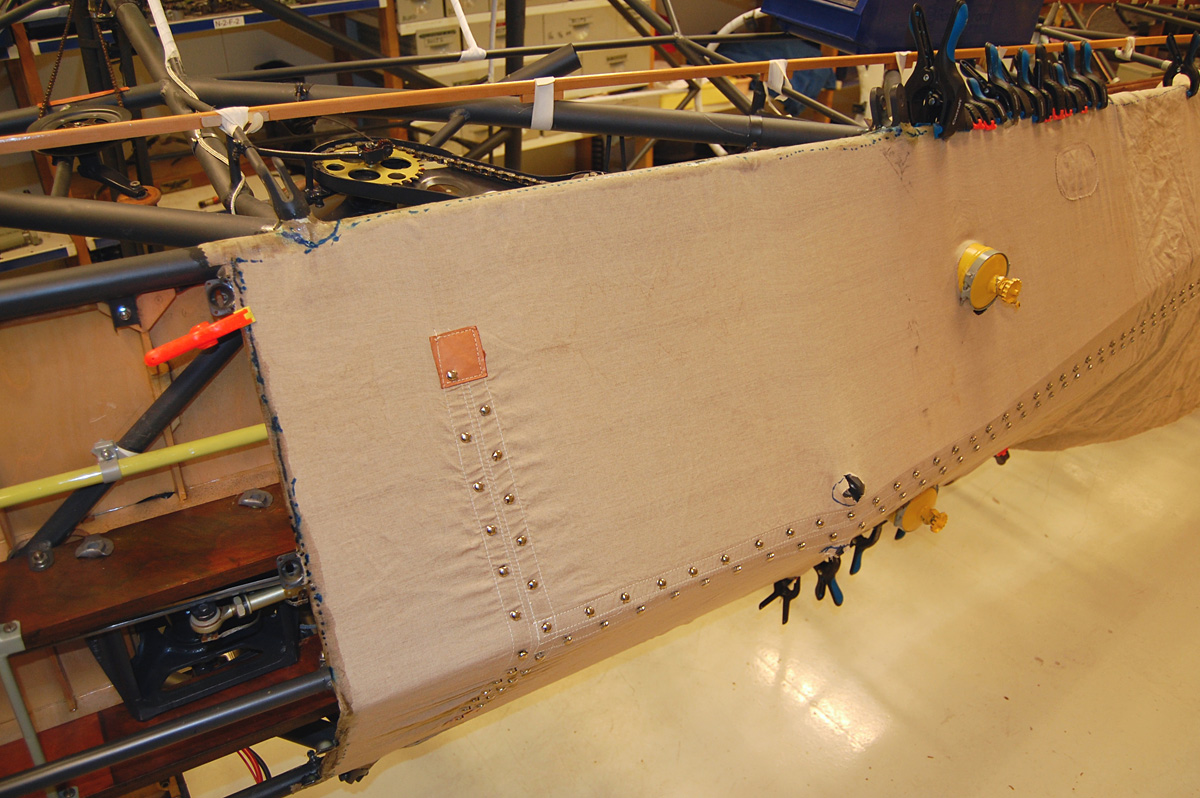
We have now turned the fuselage onto its right side for better access to the underside. The belly fabric is original old stock cotton. The quality is exceptional despite the age. By using an original spare part we don’t have to spend quit a number of working hours installing hooks and reinforcements. Thank you Alain! After installation, the fabric can be cut open for access to systems below the floorboards and inside the tail. It can then be closed again with long strings zigzagged between the hooks.
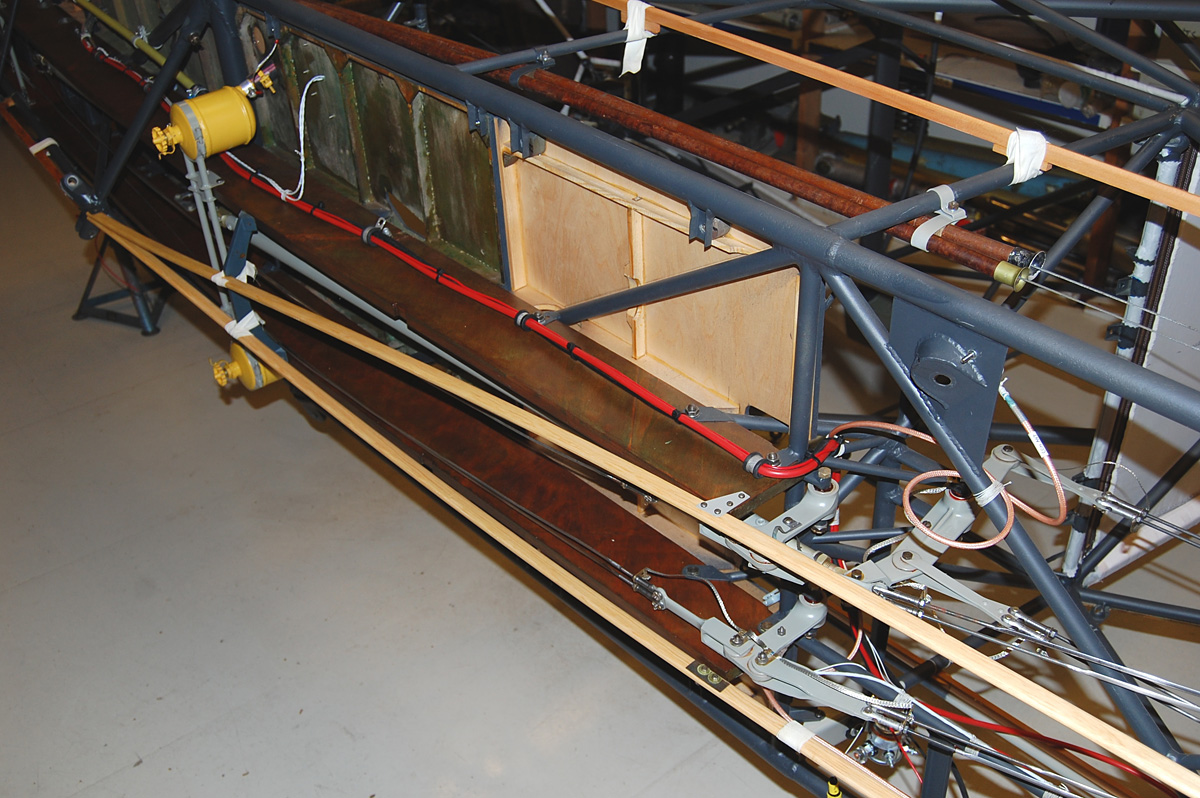
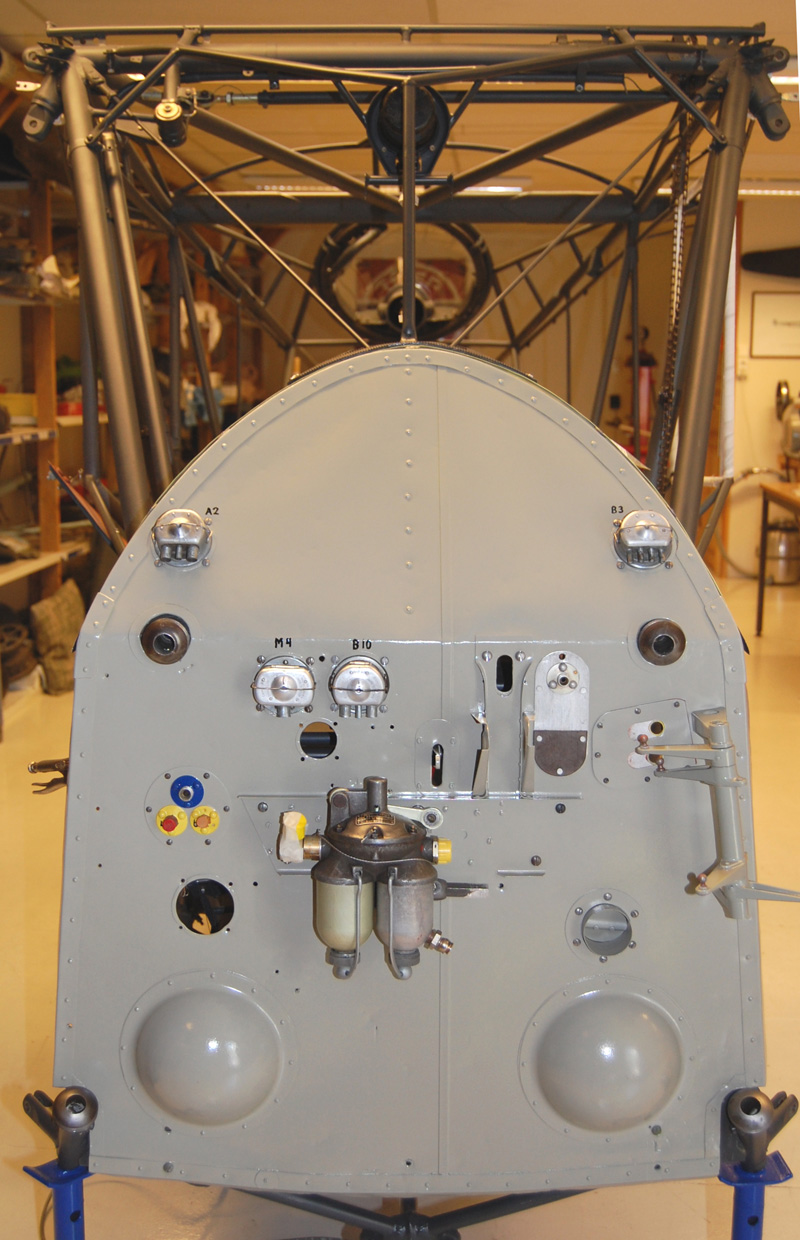
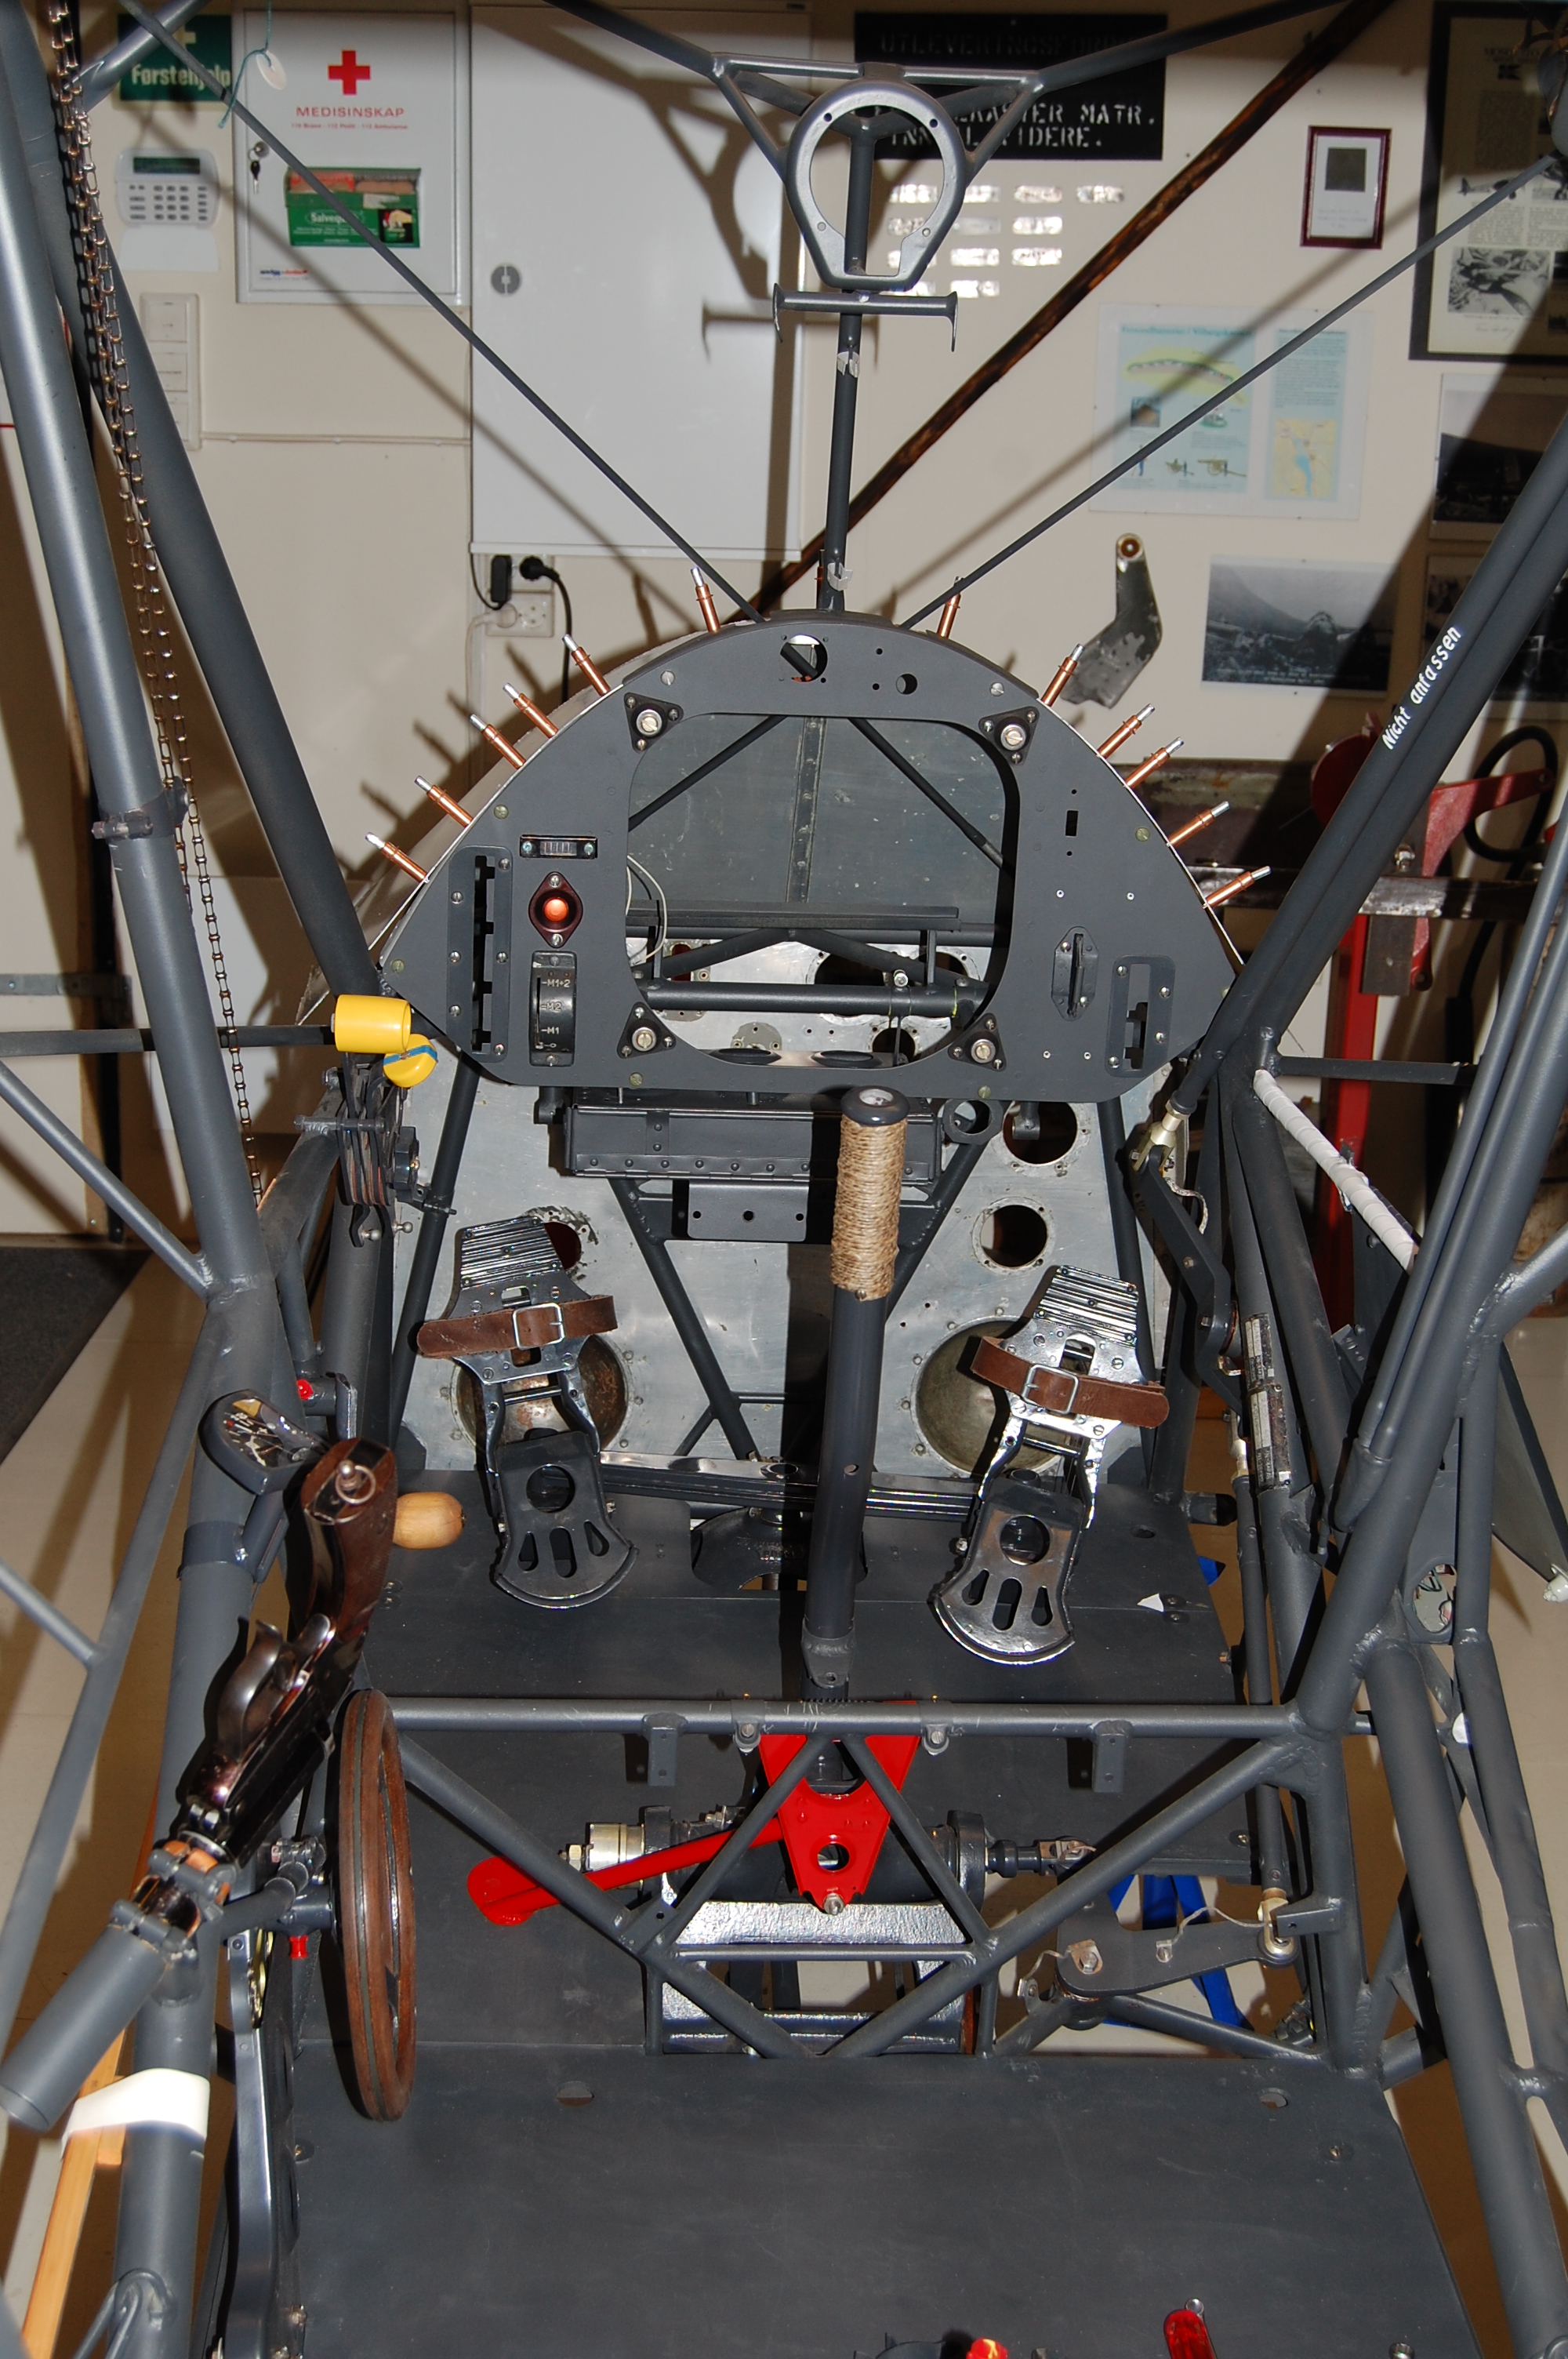
Details from the fuselage underside before fabric installation: Yellow fuel drains (water separators) are French add-ons for extra safety. Wooden “keel beams” (dark brown). Easy to distinguish between old (dark green) and new sections of floor boards. Red battery cable. Brown tubes protects the elevator trim cable. The copper coloured VHF antenna cable is coiled around a fuselage tube. Flight control details in the lower right corner.
The belly fabric being glued to the fuselage frame.
News 3 November 2013
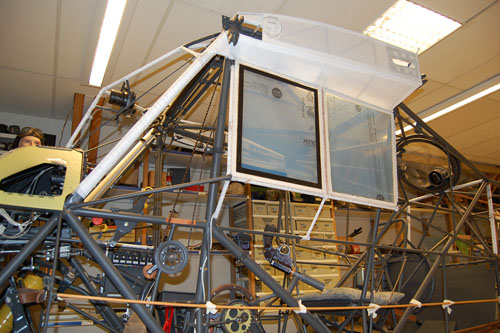
Window installation is somewhat unusual on the Storch. A string and fabric tape is glued to the windowpane along the edges. The windowpane is then stitched to fabric tape wrapped around fuselage frame tubes. To make it strong and neat, fabric tape is glued on top of the seams. This is meticulous work demanding high patience and precession. We started with window installation on the door because it was easier to learn the process on a small item. I have to mention that the door is an original German spare part which was never used. It still had paper protection on the Plexiglas. It turned out that three out of four windowpanes was in such a good condition that reuse was possible. Only seven windowpanes are partly installed at time being. I assume that window installation will continue during most of the winter months.
Arild Tveit installs the flare box in the door. Three out of four window panels

are original.
The very beginning of what will become a greenhouse.
The two first window panes are already stitched to the fuselage frame. Lots of internal details are visible on this picture. The stub wings are already fabric covered.
News 31 August 2013
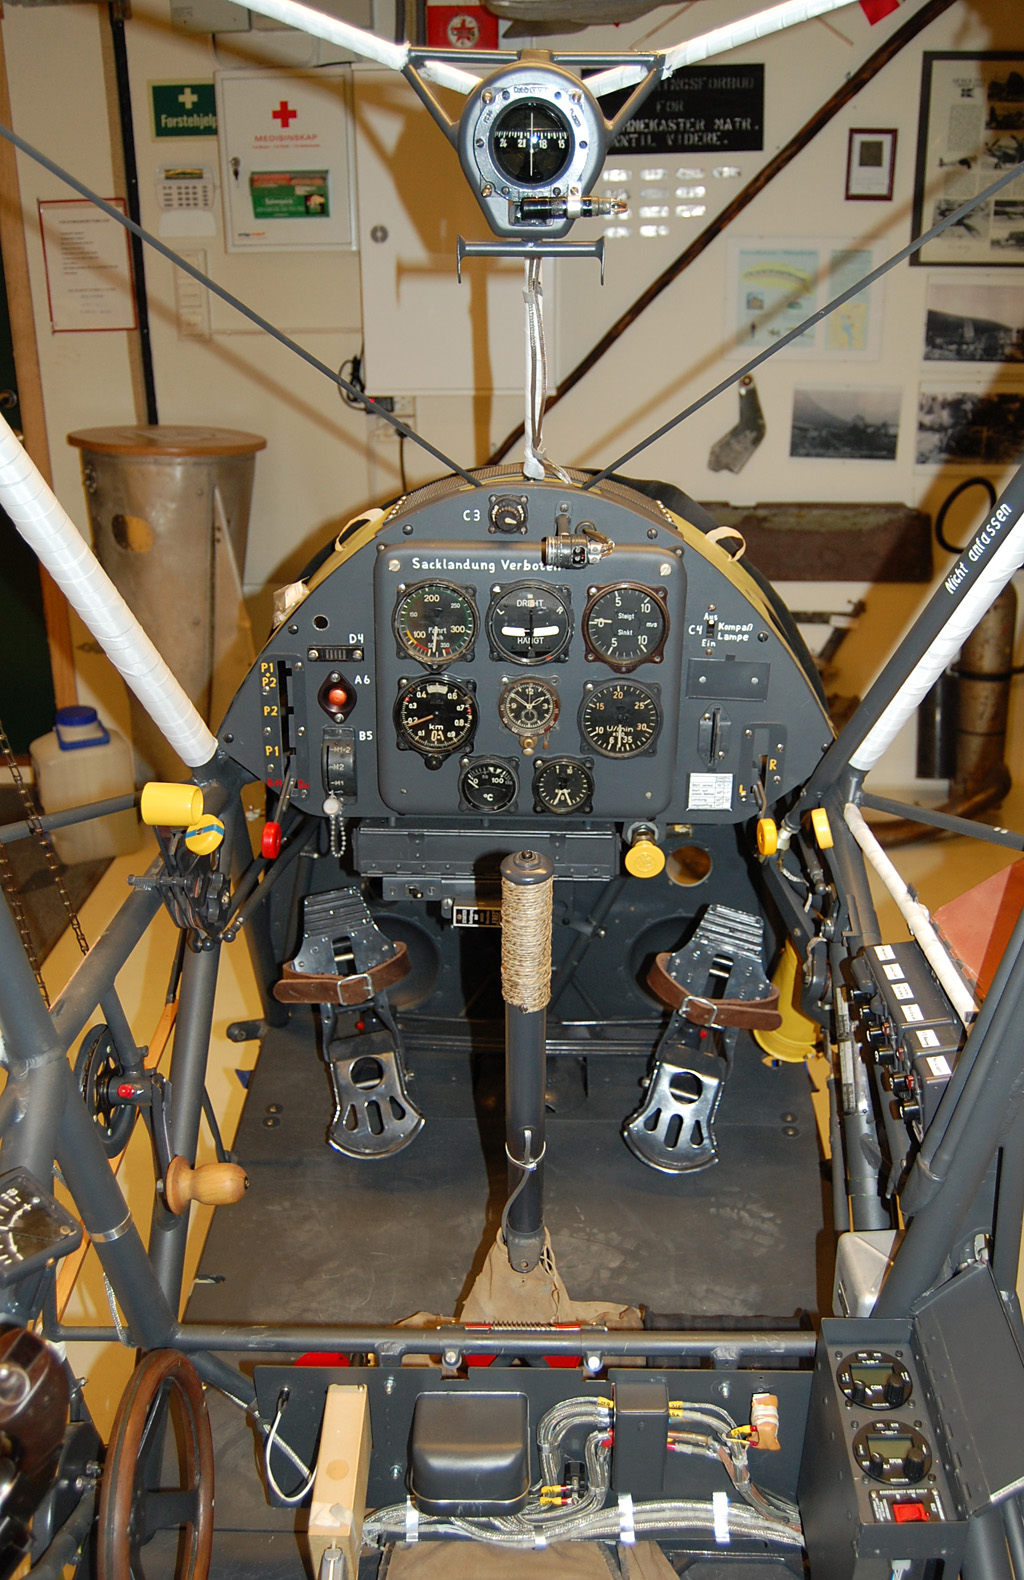
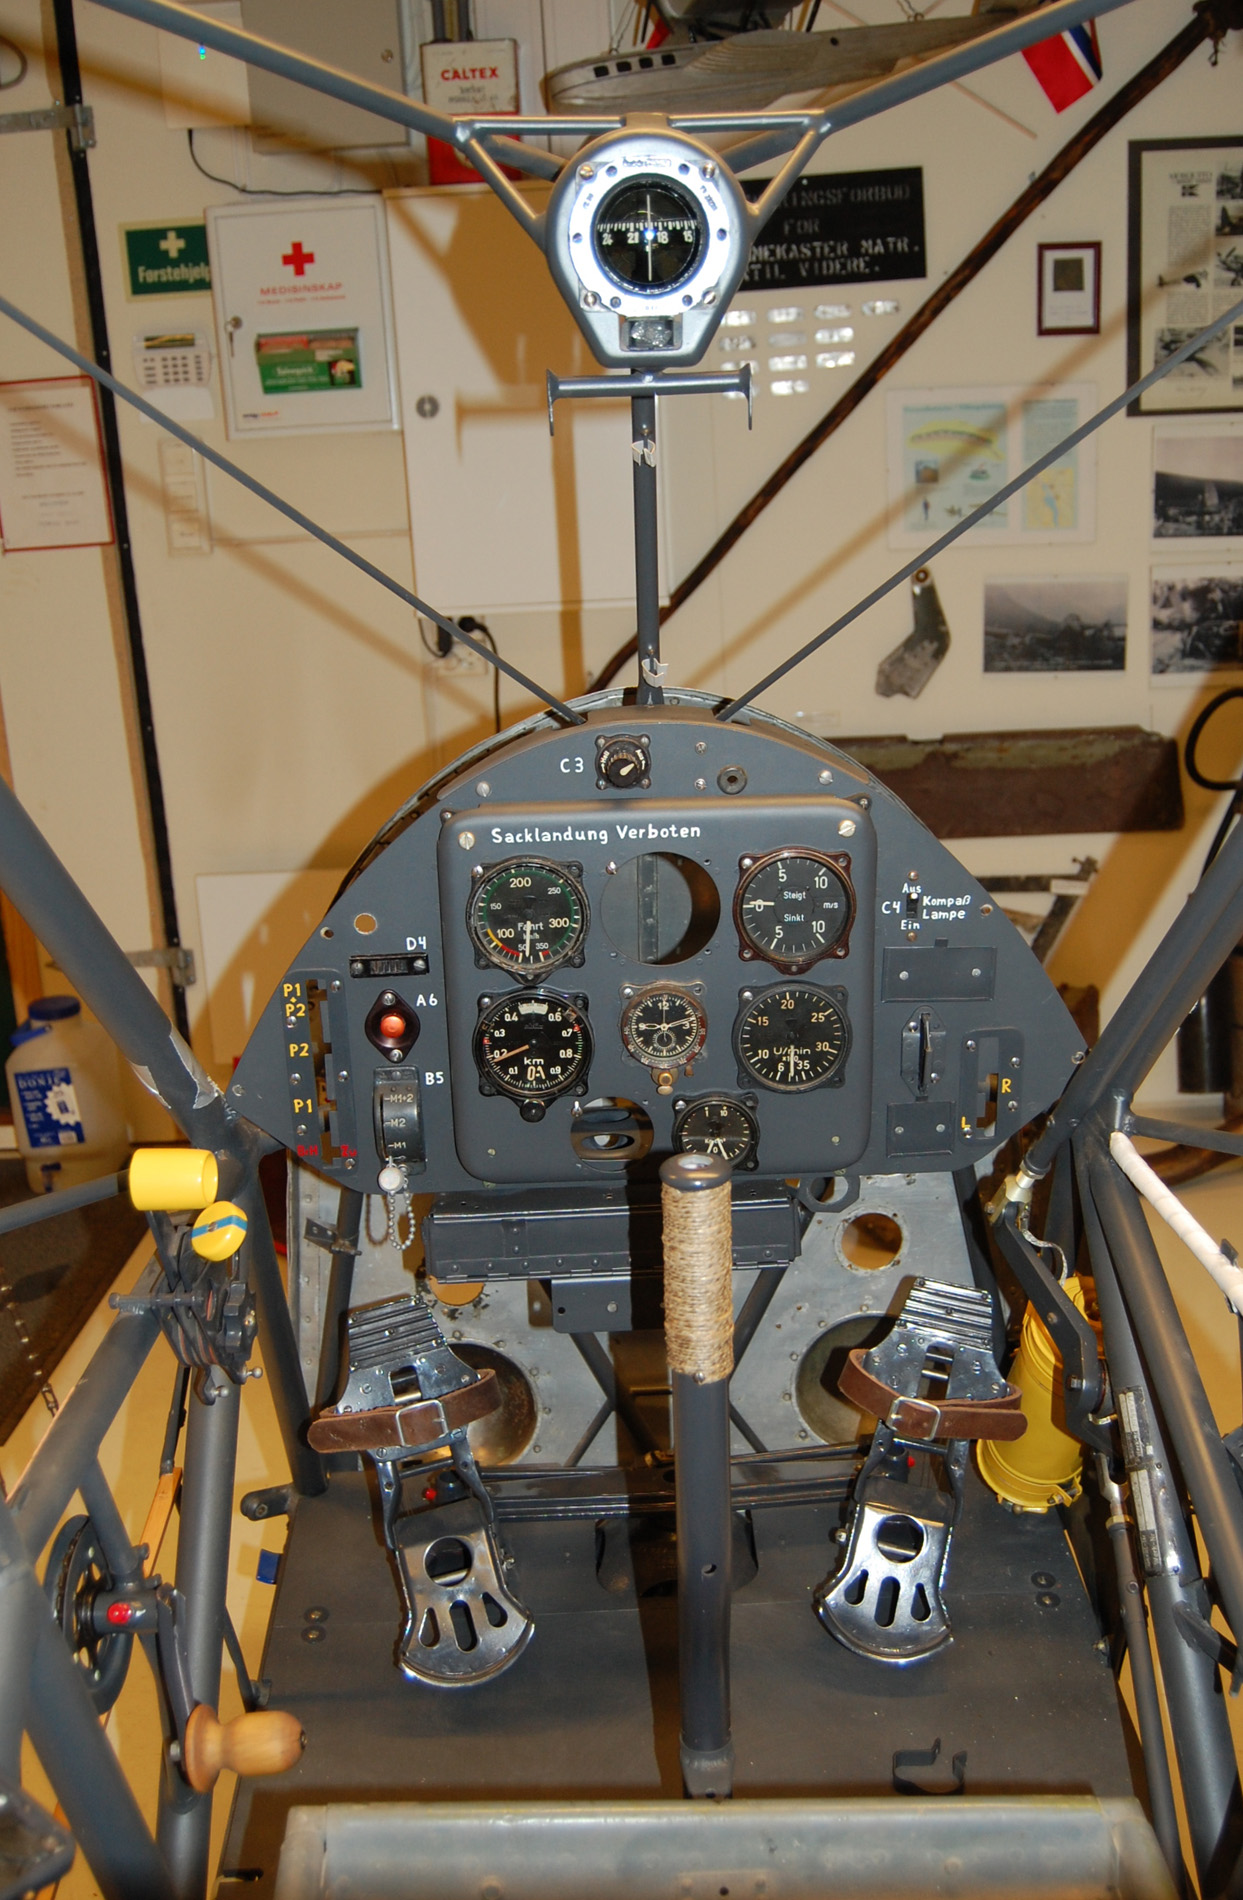
The cockpit is nearly completed. It looks pretty much like a Storch cockpit, but all instruments are not calibrated and connected properly yet.
It’s now possible to do some hangar flying! The electrical system is also nearly completed. Electrical power has been switched on for the first time.
Thus it was possible to confirm that all avionics functioned as expected. Just a few internal details remain before we can start to install 26 windows.
The cockpit without the pilot seat.
Some fuselage tubes are wrapped in white tape to prepare for window installation.
News 7 June 2013
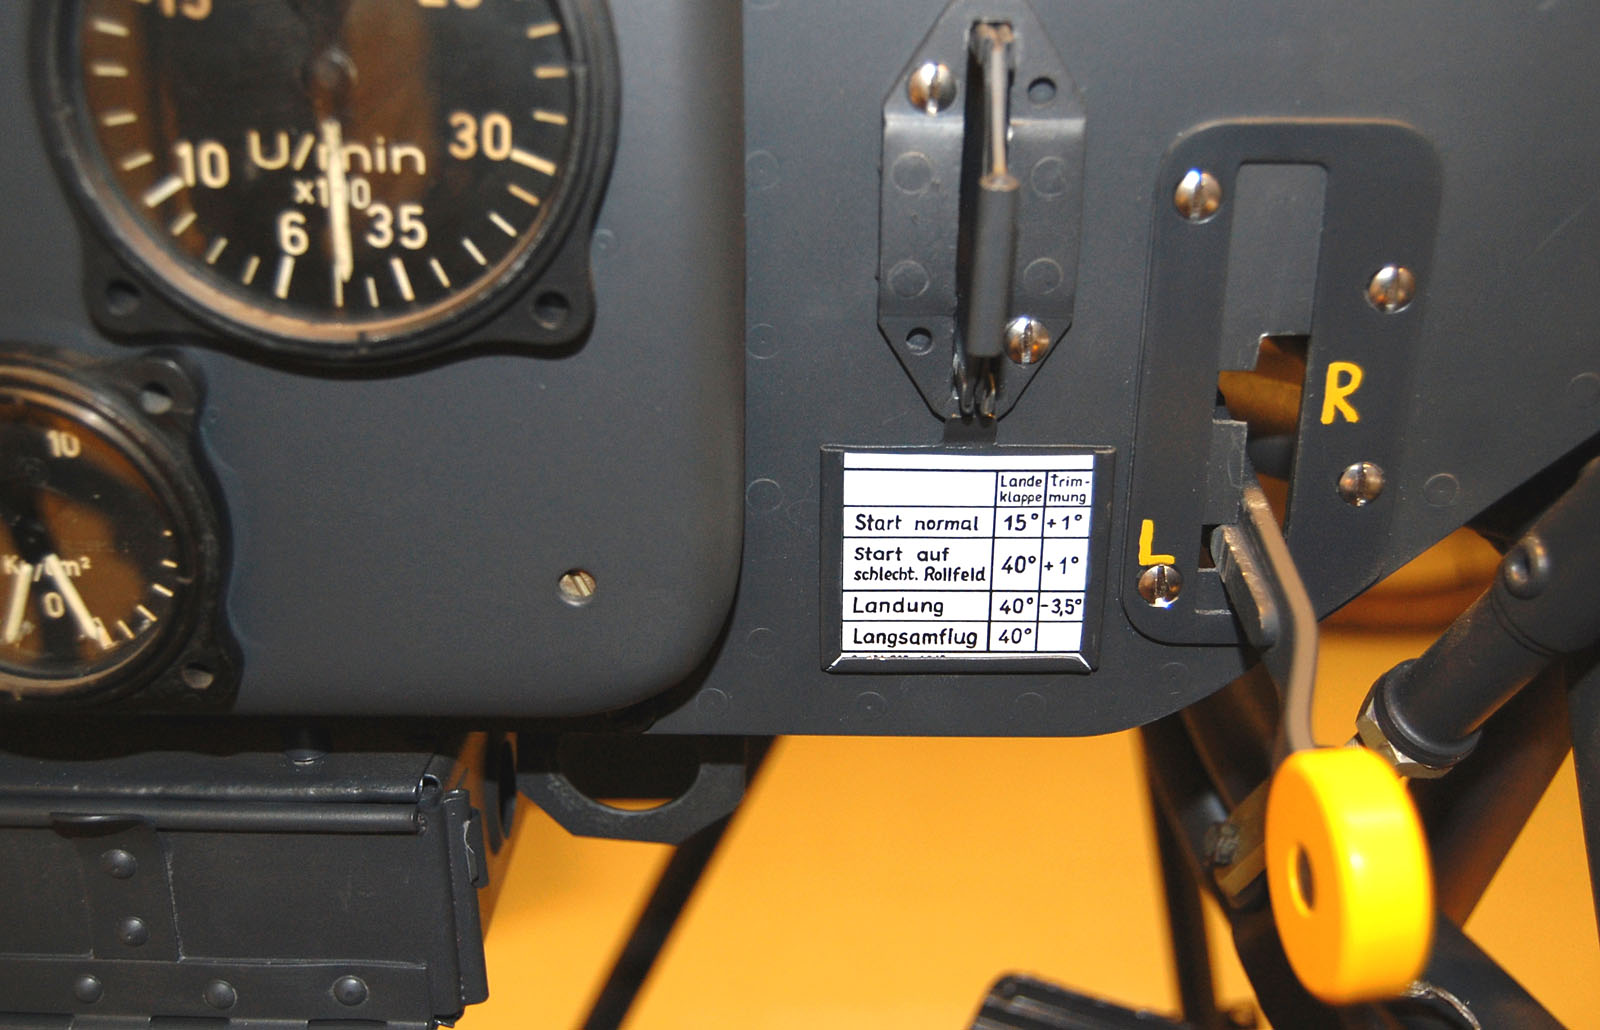
The last shafts, levers and rods operating the fuel system are painted and installed. All parts are being manufactured from scratch. Next, we installed the original firewall permanently. With the fuel filter and valves installed, it is time to adjust the systems so the correct movement of handles in the cockpit corresponds to positions on the respective component.
The firewall installed permanently. Visible on the front are the four attachments for the engine mounts, electrical plugs, various hose fittings, the combined fuel filter and fire wall shut-off valve and to the right; parts of the throttle and mixture control mechanism.
The relatively complete cockpit.
News 13 April 2013
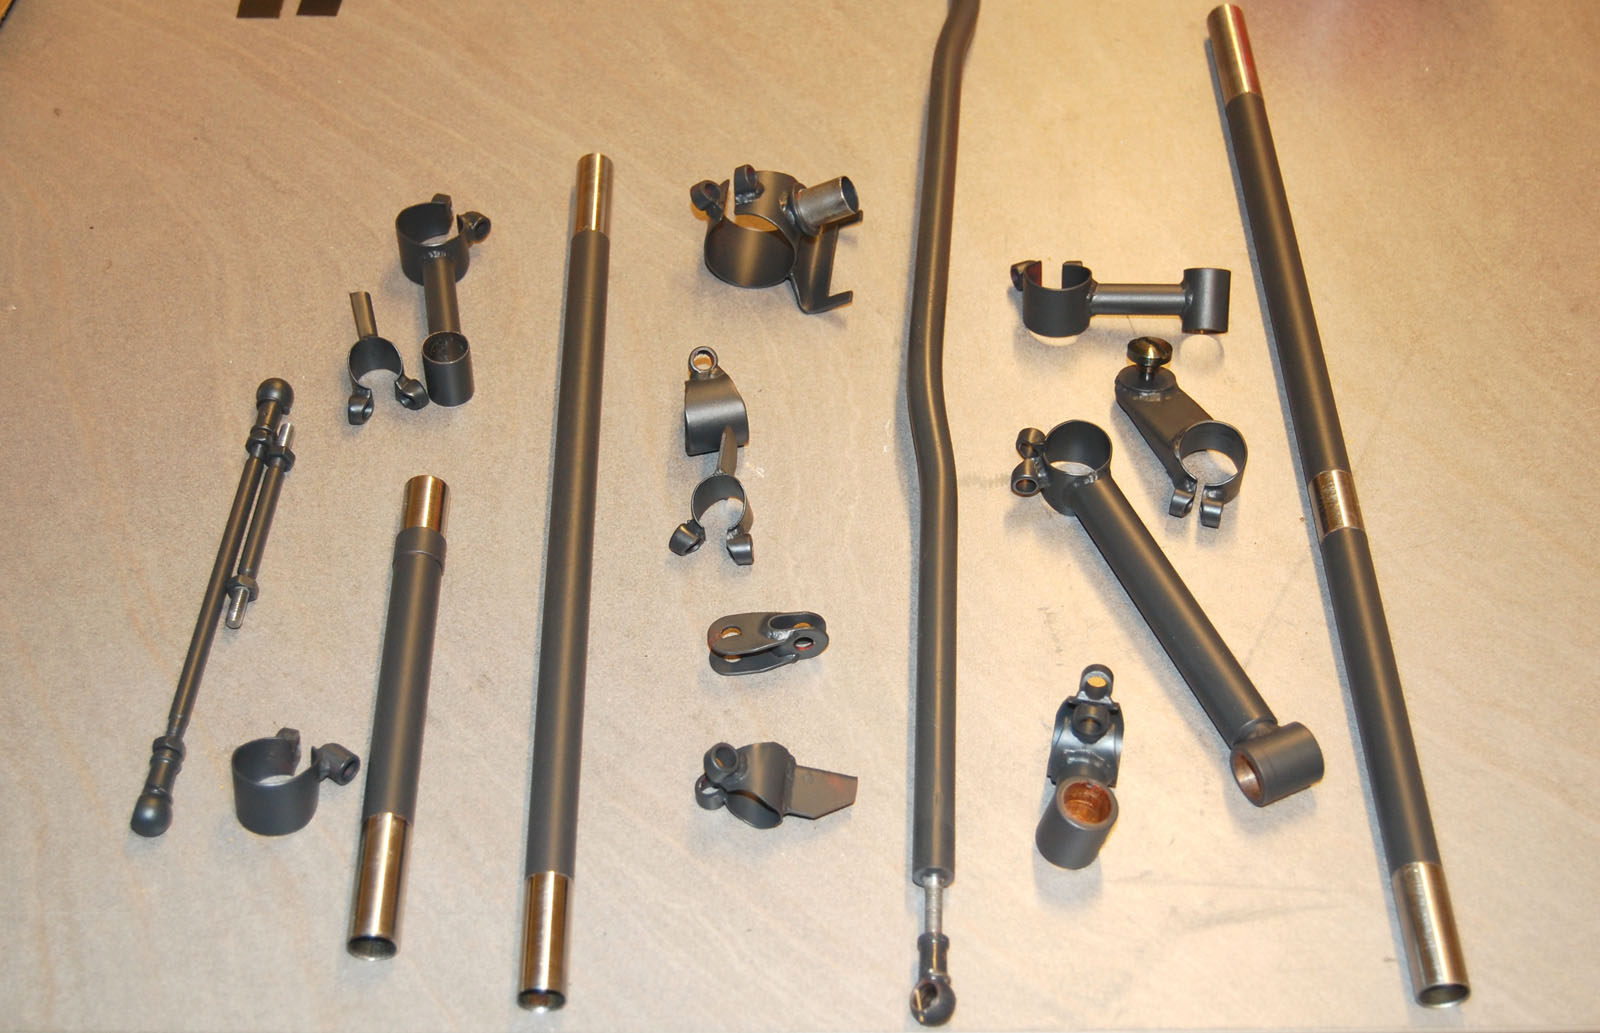
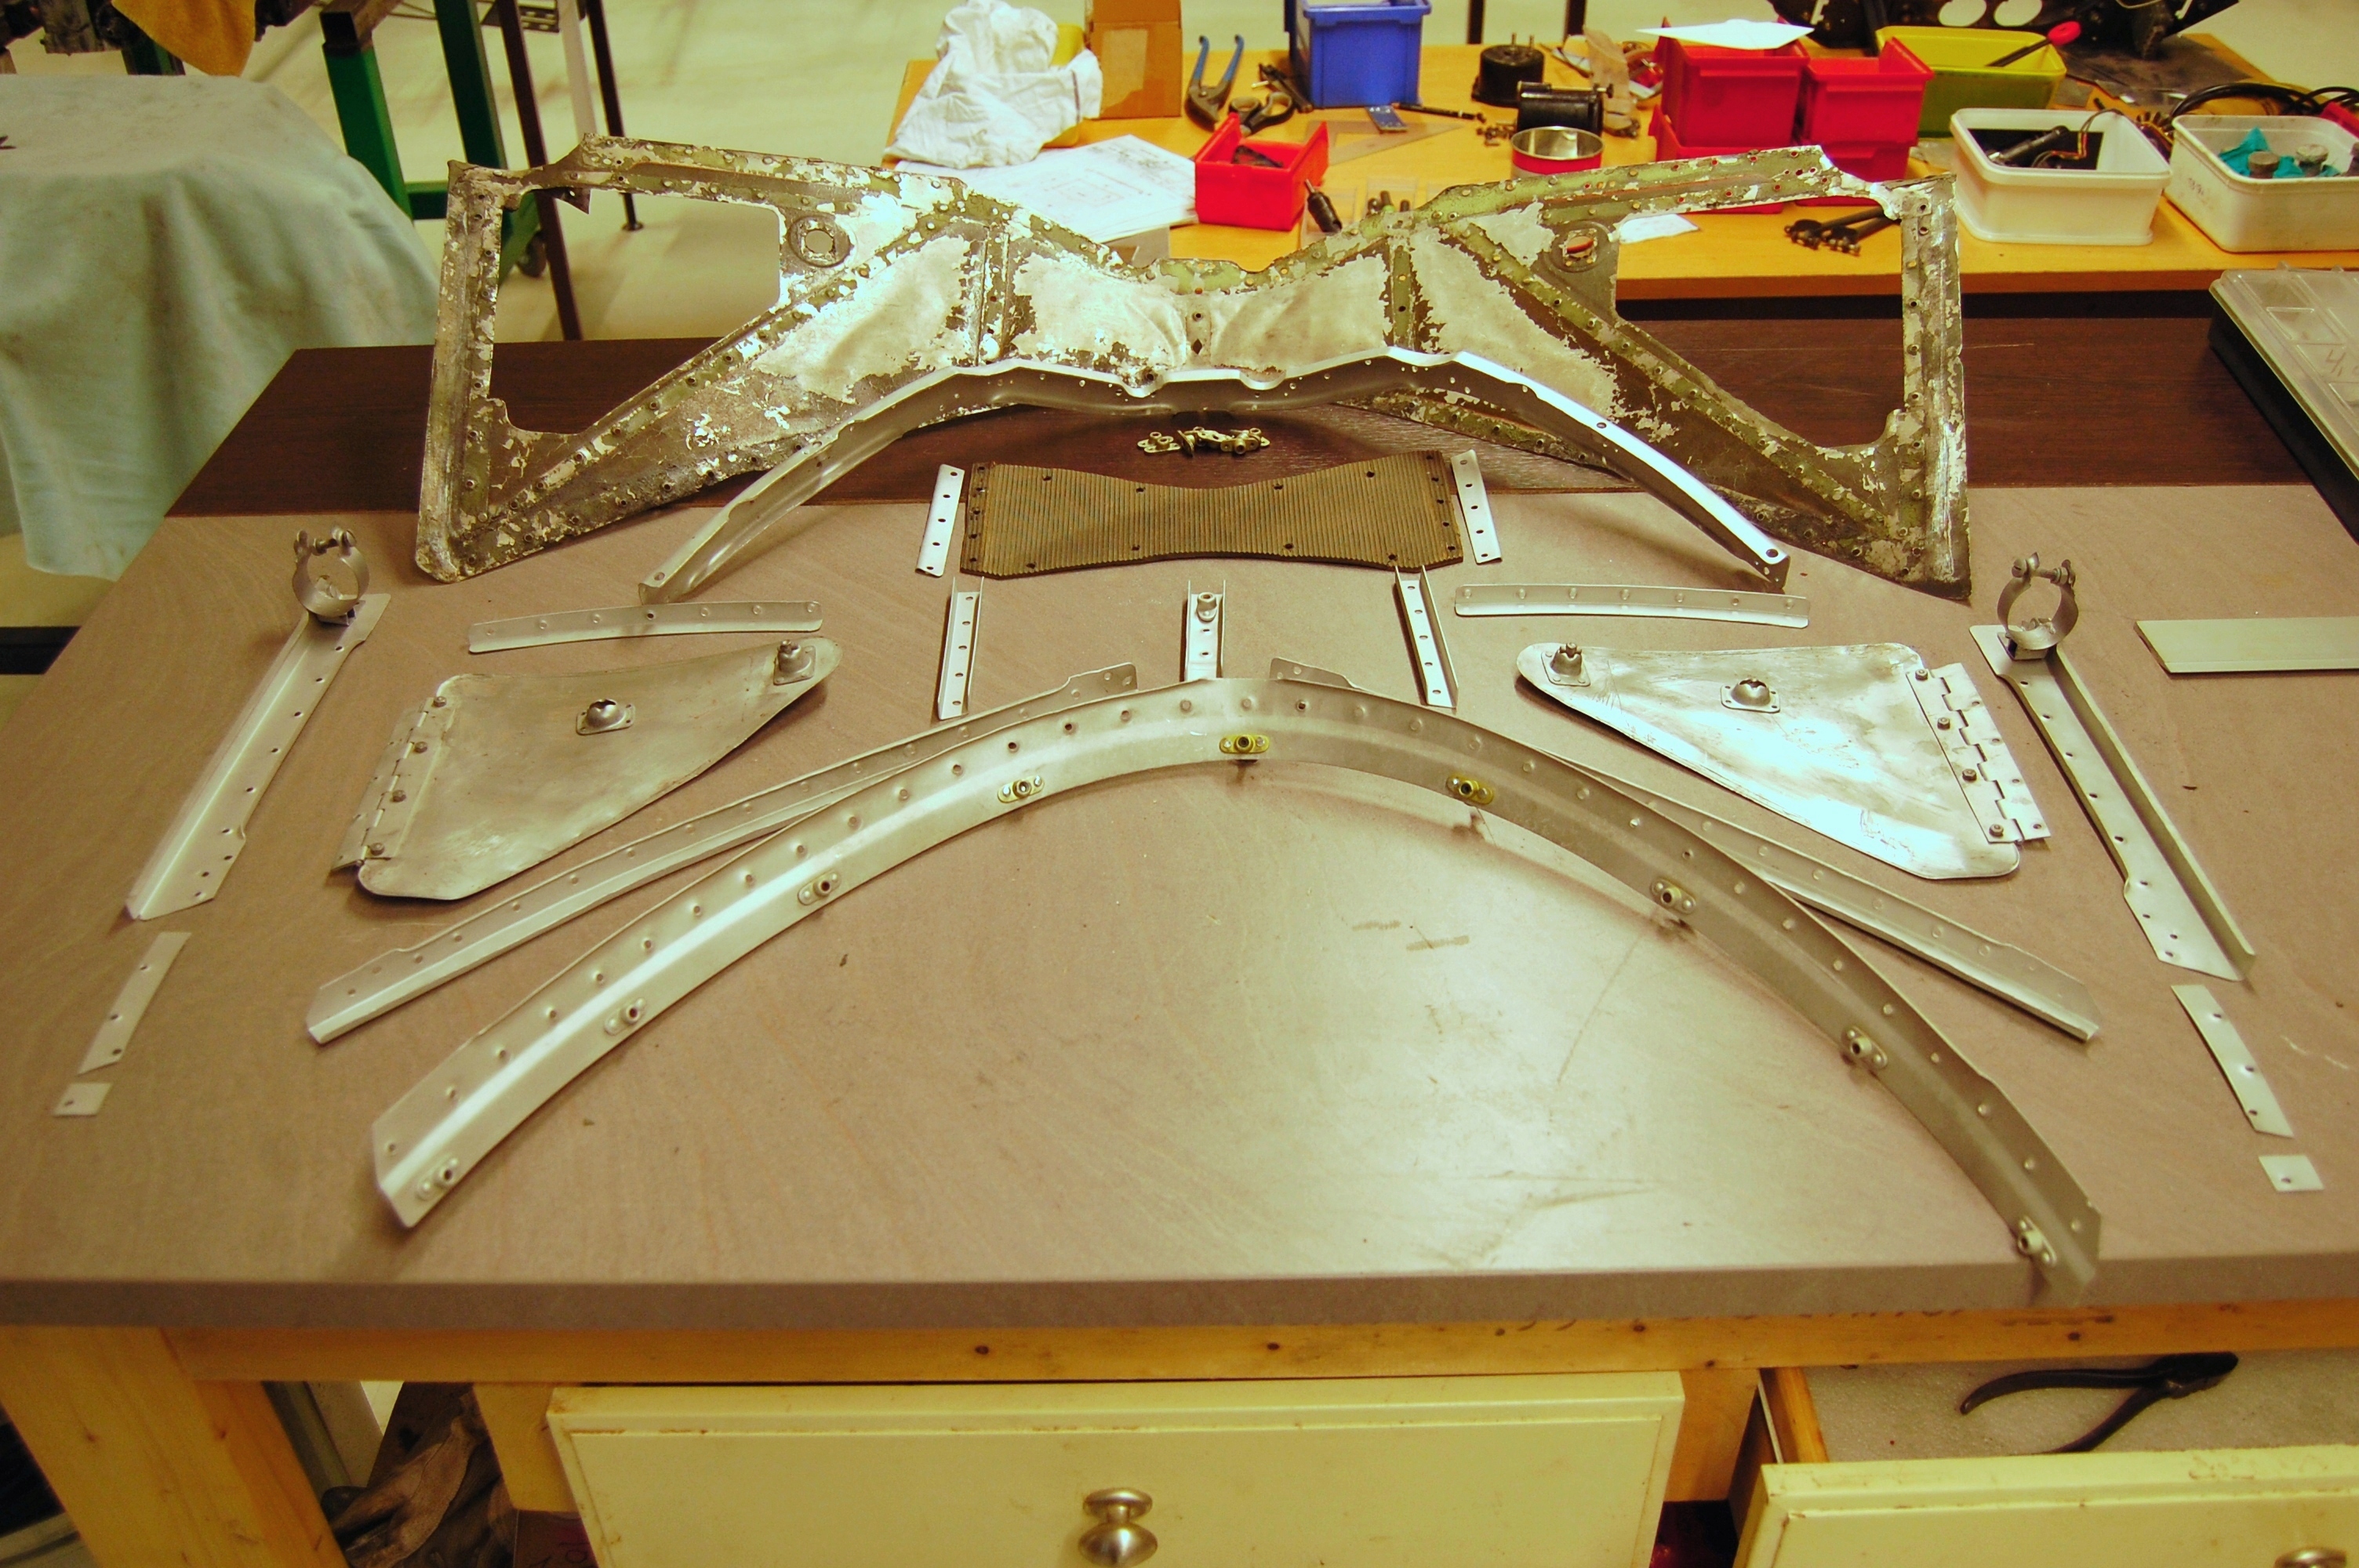
At present we produce new parts for the fuel system. The original German fuel system has at one time been replaced with a simpler French system. Just a few old brackets remain as a documentation of a distant past.
Exactly reproduced according to drawings.
Ready from the paint box.
The fuel tank selector installed on the instrument panel.
News 24 February 2013
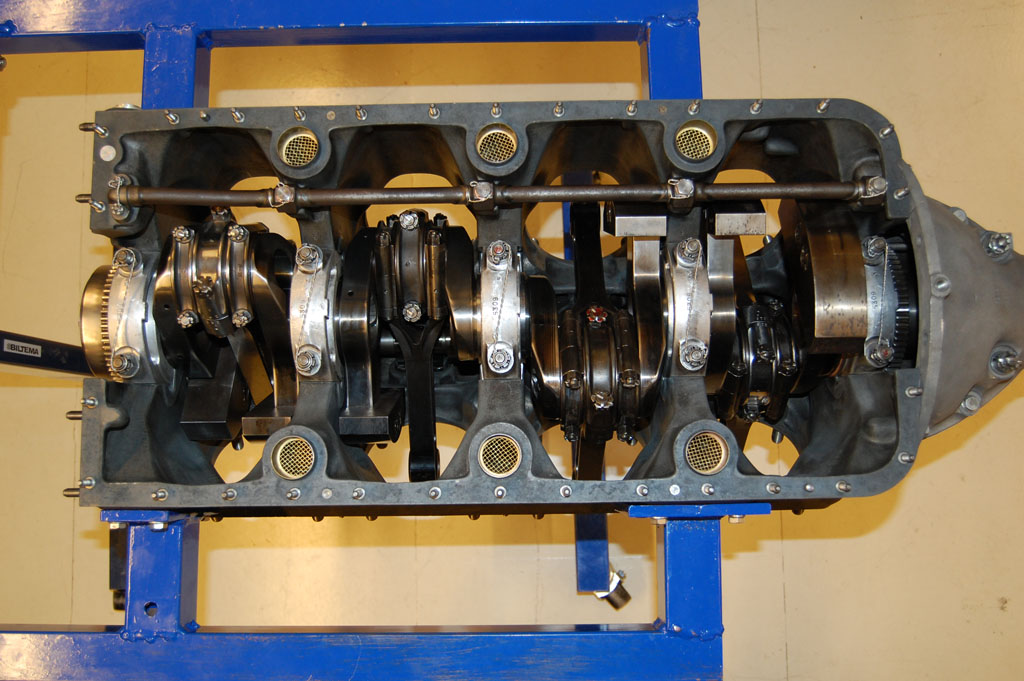
The crankshaft installed and main bearings torqued and secured. It looks great. Fingers crossed. Hopefully this will run without problems until the first overhaul. I will now set the engine aside and focus on the fuselage.
Argus As 10C. Ready to install the top lid. Note the 6 air inlets/outlets with
screens for main bearing air cooling. The steel tube is the oil distribution
manifold.Work on the fuel- and electrical systems will get attention in the future. All levers and shafts connecting the cockpit handles to the fuel system must be in place before we install wires and hoses behind the instrument panel. You can adjust the routing of a wire, but you can’t adjust the position of a lever connected to a shaft. The electrical system will be close to original, but VHF radio, intercom, transponder and ELT will be necessary additions. Many hours have been spent on finding a good location for these components. Wires can be installed when main electrical components has found their correct location.
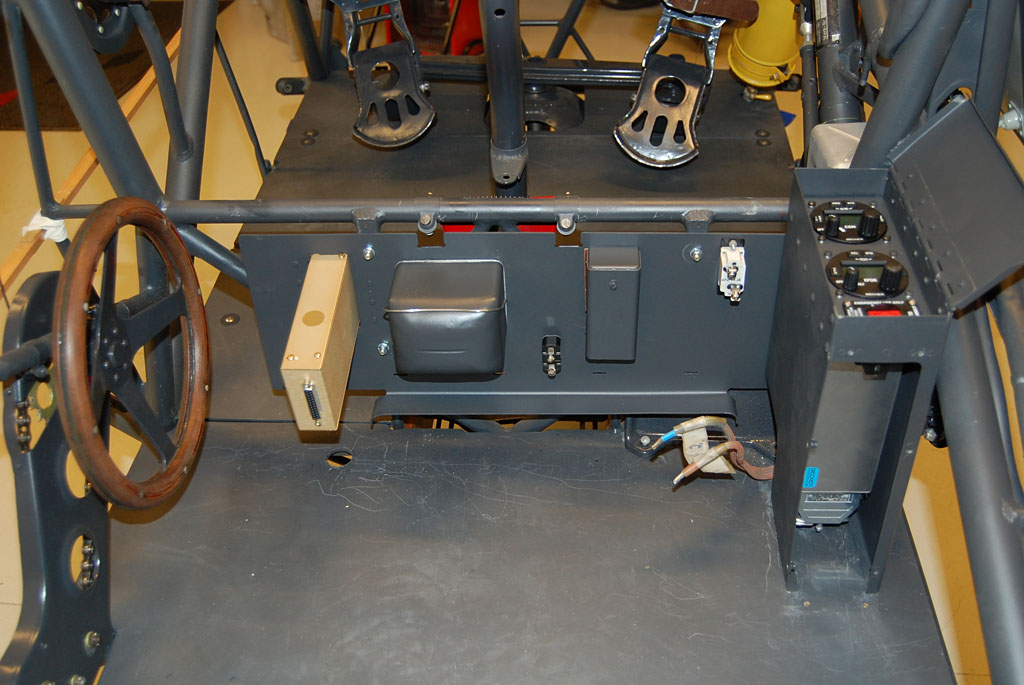
A mix of original and new components on the electrical panel under the pilot
seat. From left to right: intercom, starter relay, battery switch, junction box, starter C/B. To the right of the pilot seat: the box “hiding” the VHF radio, transponder and ELT-switch.
News 8 December 2012
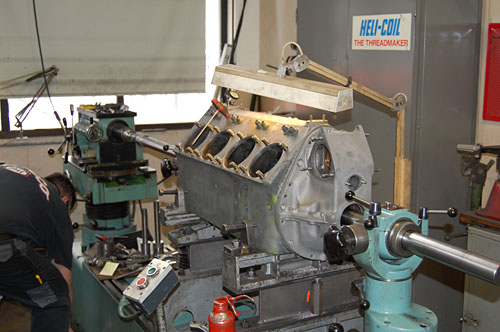
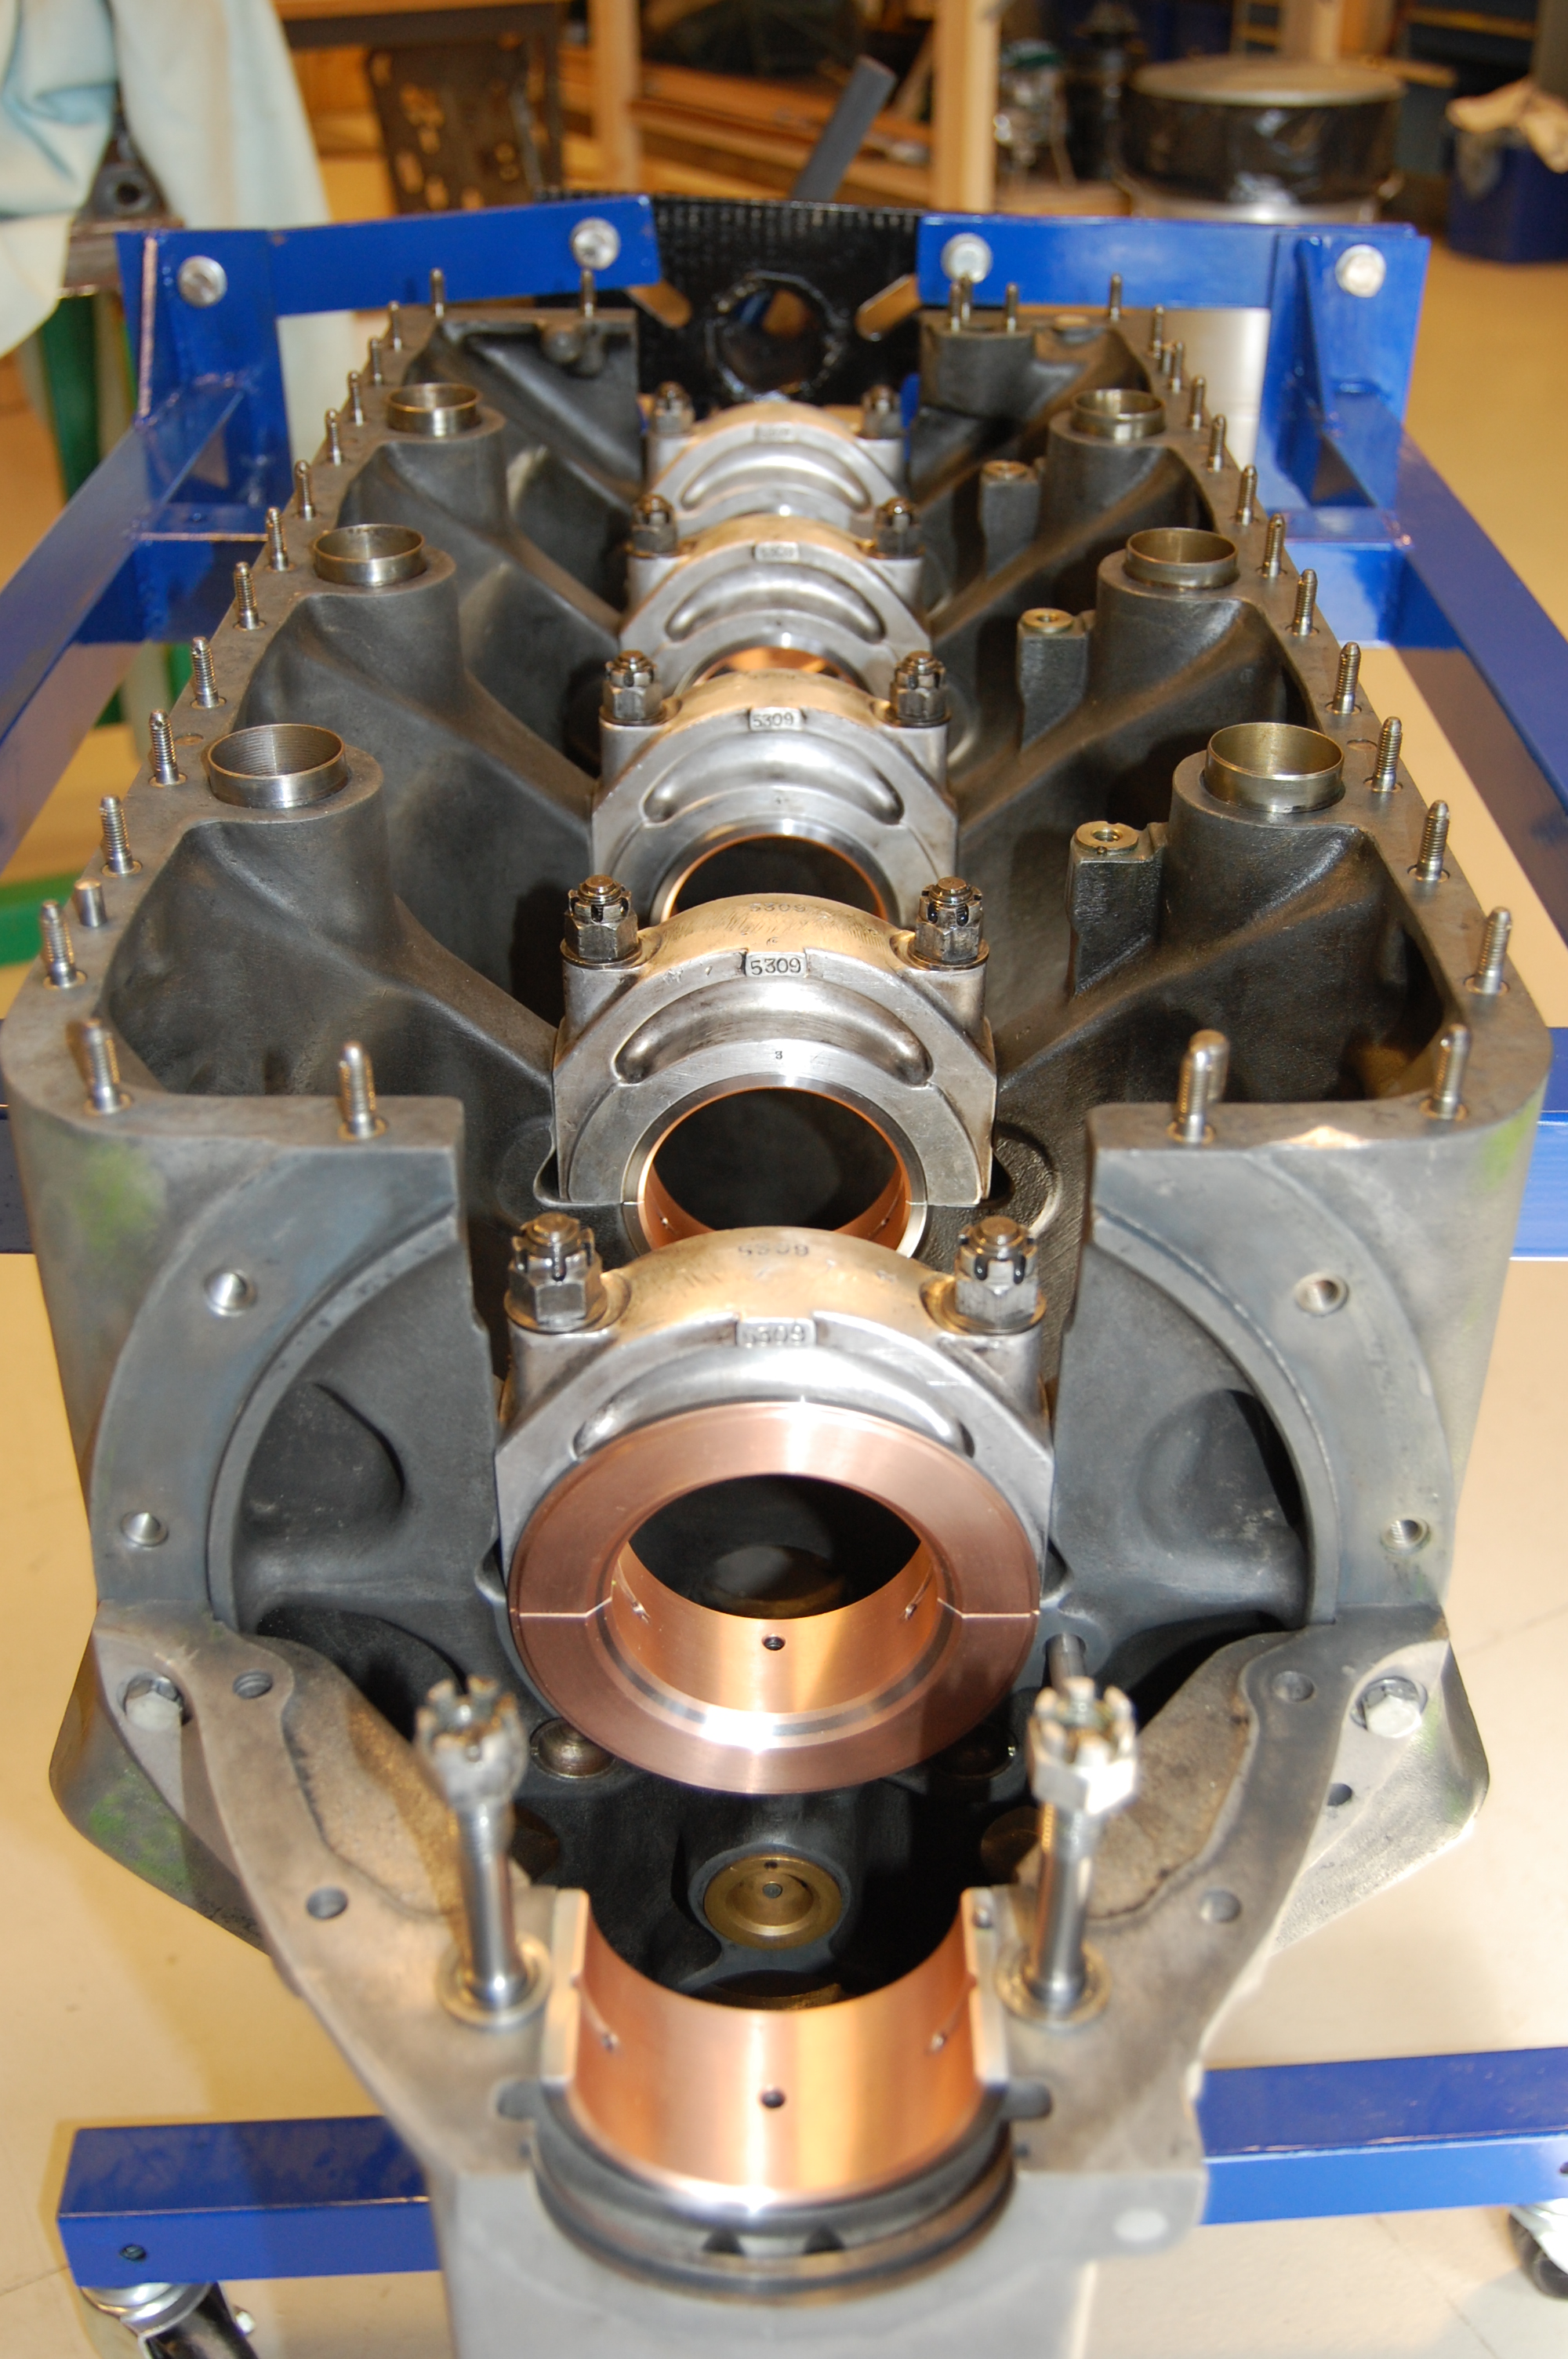
Final assembly of the engine has started. The crankshaft bearings were line-bored by Cylmo AS in Trondheim late October. We started assembly by installing tappets and the camshaft after a thorough cleaning of the crankcase. All oil passages must be open and free of dirt. From now-on cleanliness is a must! Next item installed will be the crankshaft. It might look simple but it consists of 74 different parts including the drive gear/clutch in the rear end (not counting the connecting rods). The crankshaft is probably the heaviest part in the whole aircraft. It is beautiful, polished all over and irreplaceable. It must be handled like eggs because there are no spare crankshafts available.
The engine being line-bored at Cylmo AS in Trondheim.
On a white table cloth; Crankshaft ready for installation of connecting rods.
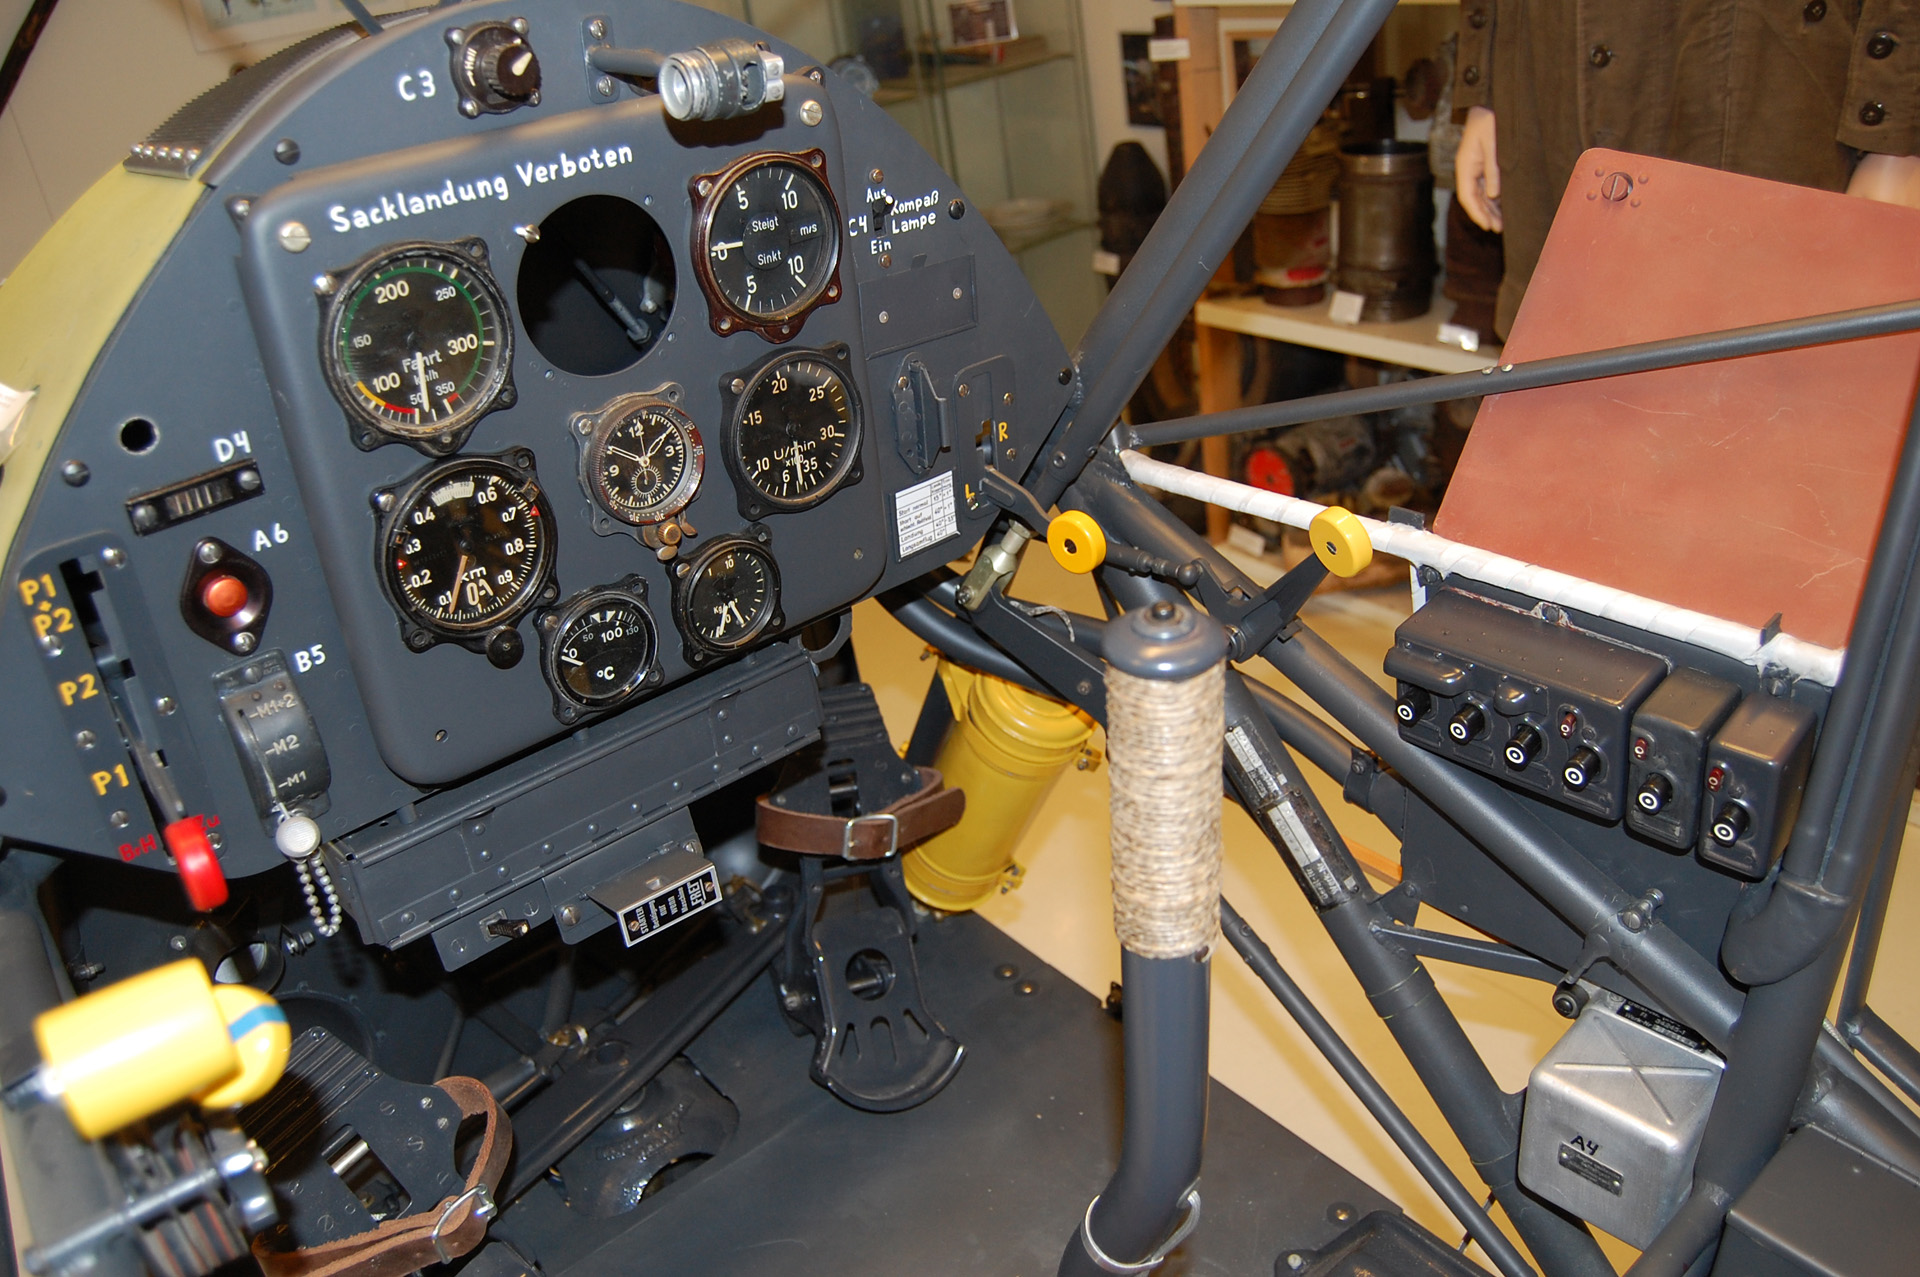
Instrument panel almost complete.
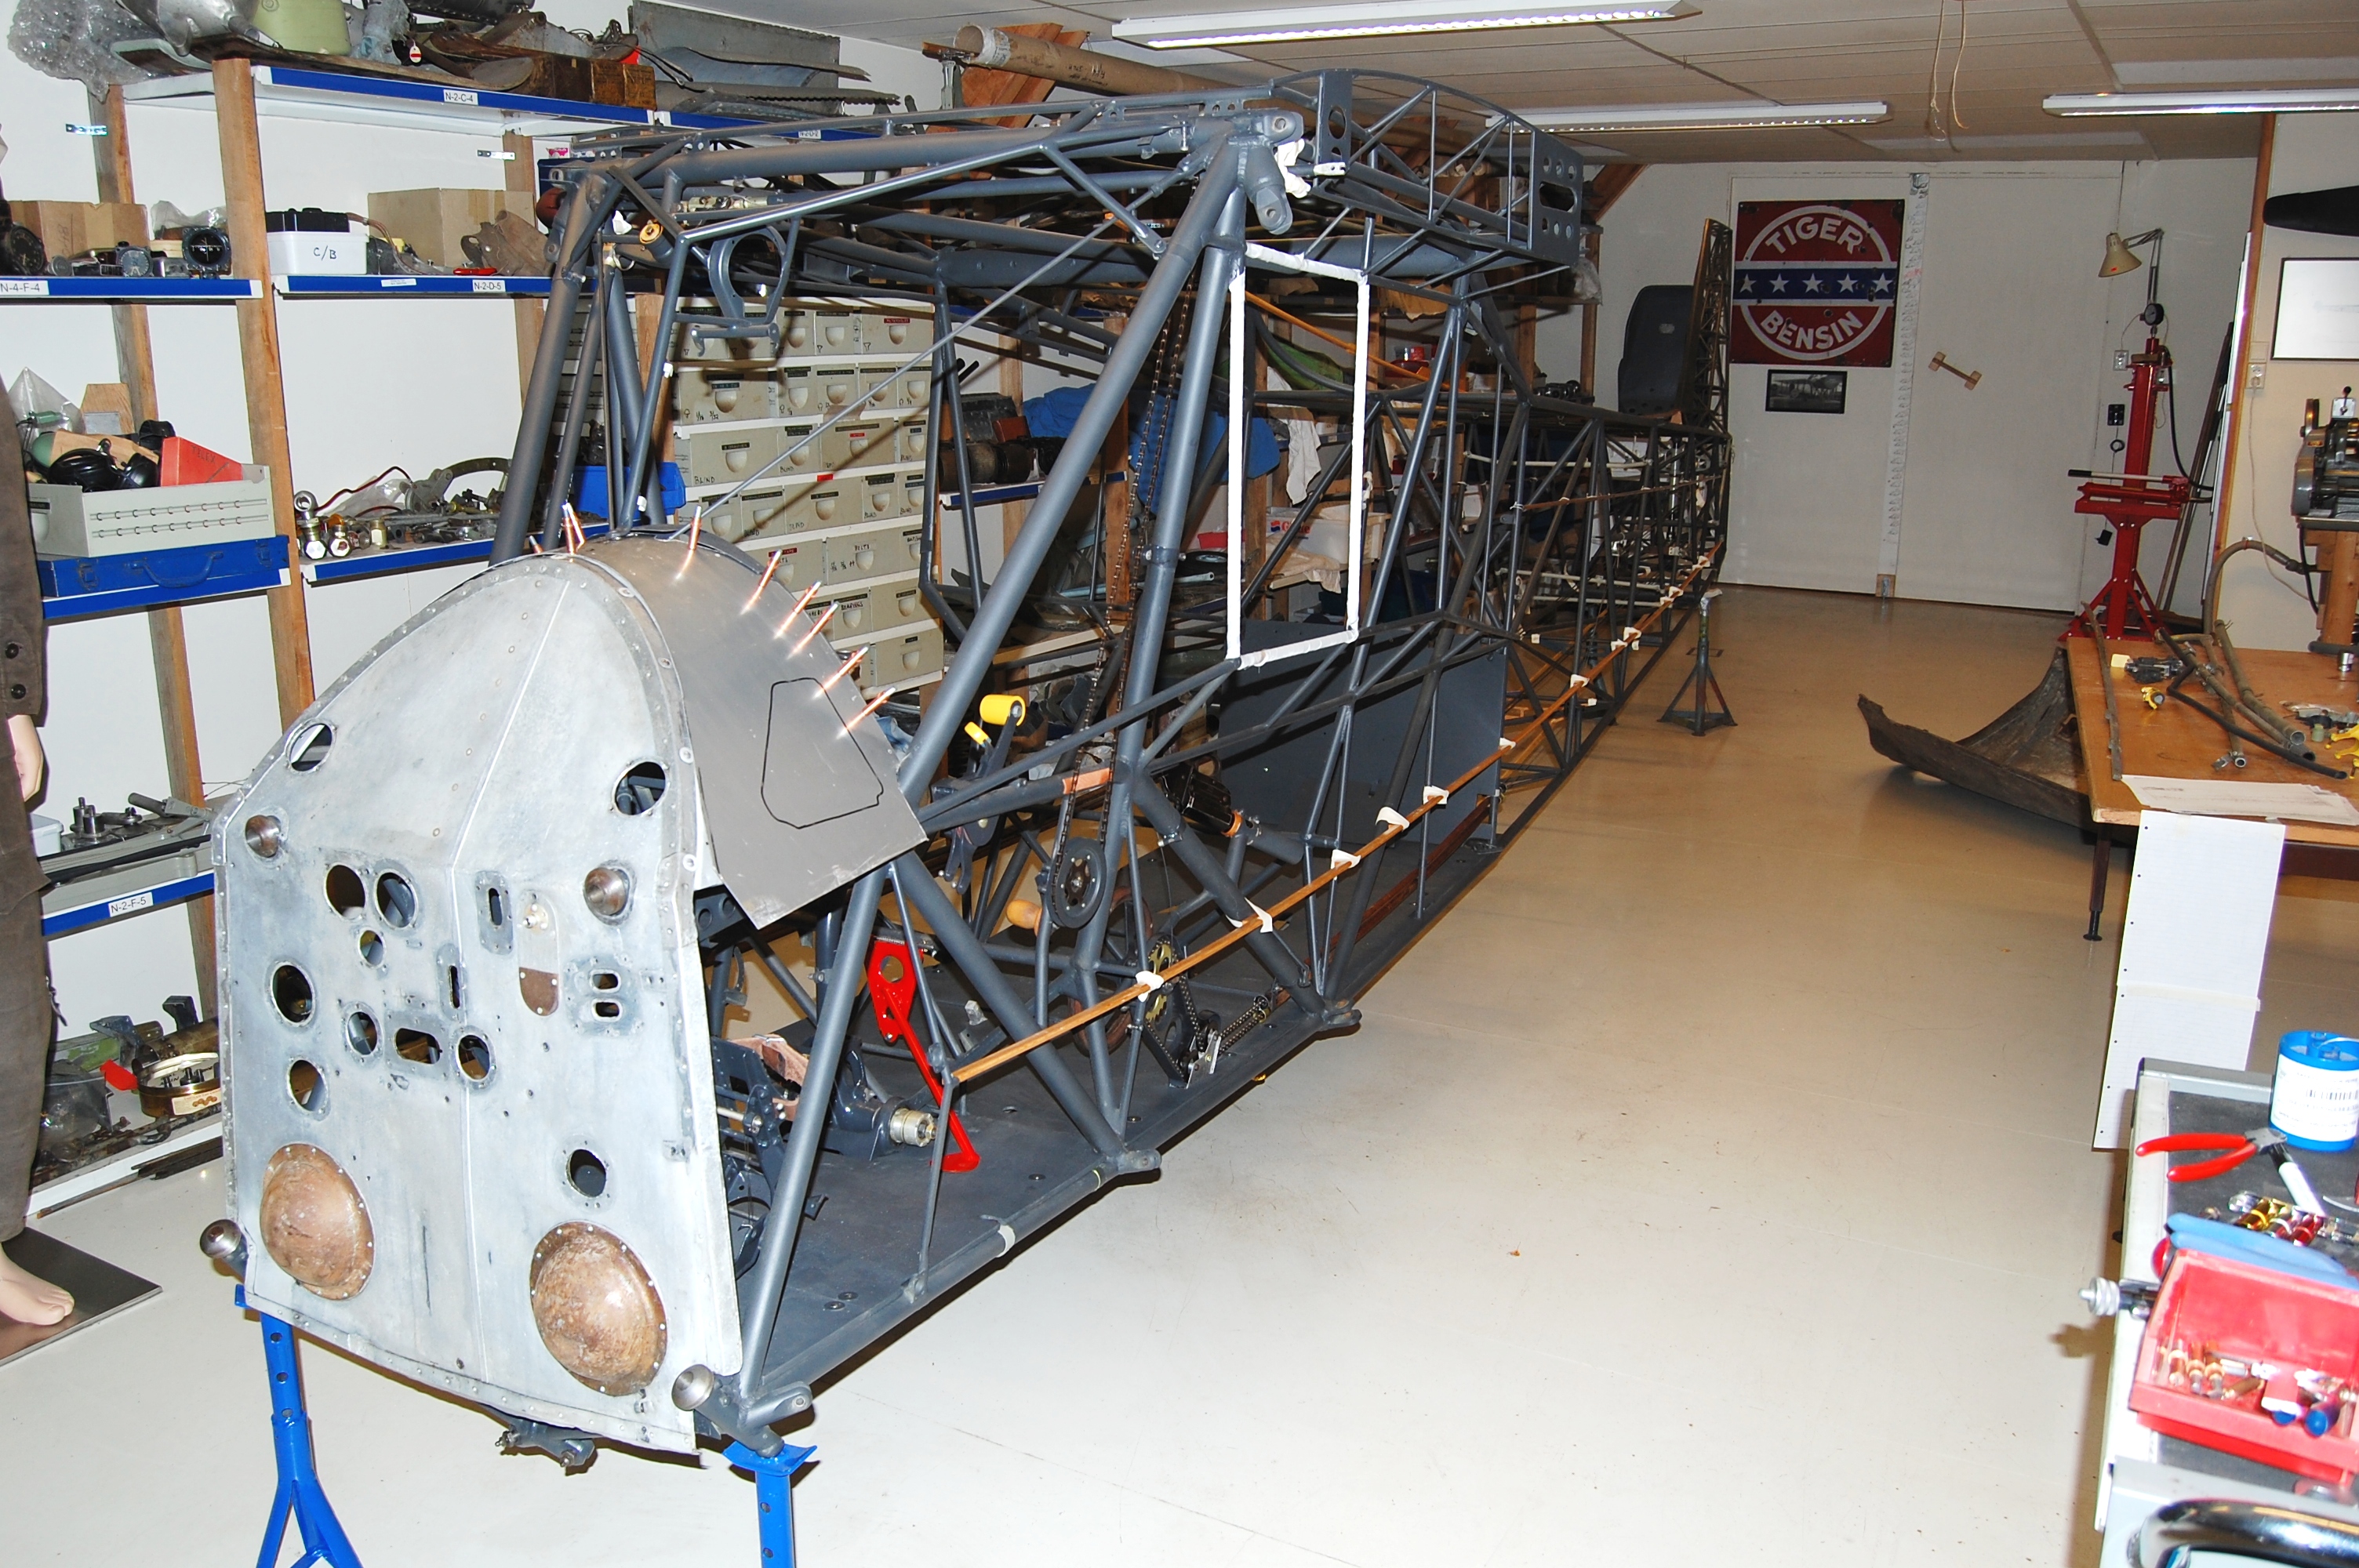
News 14 October 2012
Steady progress. All but one wooden stringer on the fuselage installed. Although it is designed as a footstep, the turtle deck in front of the windshield was badly distorted by heavy people stepping on it. As more people become overweight, we decided to re-skin it with 0.8 mm aluminum instead of the original 0.5 mm. To drill all new rivet holes on the exact spot we had to temporarily install the instrument panel and fire wall to get everything properly aligned.
The old turtle deck with all rivets drilled out.
Temporary installation of fire wall and instrument panel. The first steps on forming a new turtle deck.
It starts to look like a cockpit.
News 6 July 2012
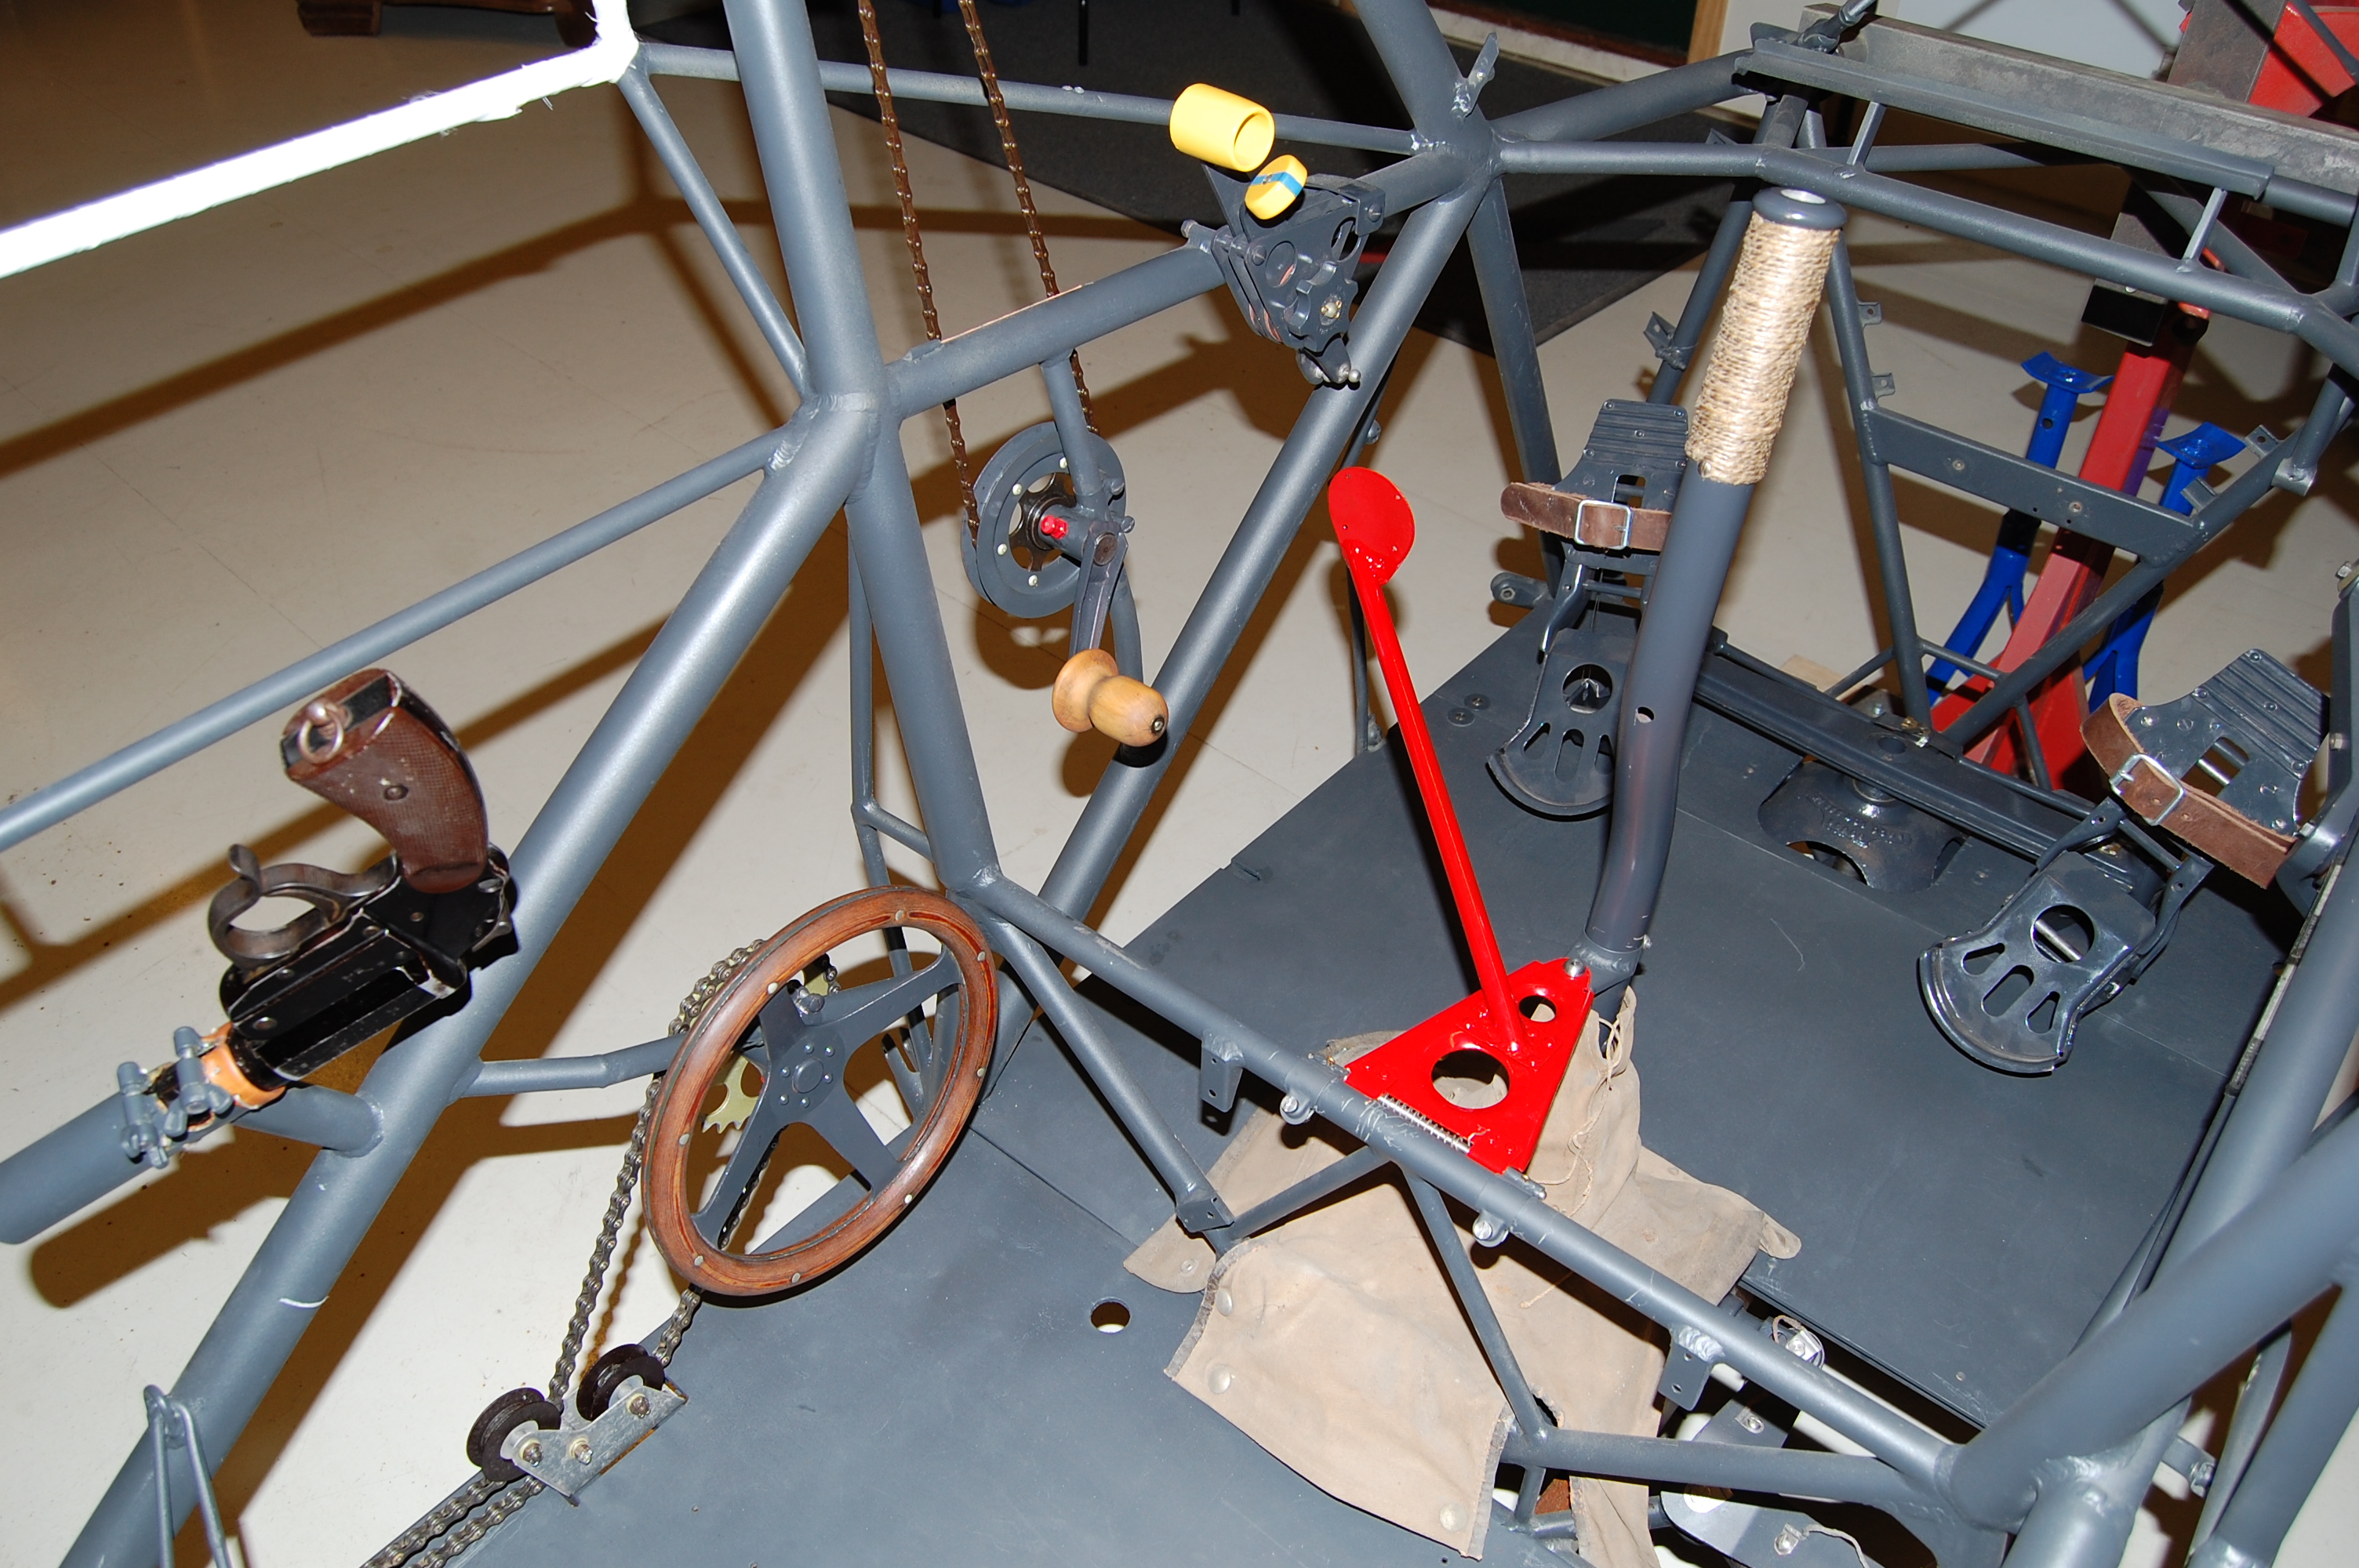
This is pure fun! It’s becoming an aeroplane. Now it’s possible to grab the stick and move the elevator controls all the way to the tail or give aileron inputs to the wing root connection. The elevator trim is also working although the chain is of a heavy bicycle type and should be replaced with a proper lightweight type. Small details are added every week. The numbers of ball bearings in the flight controls are unbelievable. As for comparison, the Piper L-4 Grasshopper has no ball bearings except for roller wheel bearings. The wheel bearings on the Storch are just plain cupper bushings riding on a steel shaft.
Progress is also made on the engine. New crankshaft bearings are installed, ready for line boring. The cylinder heads have got new valve guides and the valves are seated to perfect fit.
The cockpit including (left to right) flare gun, trim wheel, flap crank, throttle/mixture, control lock, stick and rudder pedals.
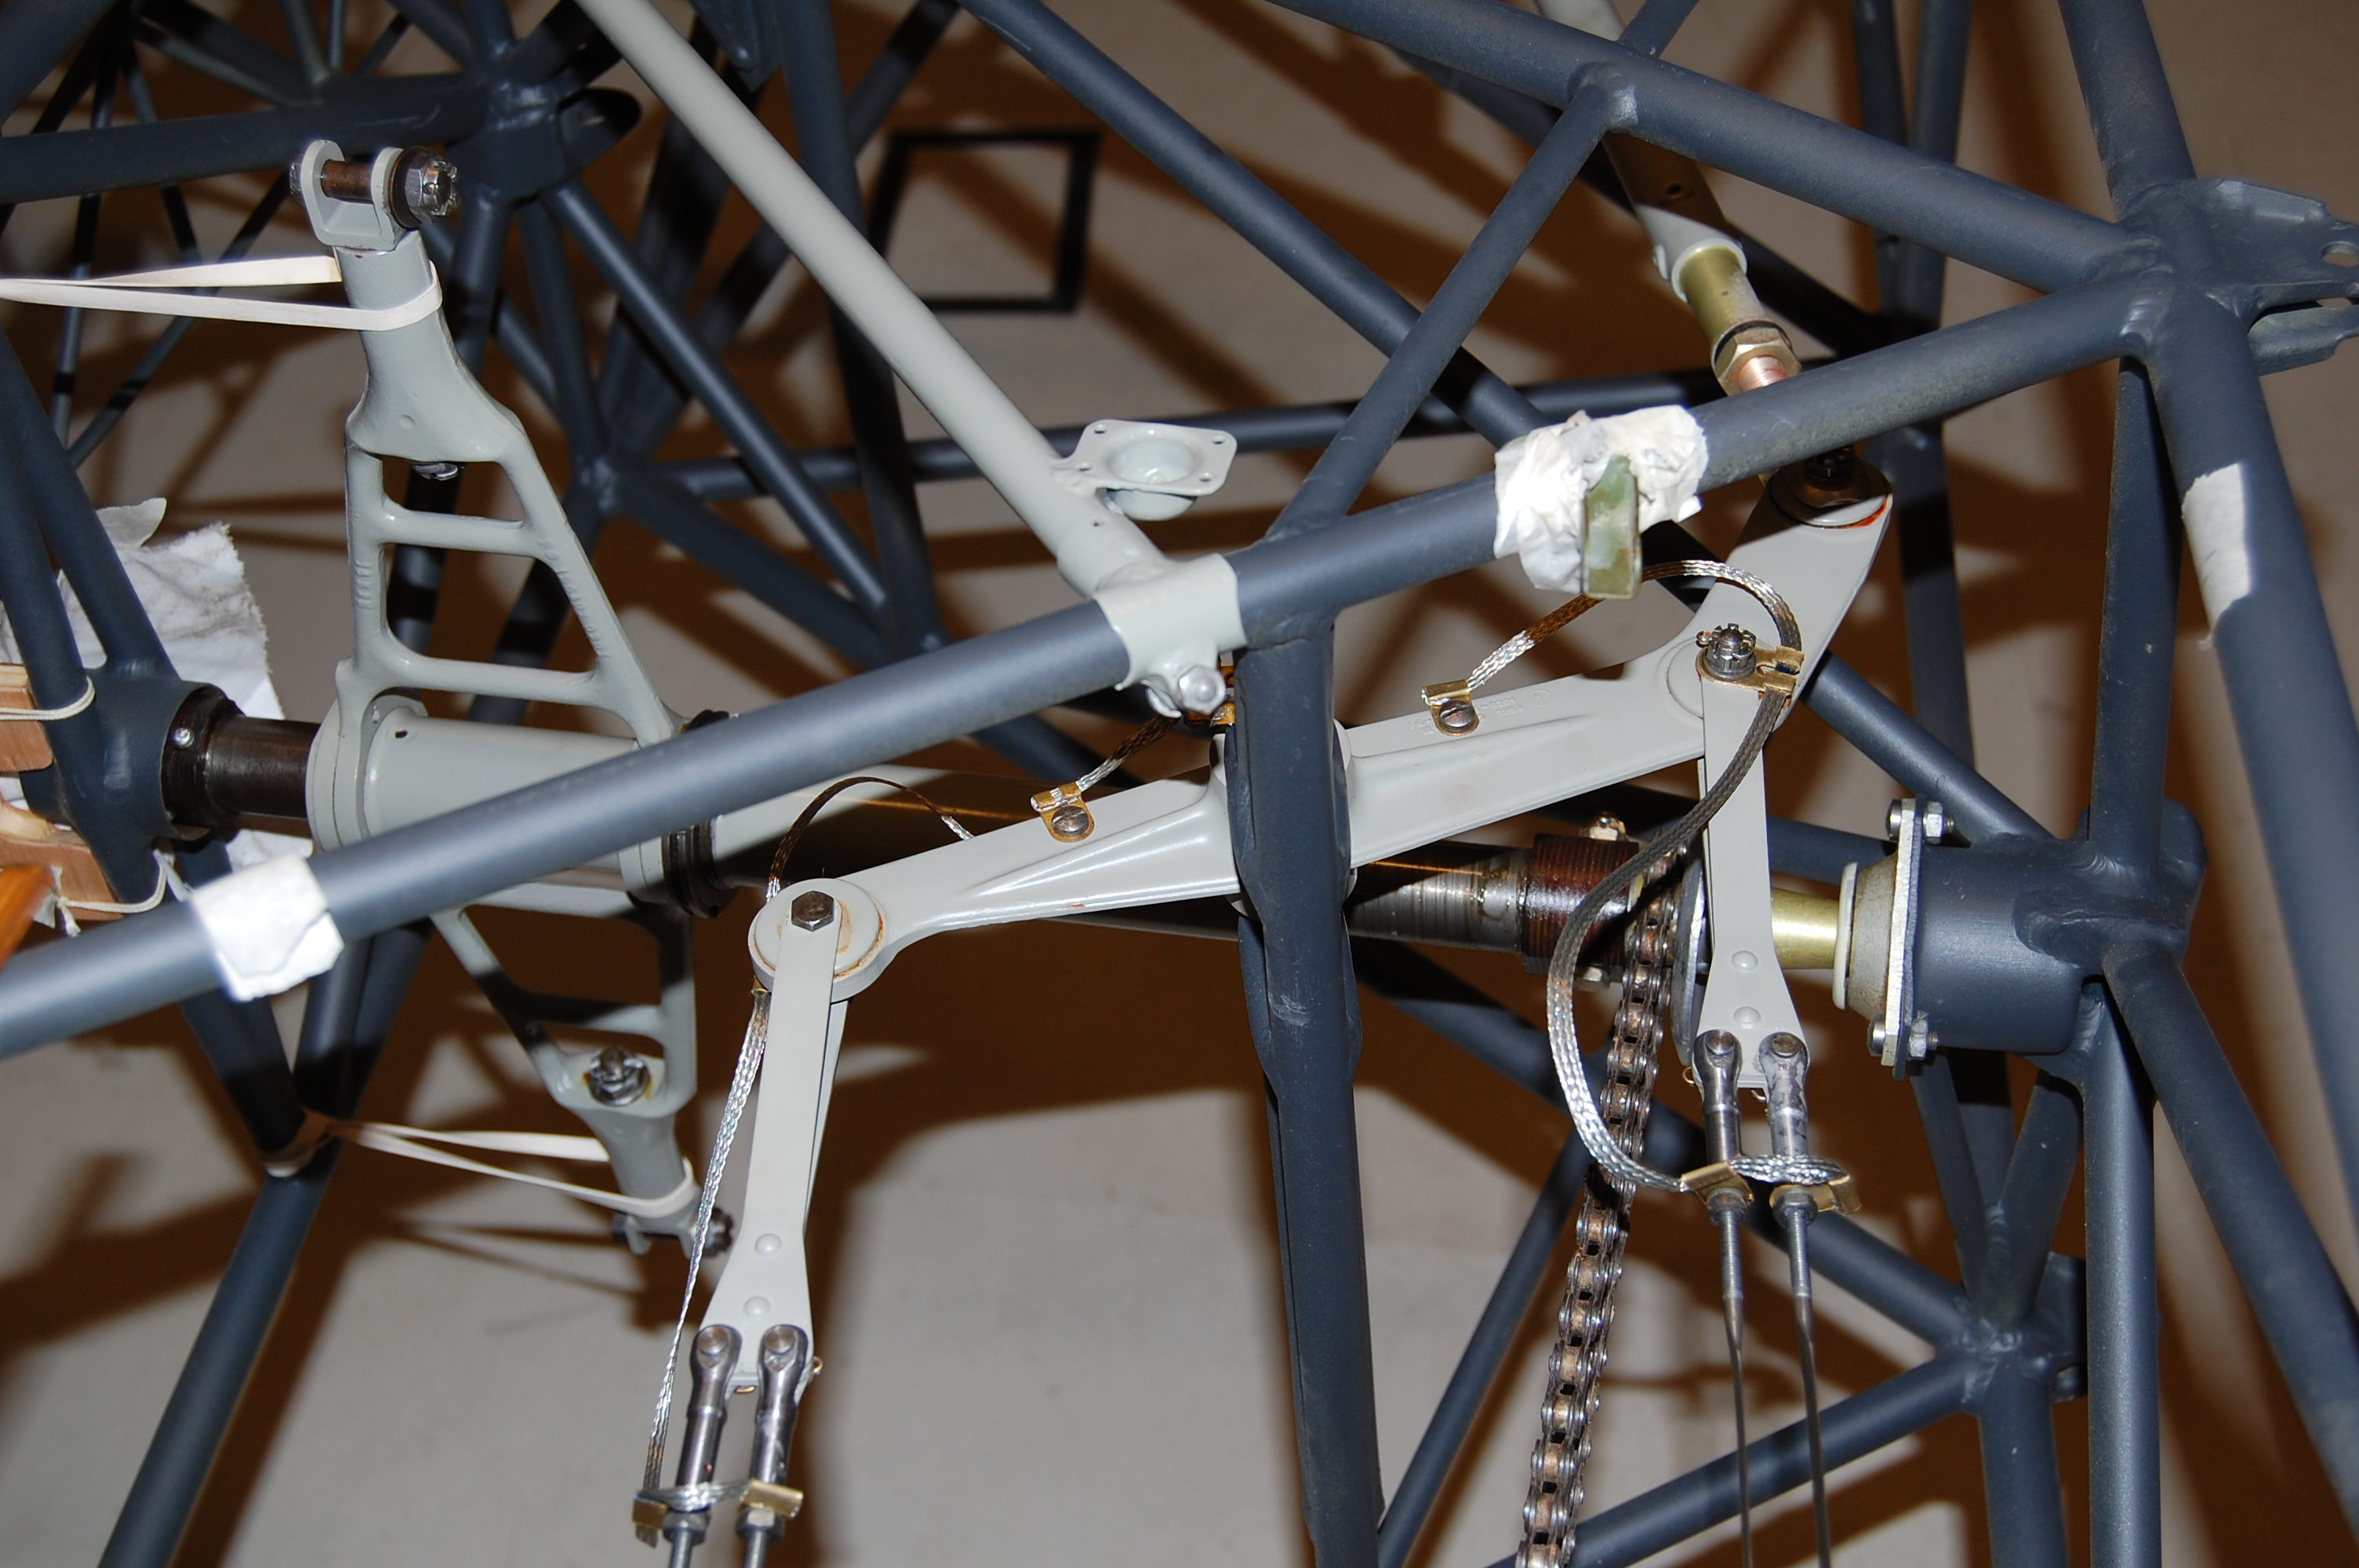
Elevator trim and parts of the elevator control seen from above while
the fuselage is resting on its right side.
New crankshaft bearings.
News 7 April 2012
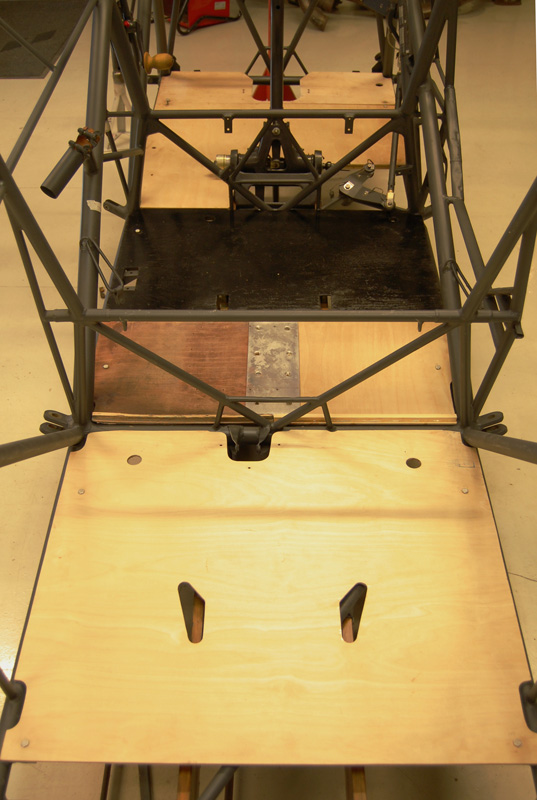
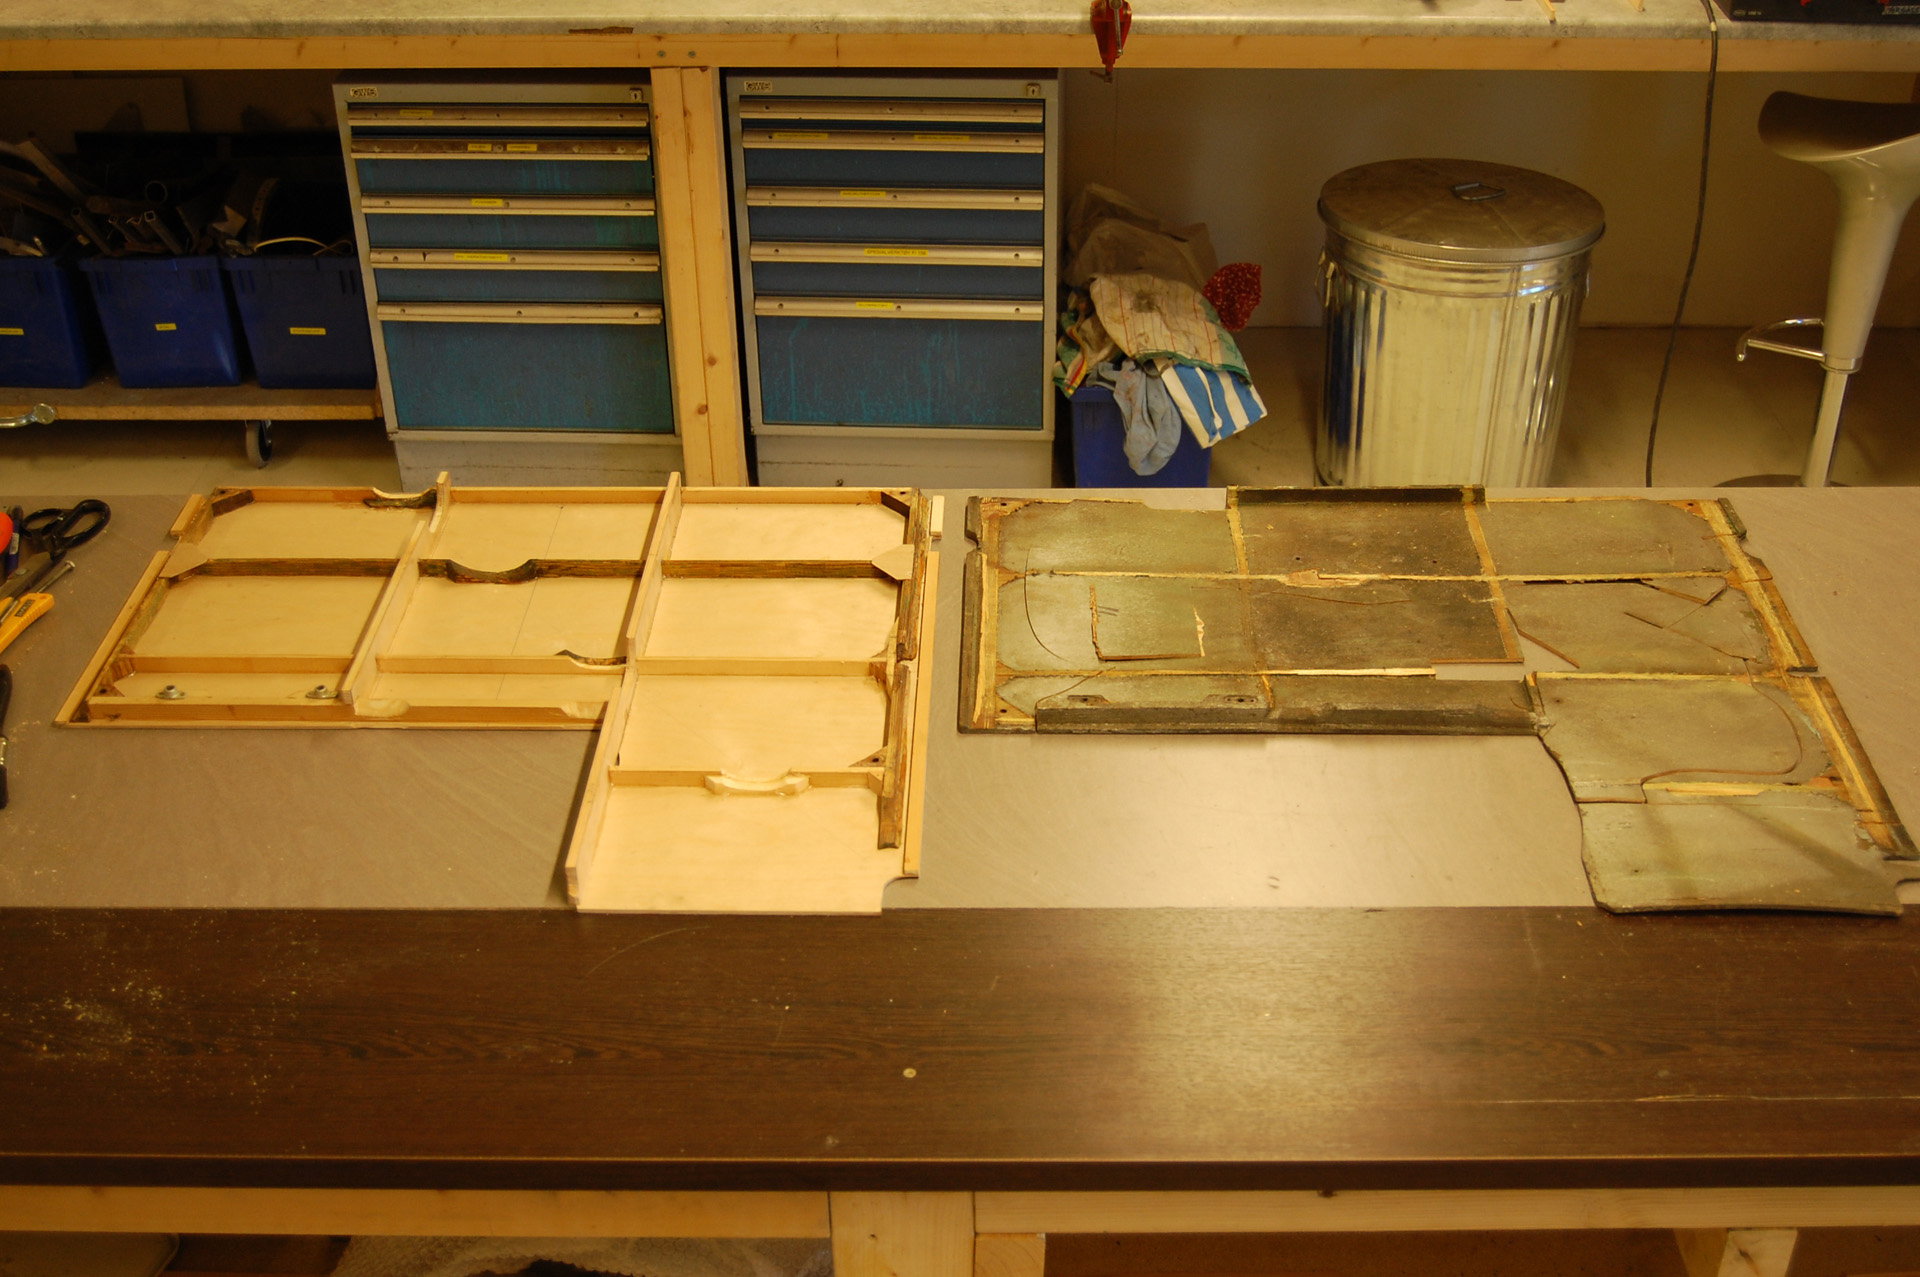
Floorboards nearly finished. The floorboards on the Storch are rather complicated. It consists of six separate sections, of which one is split into two. The later being a modification to improve access to items underneath the floorboards. Out of total seven segments, only two could be reused without repair. Four segments had to be made from scratch, and one was repaired. The most complicated segment consisted of about 50 items, all to be made from wood and glued together with T-88 epoxy glue. We had good use of our carpenter’s workshop during this work.
Floorboards on the five forward sections laid out to check fit.
The black and the brown segments are old and usable without repair. Seen in direction of flight.
One of the floorboards manufactured from scratch showing all the details on the underside. The old floorboard to the right is used as reference. It is also cut in pieces to allow reuse of some details.
News 14 December 2011
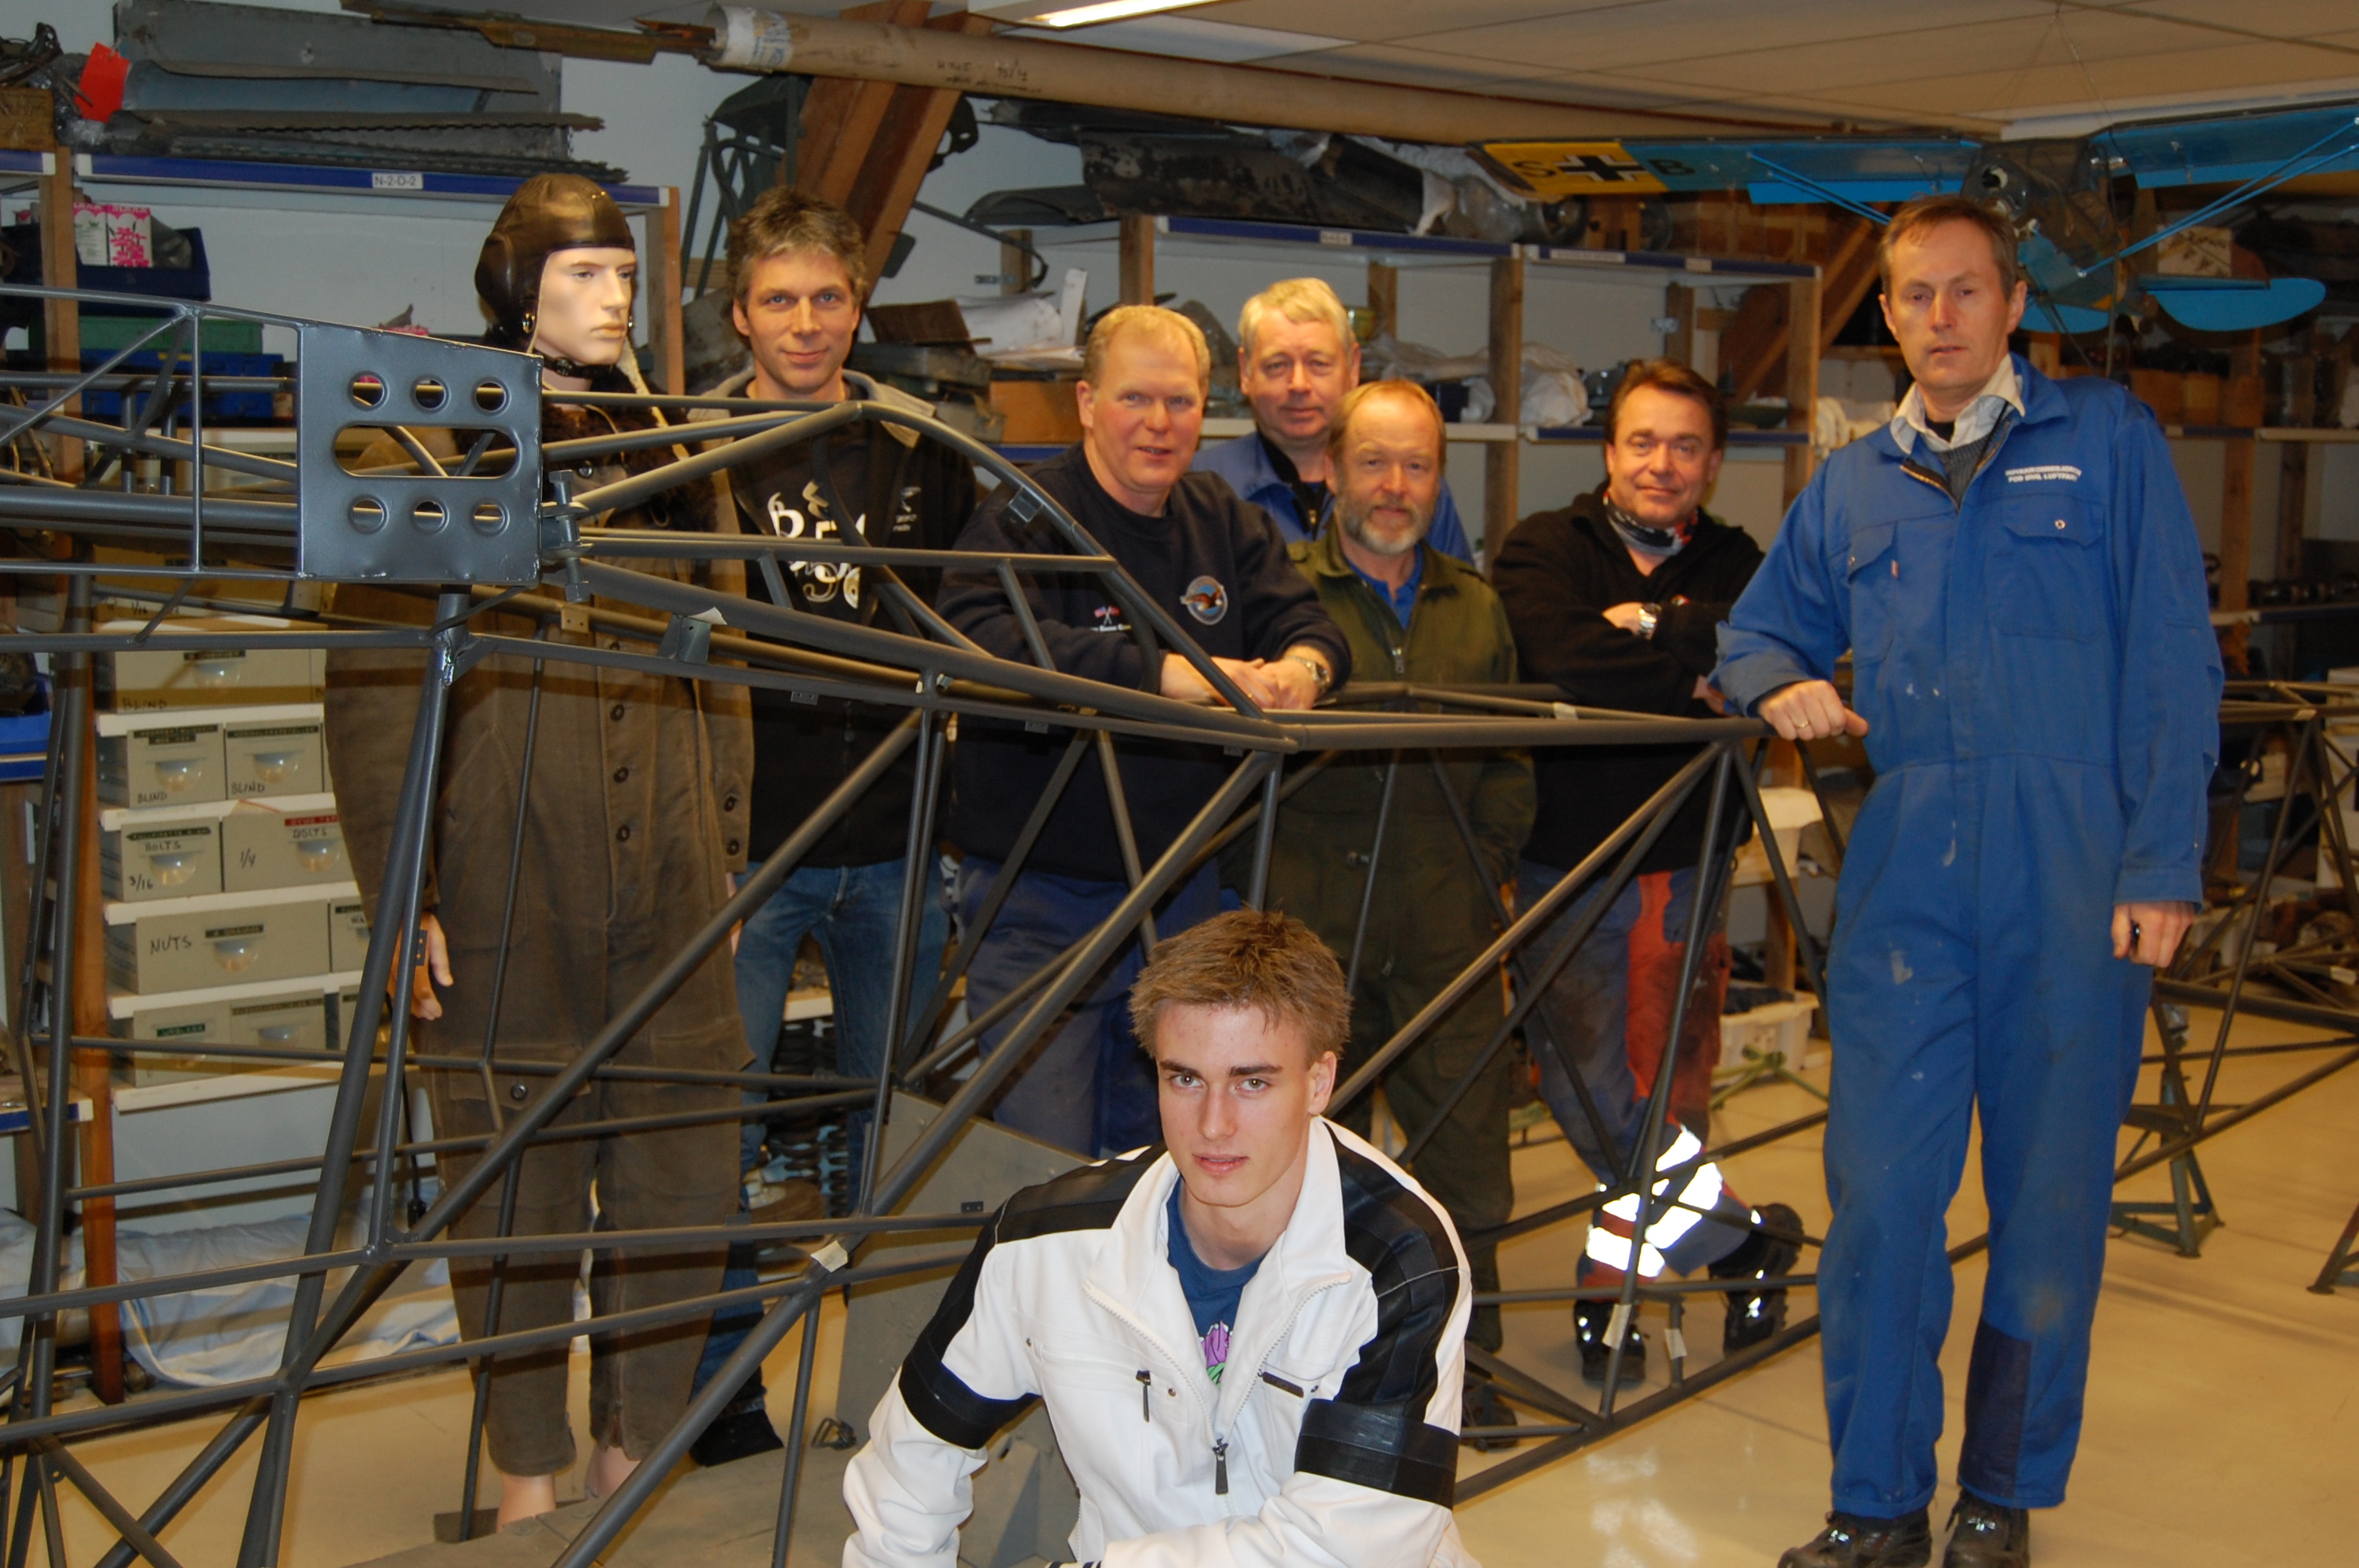
A milestone was reached 14 December when the fuselage frame was finished. It is repaired and some small original details like the signal pistol holder and door hinges are put back in place. A few new details are also introduced like attachments for shoulder hardness in the aft seat and antenna mountings. The fuselage frame was then primed and painted with Schwarzgrau 66. Finally, we filled boiled linseed oil into the frame, turned it around several times and drain it again. Now it can take another 67 years of operation. This must be the restoration turning point. From now-one we will do assembly instead of disassembly. Floorboard and other details are next in line.
From left to right behind the finished frame: Fritz (Stand-in for Bjørn Ivar Aarseth), Harald Holm, Torstein Walseth, Ørnulf Lien, Arild Tveit, Eivind Svenningsen. In front of the frame: Christian Svenningsen and Tor Nørstegård.
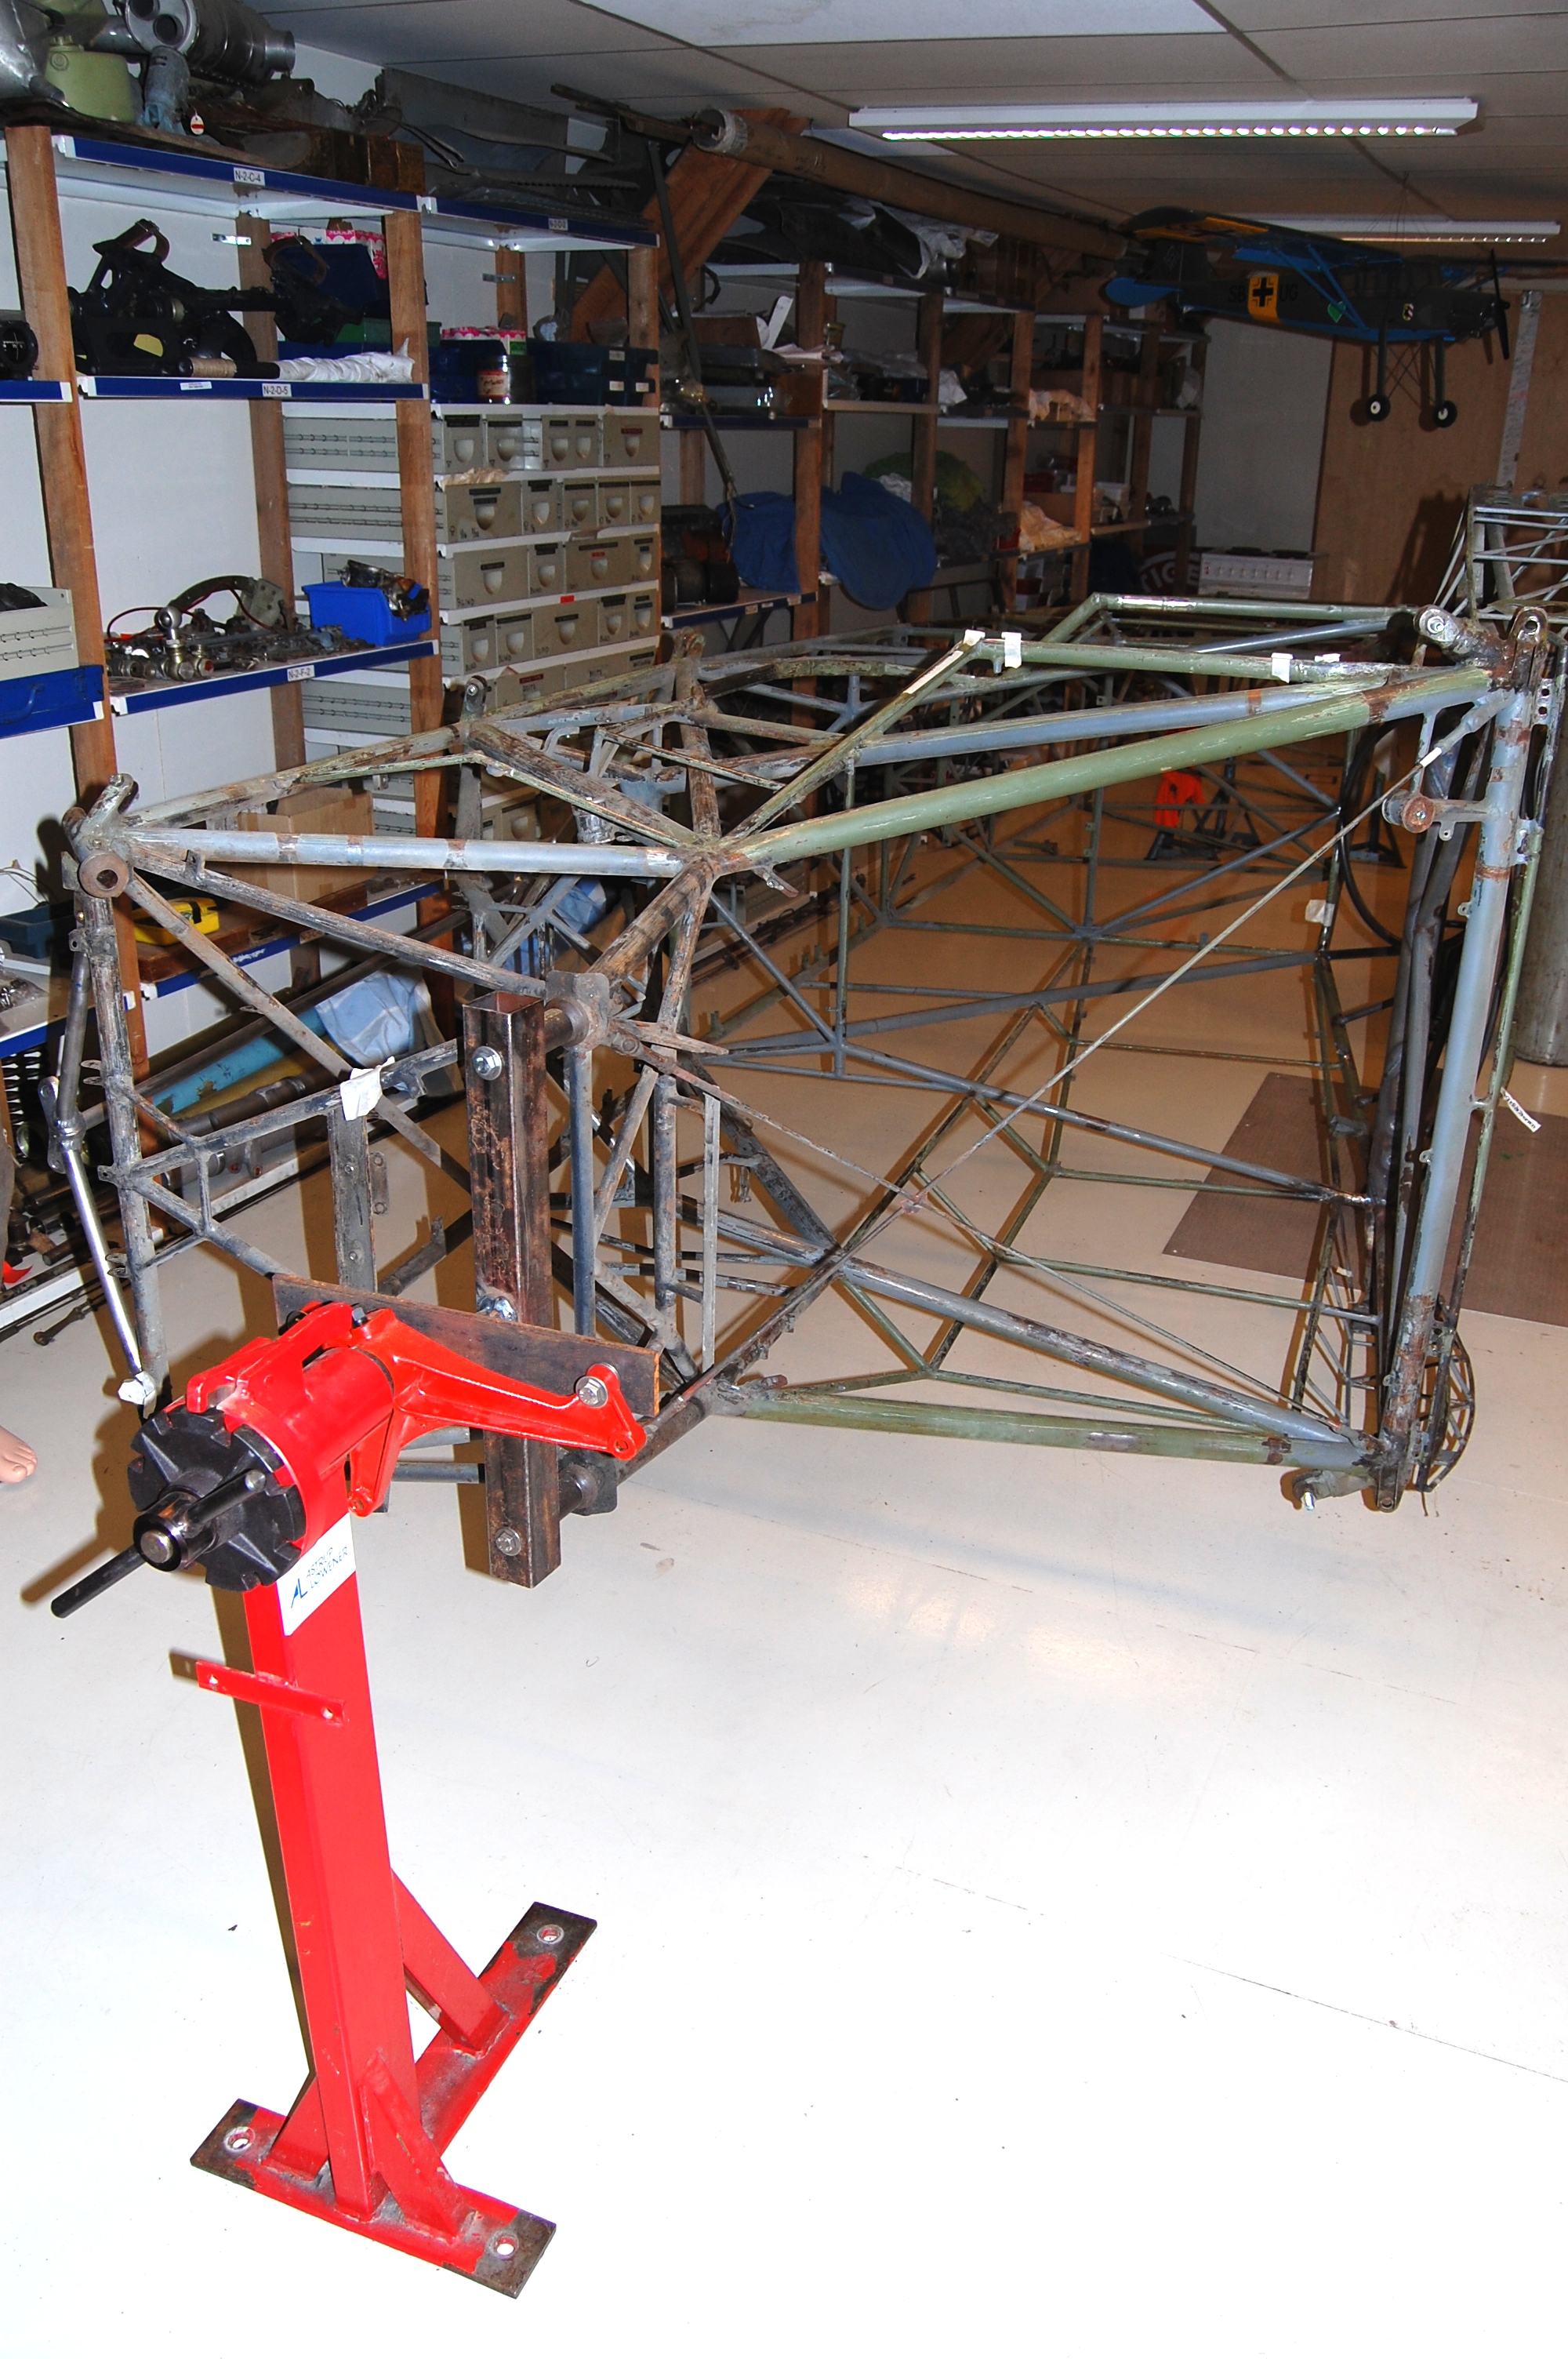
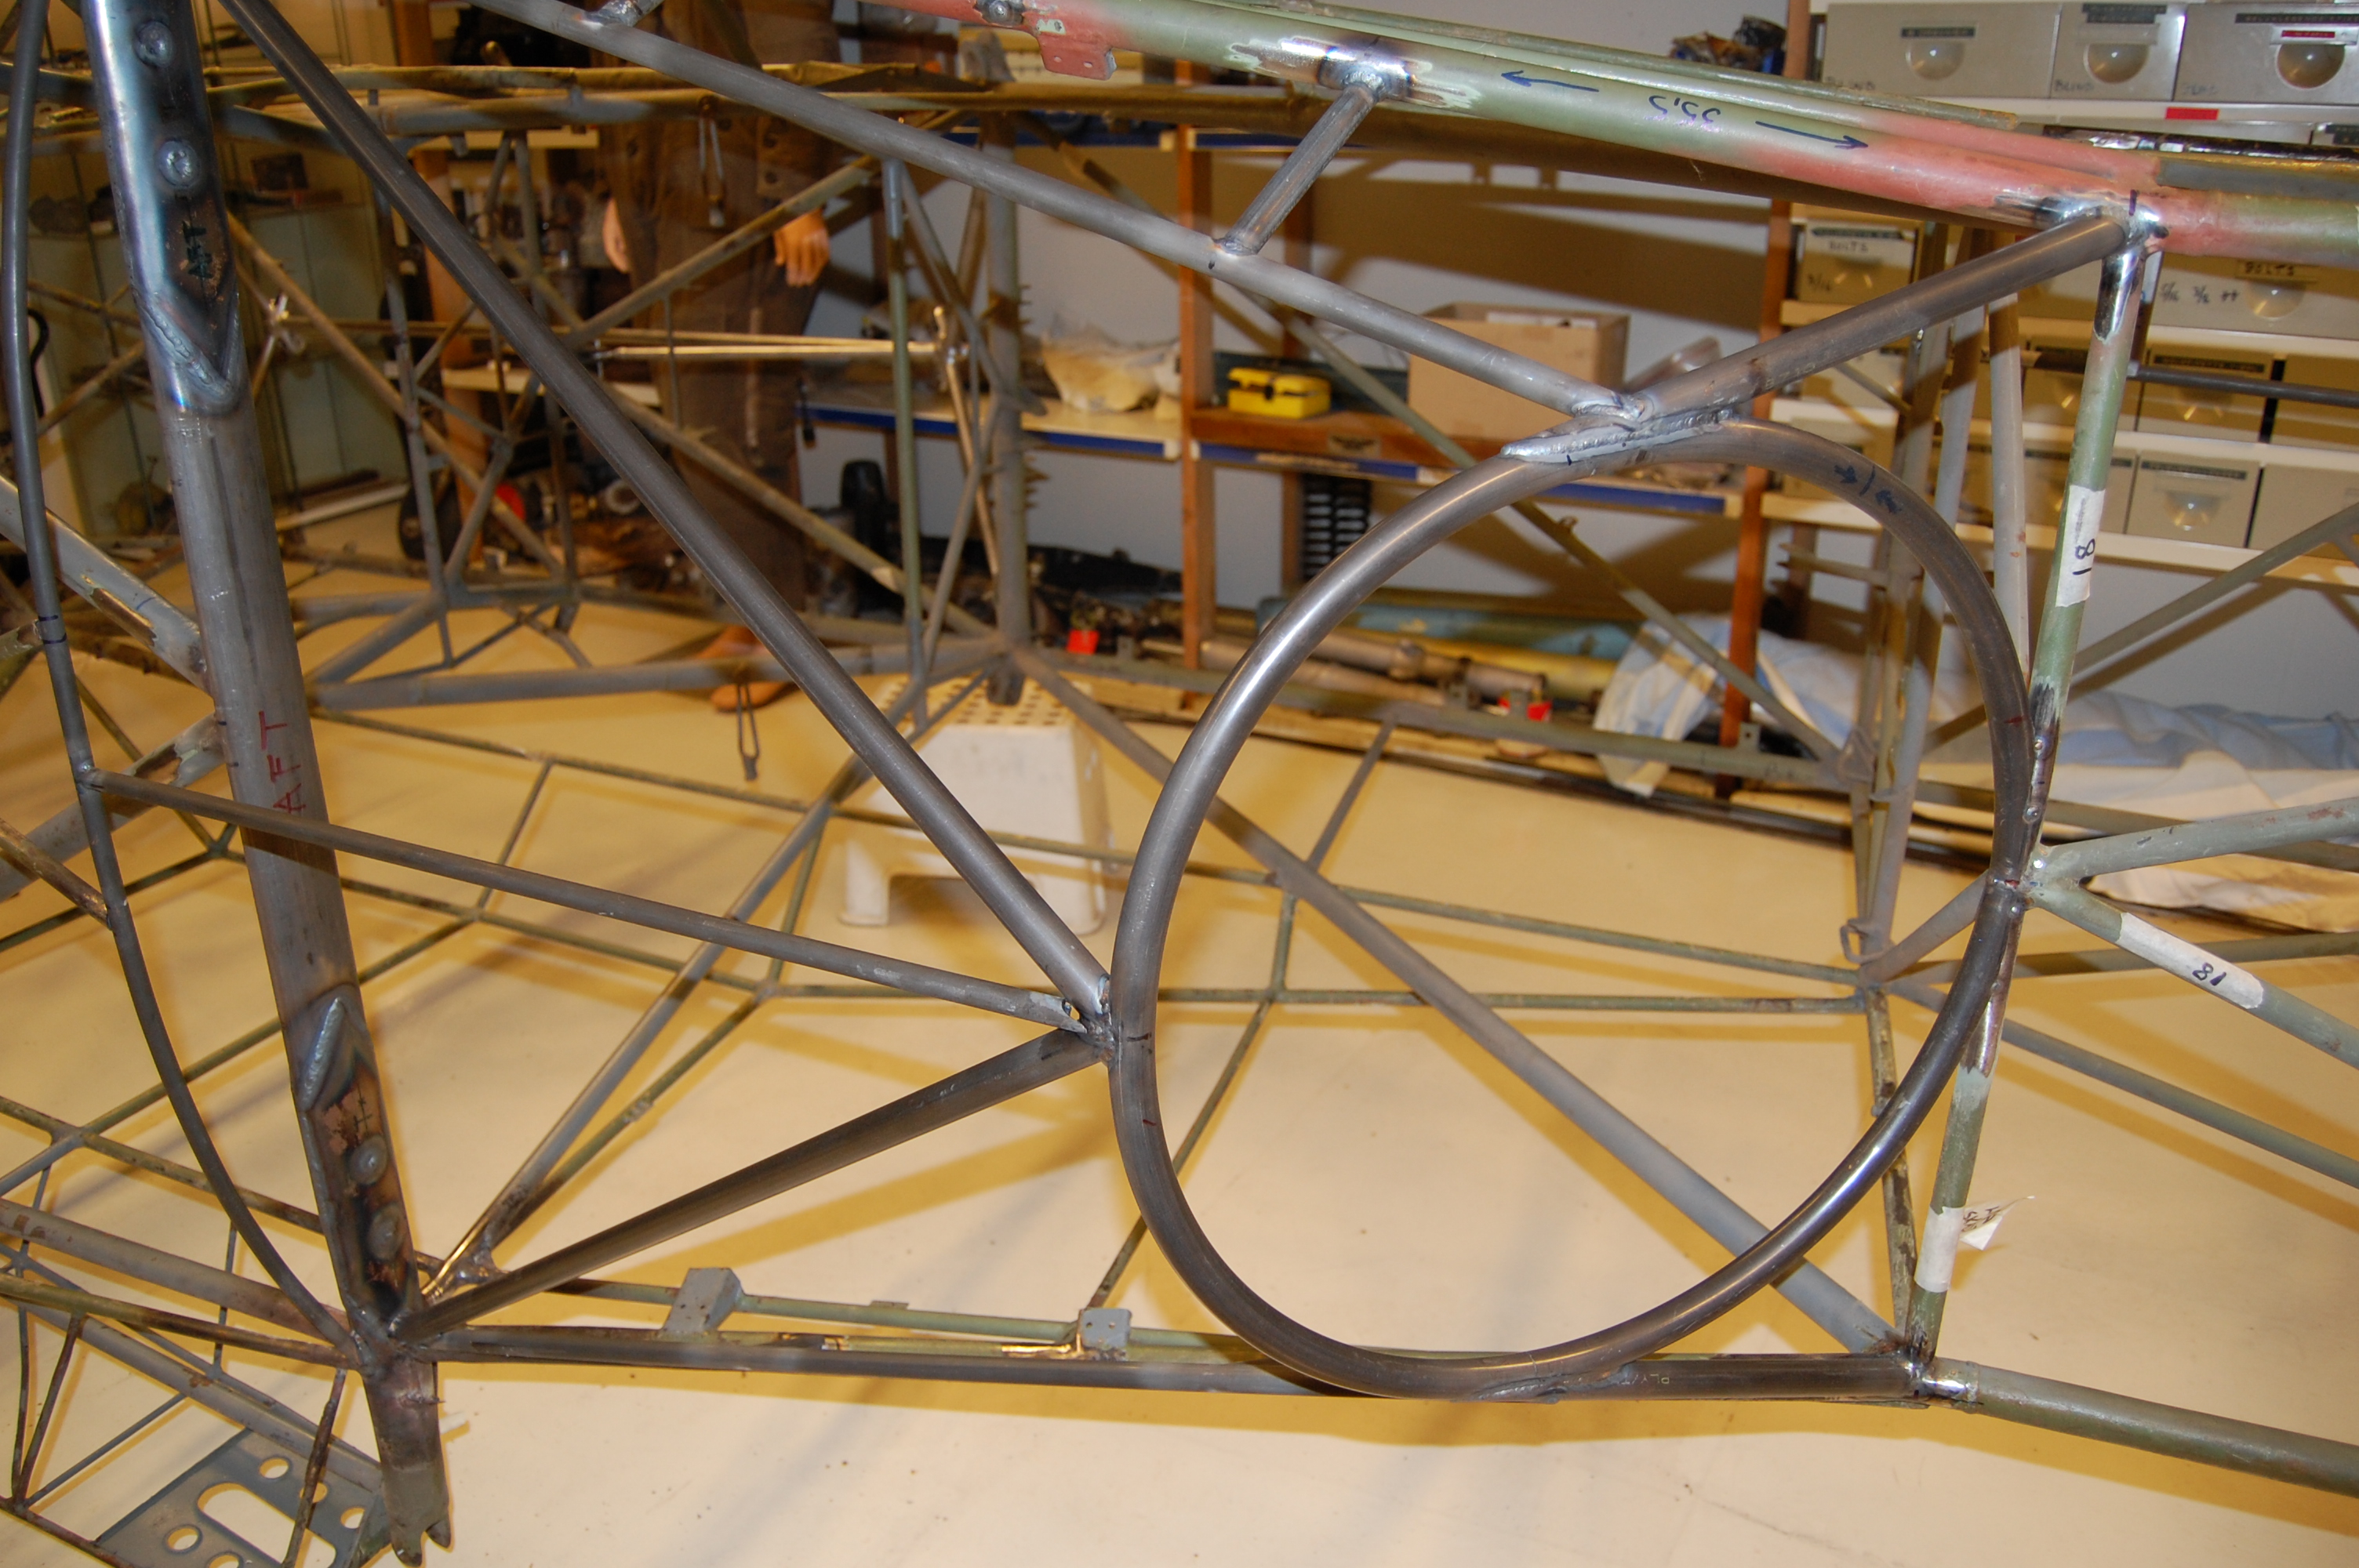
News 10 August 2011Restorations always turn out to be more complicated than expected. The wing attachment structure is sound and safe again, but other details needing attention has kept us busy during the summer. We soon found it necessary to build a working stand that allowed us to rotate the fuselage frame around its longitudinal axis. Our certified aircraft welder Martin Raasok Killingmo has done an excellent job on the Mg 15 attachment, which is nearly finished. The next major task will be to remove paint and slight surface corrosion on the frame.
The work stand making it easy to rotate the fuselage frame.
The conversion to C-3 standard nearly completed. The repaired wing attachment structure can be seen to the left on the photo.
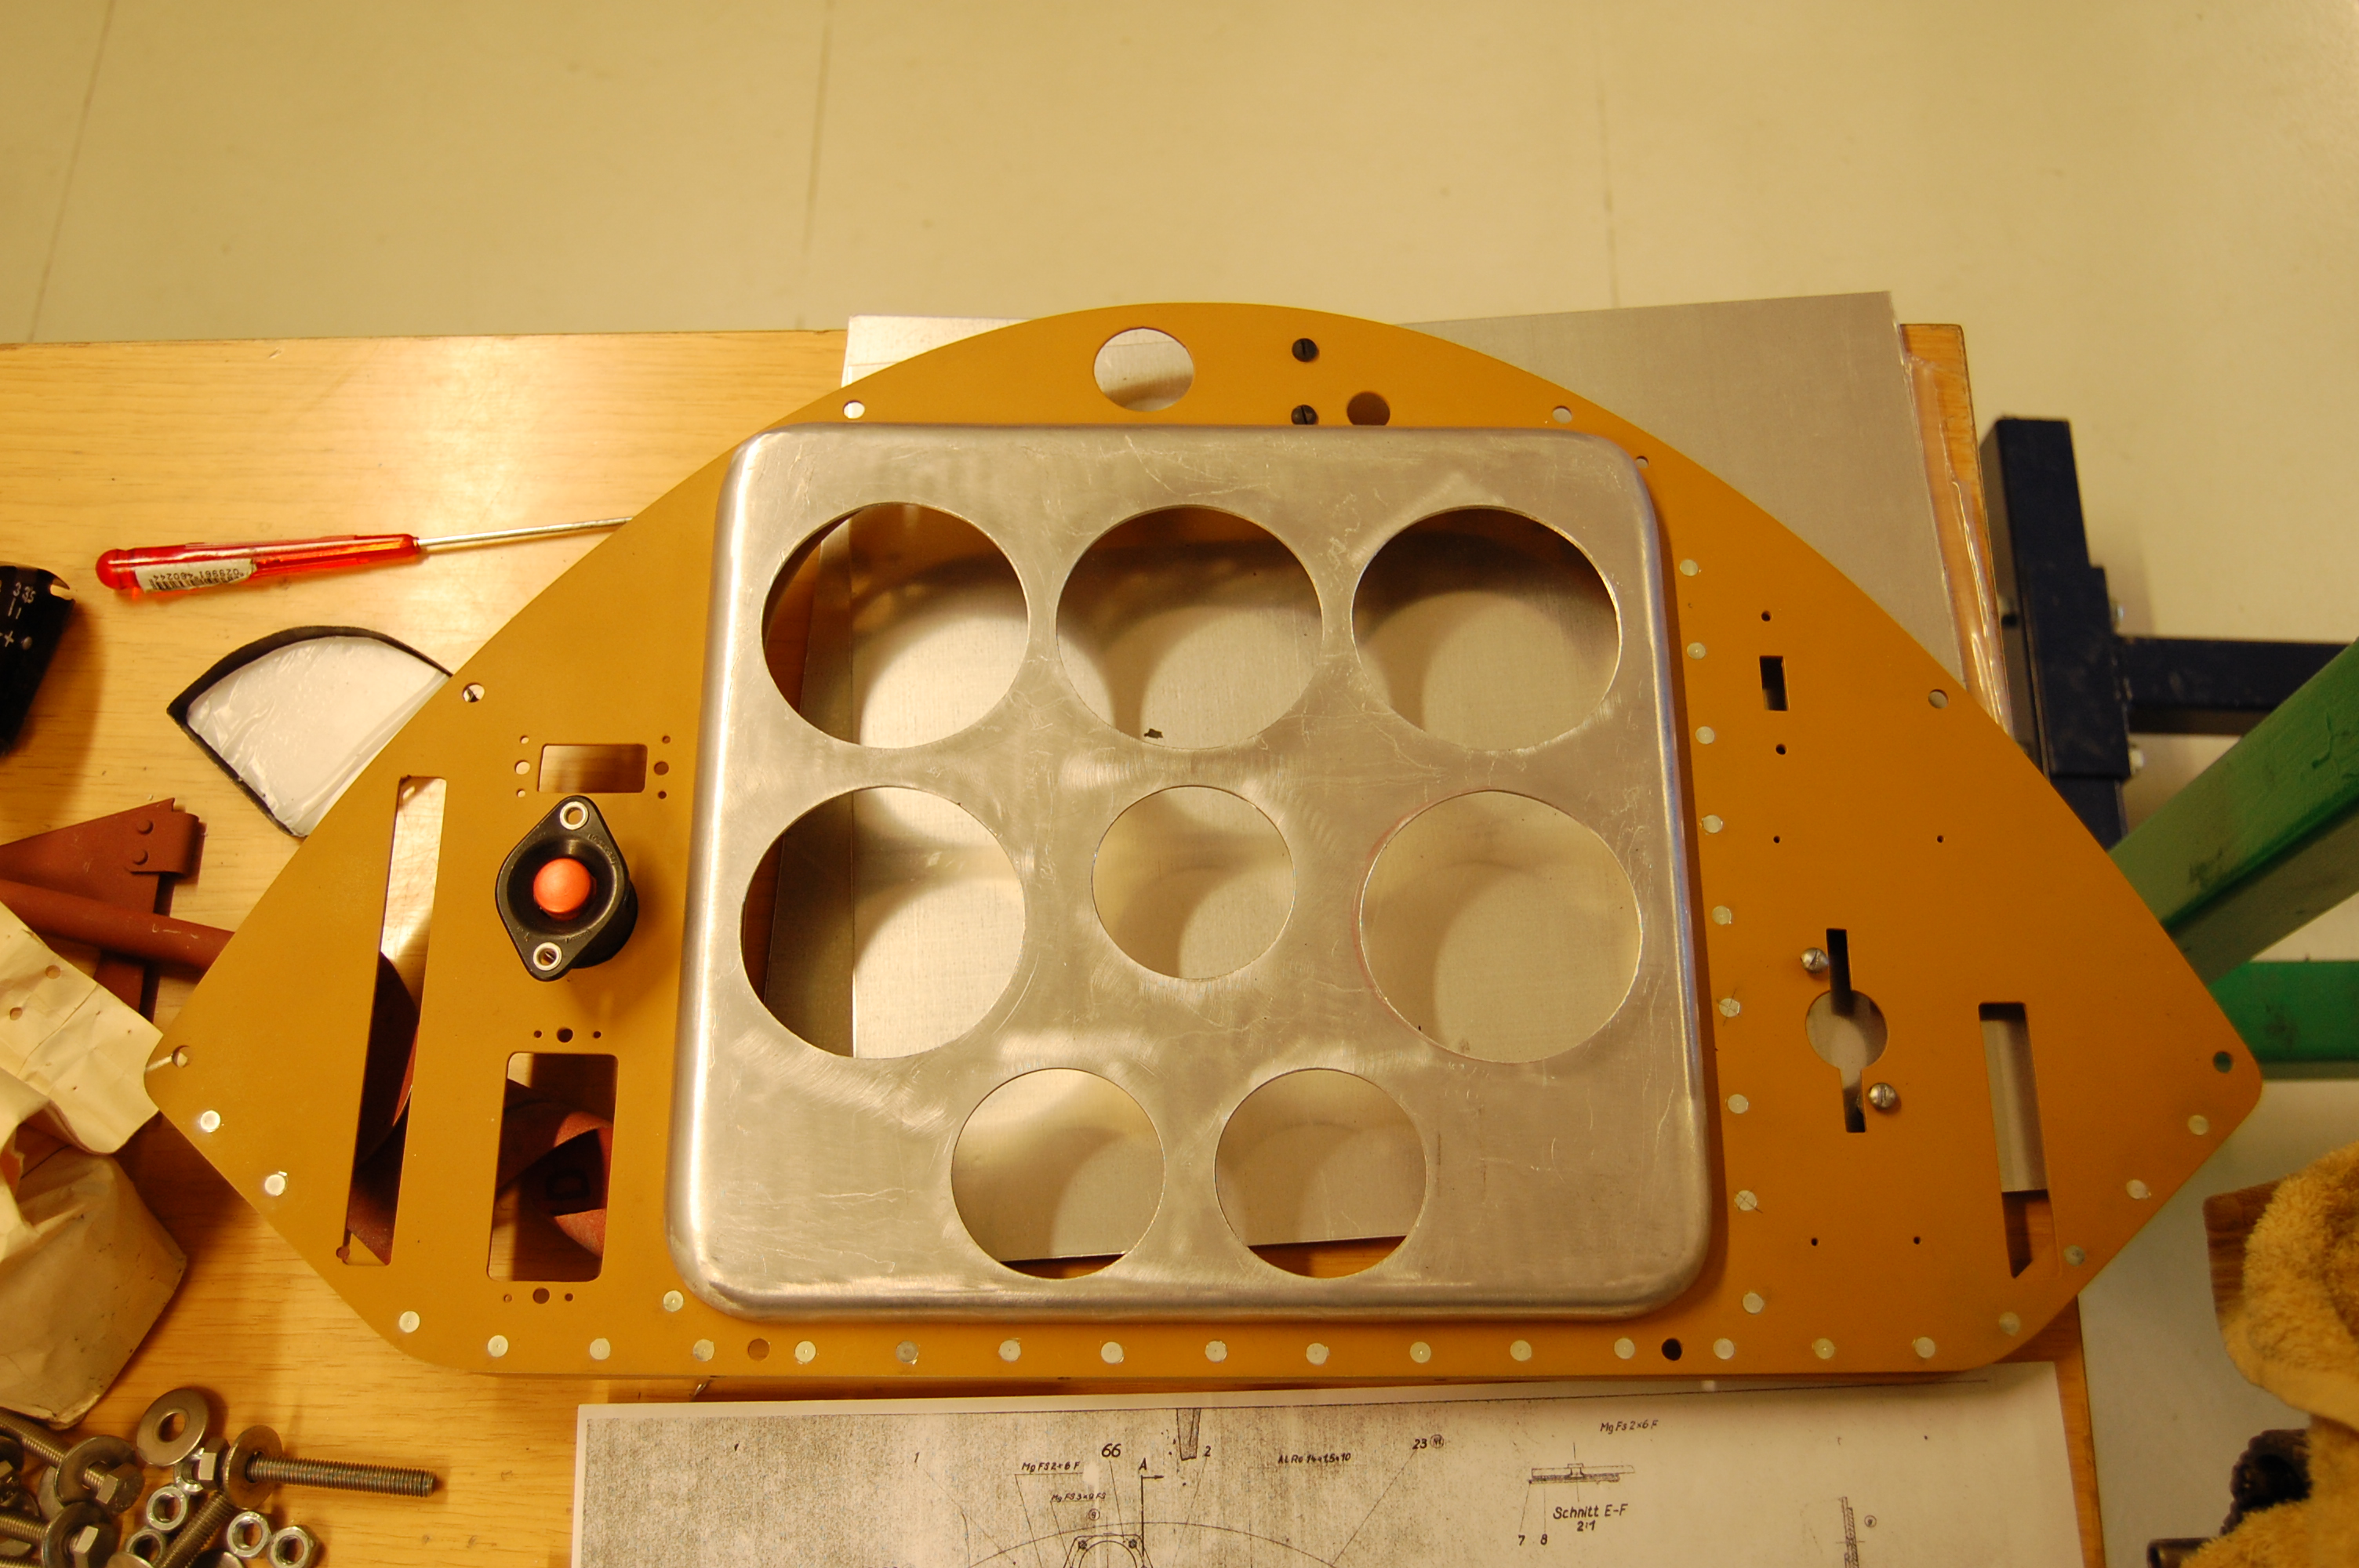
Progress on the instrument panel.To see older progress reports see next page!